

Self-Hosted Airflow
This page explains how to connect Sifflet to an Airflow instance that you run yourself. For an overview of the Airflow integration and its other deployments, see Apache Airflow; for what Sifflet imports, see Airflow Collected Data.
Permissions Required
Sifflet has read-only access to Airflow. It calls the Airflow stable REST API (/api/v1) as a dedicated Airflow user with the Viewer role, authenticated with basic authentication, or with an access token obtained through an OAuth2 client credentials flow.
| Permission | Used for | Required |
|---|---|---|
Airflow Viewer role | List DAGs (GET /api/v1/dags) and read their latest runs (GET /api/v1/dags/{dag_id}/dagRuns, POST /api/v1/dags/~/dagRuns/list) | Yes |
The POST /api/v1/dags/~/dagRuns/list endpoint only reads DAG runs. Sifflet also calls the unauthenticated GET /api/v1/health endpoint to check that the instance is healthy.
Requirements
Required Roles for Setup
- In Airflow, the
Adminrole (or any role allowed to create users), and access to the Airflow configuration to enable an API authentication backend. - In Sifflet, the Admin role to create the credential. The System Editor role is enough to create the source with an existing credential. See Access Control.
Supported Versions and Editions
- Airflow 2.0.0 and later 2.x versions.
- Airflow 3 isn't supported: Sifflet uses the Airflow REST API v1, which Airflow 3 removed.
Network Access
- Default: Sifflet connects to the Airflow REST API from the internet, so your Airflow web server must be reachable from the public internet.
- IP allowlisting: if a firewall or load balancer protects your Airflow web server, allow the IP addresses of your Sifflet instance, listed in Settings > Integration Preferences.
Other Prerequisites
- The Airflow REST API must accept basic authentication or OAuth2 bearer tokens: see Step 1.
Connect Sifflet to Self-Hosted Airflow
Step 1: Create an Airflow User for Sifflet
Basic authentication with a dedicated Airflow user is the recommended method: it needs no external identity provider. If your Airflow instance authenticates API calls with an OAuth2 identity provider instead, see Alternative: OAuth2 Client Credentials.
Create the User
- In the Airflow UI, go to Security > List Users and click +.
- Enter a username (for example
sifflet_user), a first name, a last name, an email address, and a strong password. - In Role, select Viewer only. See the Viewer role in the Airflow documentation.
- Click Save.
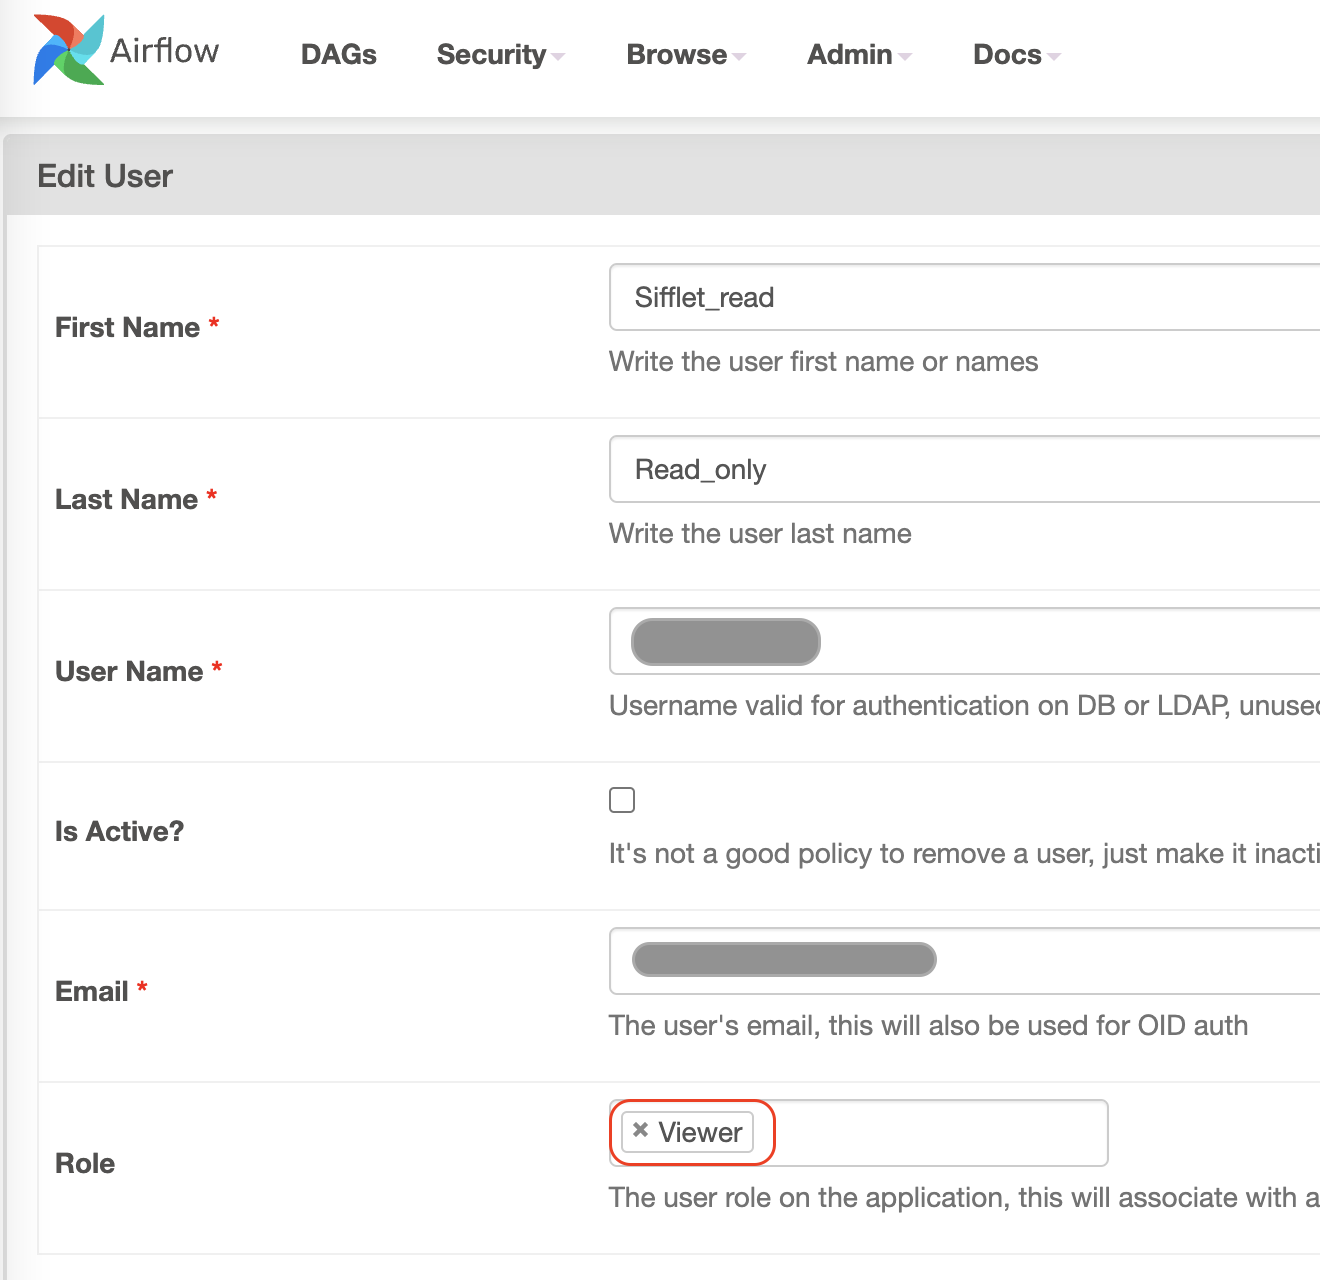
Sample configuration for a Sifflet user in Airflow
You can also create the user with the Airflow CLI:
airflow users create \
  --username <SIFFLET_USERNAME> \
  --firstname Sifflet \
  --lastname Integration \
  --email <SIFFLET_USER_EMAIL> \
  --role Viewer \
  --password <SIFFLET_PASSWORD>
Enable Basic Authentication on the API
Airflow disables basic authentication on the REST API by default.
-
Check the authentication backends currently enabled:
airflow config get-value api auth_backends -
Add
airflow.api.auth.backend.basic_authto theauth_backendsoption of the[api]section of your Airflow configuration. Keep the backends you already use, separated by commas, for example:[api] auth_backends = airflow.api.auth.backend.basic_auth,airflow.api.auth.backend.session -
Restart the Airflow web server.
Keep the username and password of the Sifflet user for step 2.
Alternative: OAuth2 Client Credentials
📝 Note: OAuth2 authentication is in beta.
Use this method when an OAuth2 identity provider protects your Airflow REST API. Sifflet requests an access token from your identity provider with the client_credentials grant, then calls the Airflow API with this token as a bearer token.
- In your identity provider, create a client (application) for Sifflet that can use the client credentials grant.
- Map this client to an Airflow identity with the
Viewerrole, as for the Sifflet user above. How you do this depends on your identity provider and on the authentication manager of your Airflow instance. - Keep the following values for step 2:
- the URL of the token endpoint of your identity provider;
- the client ID and client secret;
- the scopes Sifflet must request, separated by spaces.
Step 2: Add the Airflow Source in Sifflet
Create the Credential
- In Sifflet, go to Integrations > Credentials and click New credential.
- Enter a name for the credential, and paste one of the following JSON documents, depending on your authentication method.
For basic authentication:
{
  "user": "<SIFFLET_USERNAME>",
  "password": "<SIFFLET_PASSWORD>"
}
For OAuth2 client credentials, keep the value of oauth_provider as is, and enter the token endpoint URL in authorization_url:
{
  "oauth_provider": "Airflow Client Credentials",
  "authorization_url": "<TOKEN_ENDPOINT_URL>",
  "client_id": "<CLIENT_ID>",
  "client_secret": "<CLIENT_SECRET>",
  "scope": "<SCOPES>"
}- Click Save.
Create the Source
Go to Integrations > Sources, click New source, select Airflow, and fill in the form:
| Field | Description | Example |
|---|---|---|
| Source name | A name to identify the source in Sifflet | Airflow production |
| Host | The URL of your Airflow web server, with the scheme (http:// or https://), without the port and without a trailing slash. Sifflet adds /api/v1 itself. A path after the host name (such as https://example.com/airflow) works with OAuth2 authentication only. | https://airflow.example.com |
| Port | The port of the Airflow web server | 8080, or 443 for HTTPS |
| Credential | The credential created above | airflow-sifflet-user |
Sifflet imports all the DAGs the Sifflet user can see: there is no scope to select.
Test and Save
- Click Test Connection. Sifflet checks that the Airflow API is reachable and healthy (
Airflow cluster is healthy.), and that it can read DAGs with your credential. - Save the source. You can follow the status and logs of its refreshes in the source details: see Integrations Management. Your DAGs appear in the Data Catalog once the first refresh succeeds.
To link your DAGs to the tables they update, see Linking Airflow DAGs to Data Assets.
Troubleshooting
The Connection Test Returns an Unauthorized Response
-
Symptom:
Host is reachable but returned an unauthorized response. Please check your parameters and credentials. -
Cause: the Airflow API rejects the credentials: basic authentication isn't enabled on the API, the username or password is wrong, or the user doesn't have the
Viewerrole. -
Fix:
- Check that
airflow.api.auth.backend.basic_authis in theauth_backendsoption and that the web server was restarted: see Step 1. - Check that the Sifflet user has the
Viewerrole, and that the credential in Integrations > Credentials has the right username and password.
- Check that
Sifflet Can't Reach the Airflow Host
- Symptom: the connection test fails with an unknown host or a connection timeout.
- Cause: the host is wrong, or the Airflow web server isn't reachable from your Sifflet instance.
- Fix:
- Check the Host and Port fields: see Step 2.
- Check that the web server is reachable from the internet, and that your firewall allows the IP addresses of your Sifflet instance: see Network Access.
Updated about 2 hours ago