Integrations Management
This guide covers how to connect your external data systems to Sifflet.
Core Concepts: One Source per Environment
In Sifflet, an integration with an external data system is called a Source. To simplify management and provide a clear, consolidated view of your data landscape, our model is simple: one Source per environment.
For example, your entire Snowflake account, your complete BigQuery project, or your whole Looker instance should each be configured as a single Source in Sifflet.
Each Source is linked to a Credential that securely stores the access details Sifflet needs to connect to your system. We recommend using a single, environment-level credential with access to all the assets you wish to monitor within that environment.
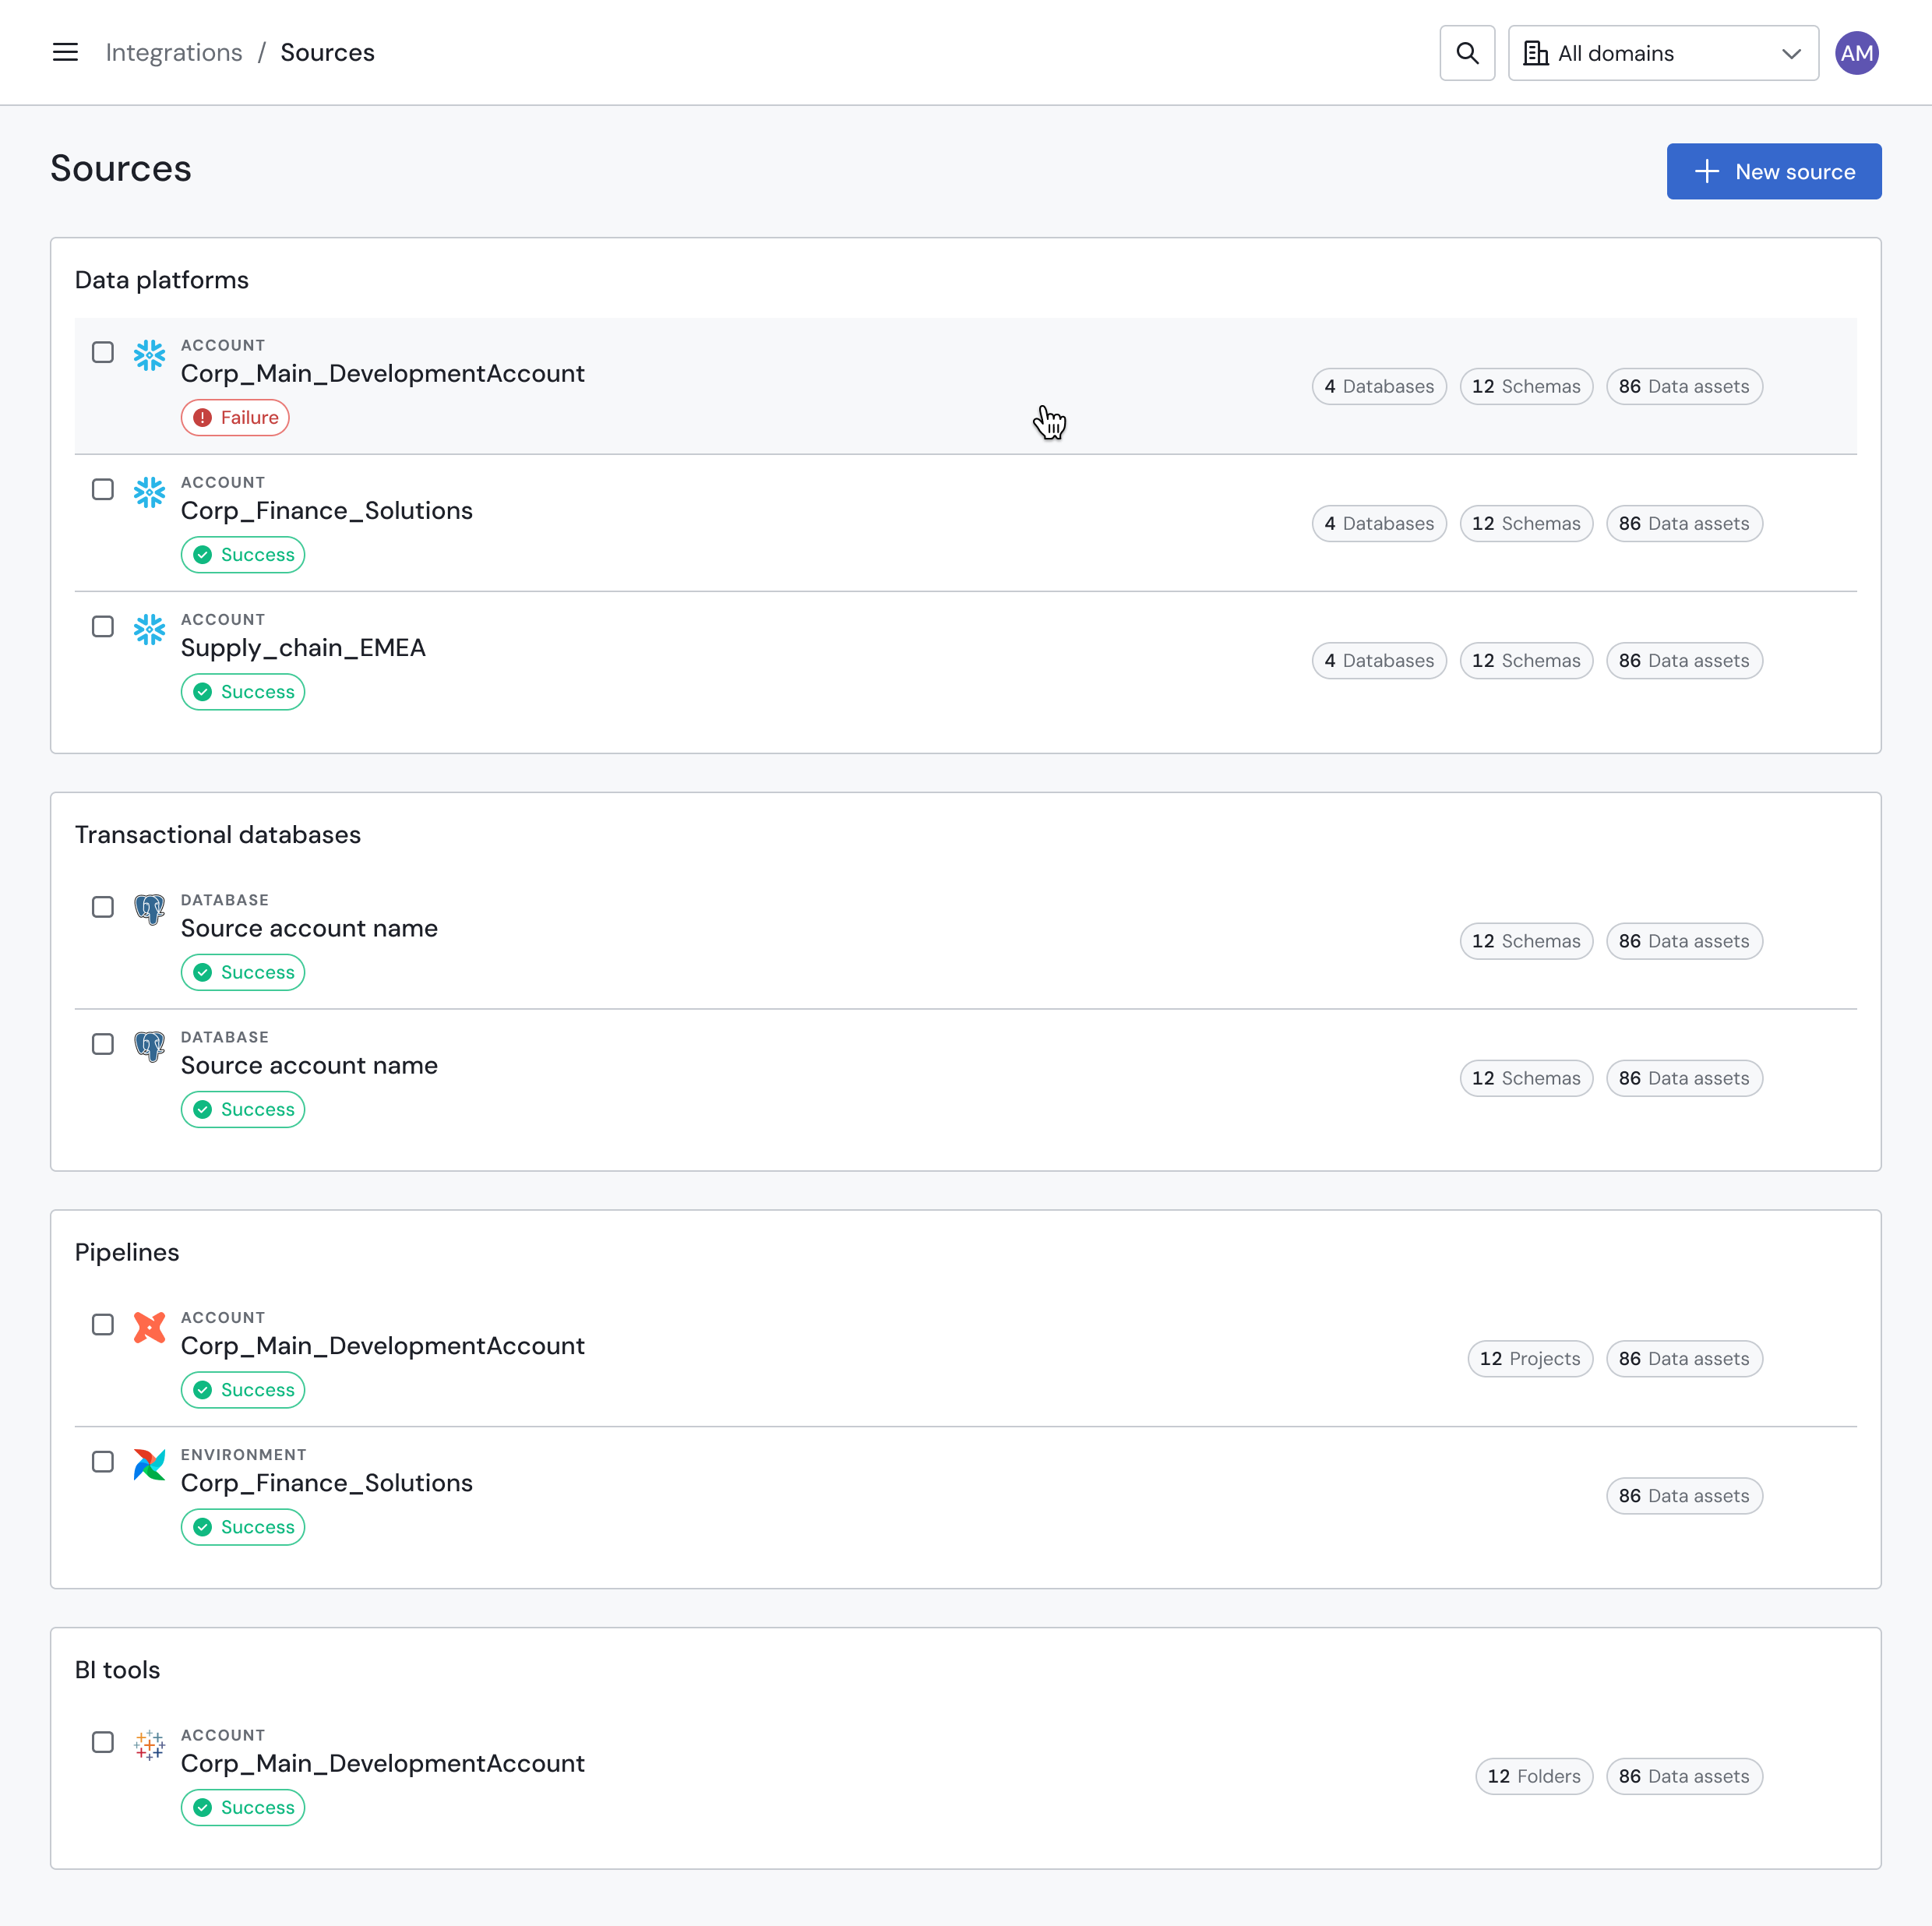
Sifflet's Sources page
Secure Credential StorageSifflet uses AWS Secret Manager to securely encrypt and store all credentials.
Adding a New Source
Follow these steps to connect a new data source to Sifflet.
Step 1: Navigate to the Sources Page
From the side panel, select "Integrations" and then "Sources". Click the "New source" button to begin.
Step 2: Configure the Source Connection
-
Select Source Type: Choose the technology you want to connect (e.g., Snowflake, BigQuery, etc.).
-
Fill Connection Details: Enter the required information, such as the server host, database name, or project ID.
-
Assign a Credential: In the "Credential" field, select an existing, compatible credential from the dropdown list.
-
Define the Data Scope: Specify which resources within your source Sifflet should scan for metadata.
- Select Groupings to Include: Manually choose the specific databases, schemas, or folders you wish to monitor.
- Enable Automatic Discovery: Activate the "Automatically include new schemas" toggle. This ensures that Sifflet will find and ingest metadata from any new schemas that are created in the future, without requiring manual updates.
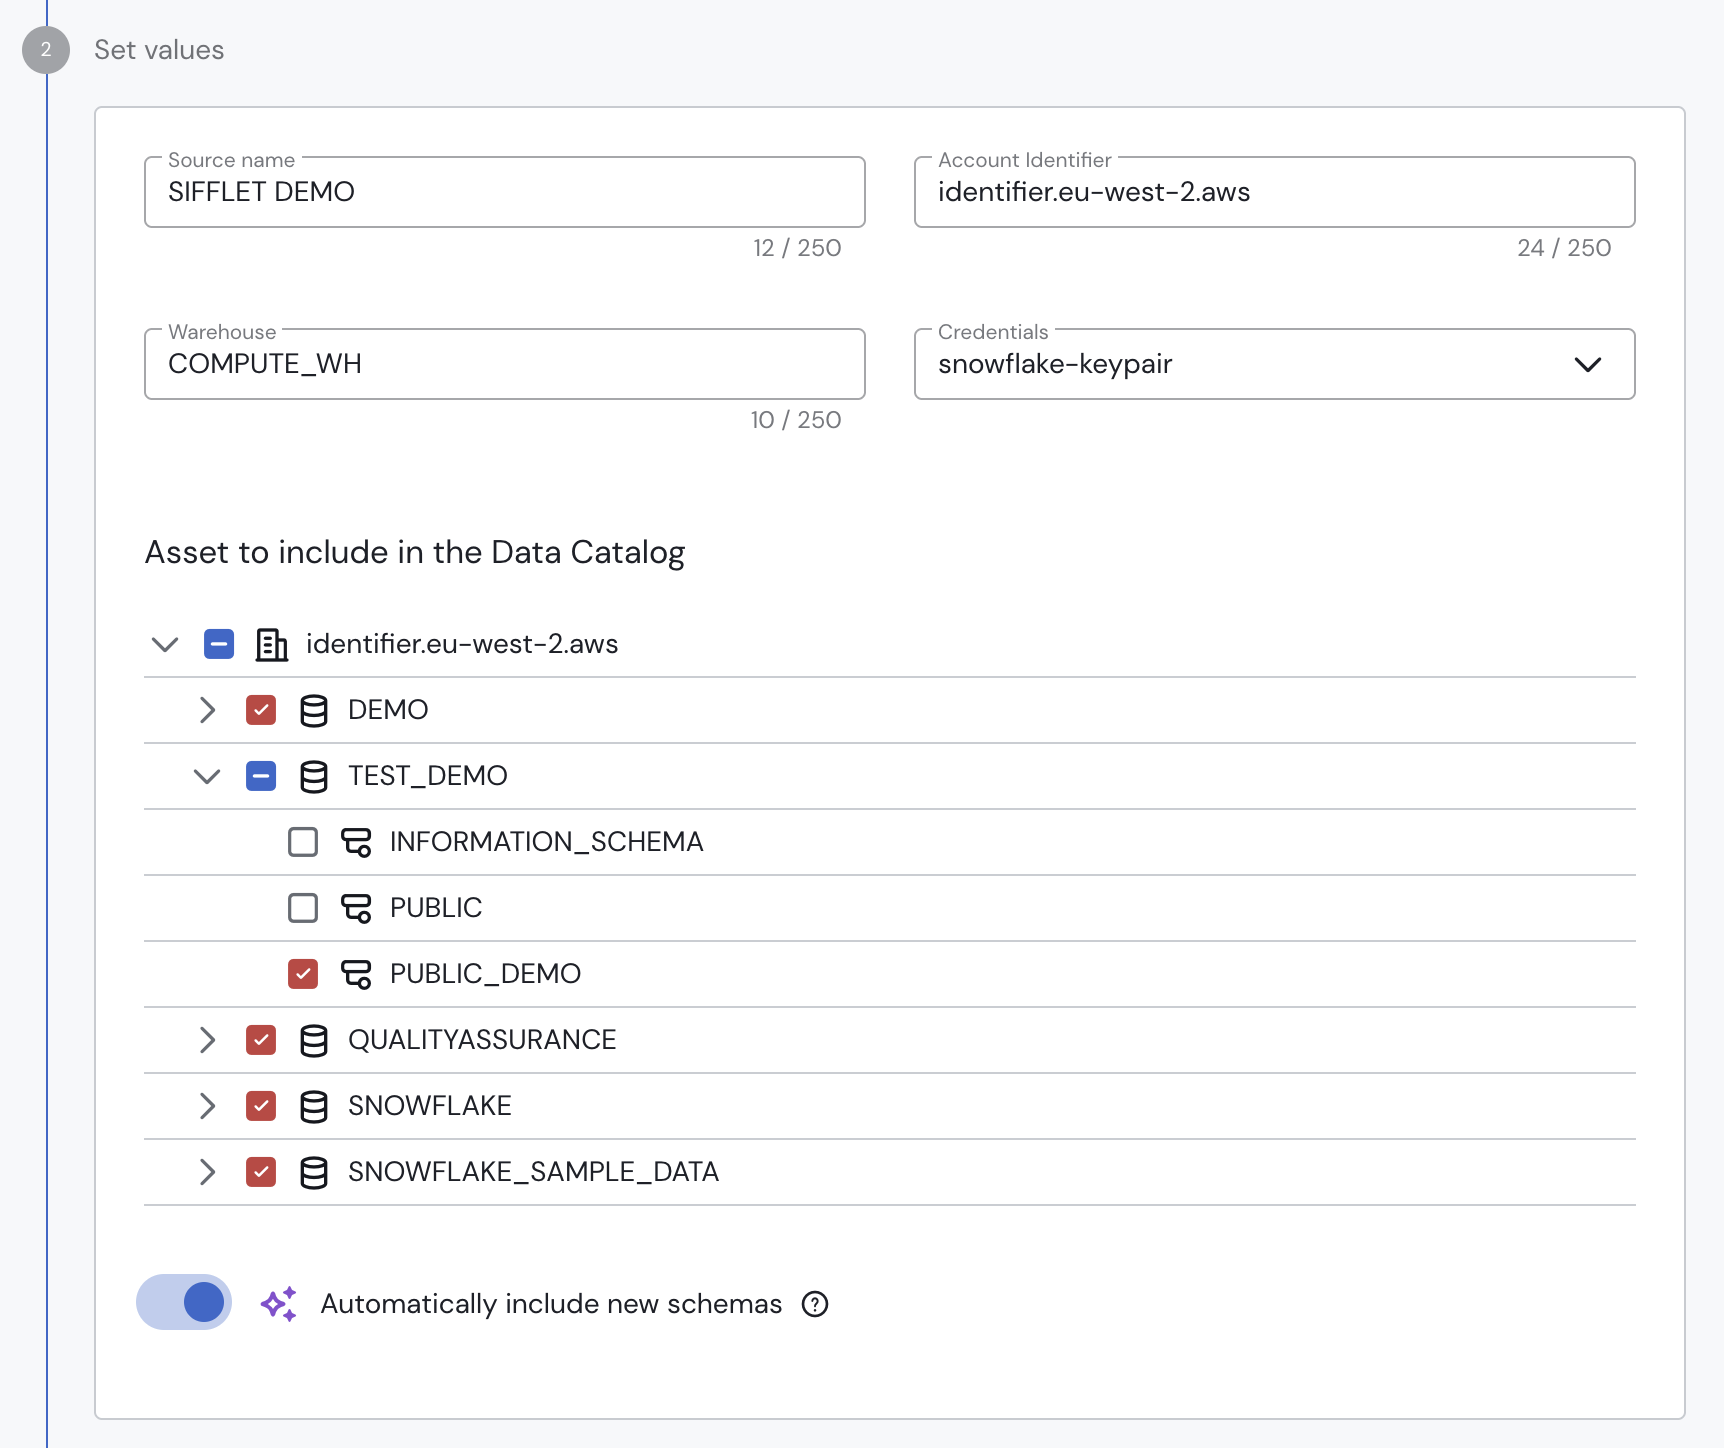
Configuring the source's data scope
-
Test and Save: Click "Test Connection" to verify that Sifflet can connect successfully with the provided details. Once the test passes, click "Save" to save the source.
Source Refresh FrequencySifflet has a default refresh frequency for each source type to keep your metadata up-to-date:
- Data platforms & transactional databases: Daily refresh.
- Data pipelines: Hourly refresh.
- BI tools: Weekly refresh.
We strongly recommend keeping the default frequency. If you have specific needs, you can provide a custom cron expression in the "Schedule" field during source configuration.
Managing Existing Sources
The "Integrations" > "Sources" page provides a centralized view of all your connected data sources. From this list, you can see each source's name, type, and last sync status. You can also perform high-level actions like initiating a metadata refresh, inspecting individual schema statuses, or deleting a source.
Refreshing Metadata from a Source
Sifflet offers multiple ways to refresh your metadata, allowing for both full-environment updates and targeted rescans.
1. Full Source Refresh
To trigger a complete metadata refresh for an entire source, click the "Refresh all" button available for every source via the actions menu. This will rescan all databases and schemas included in the source's configuration.
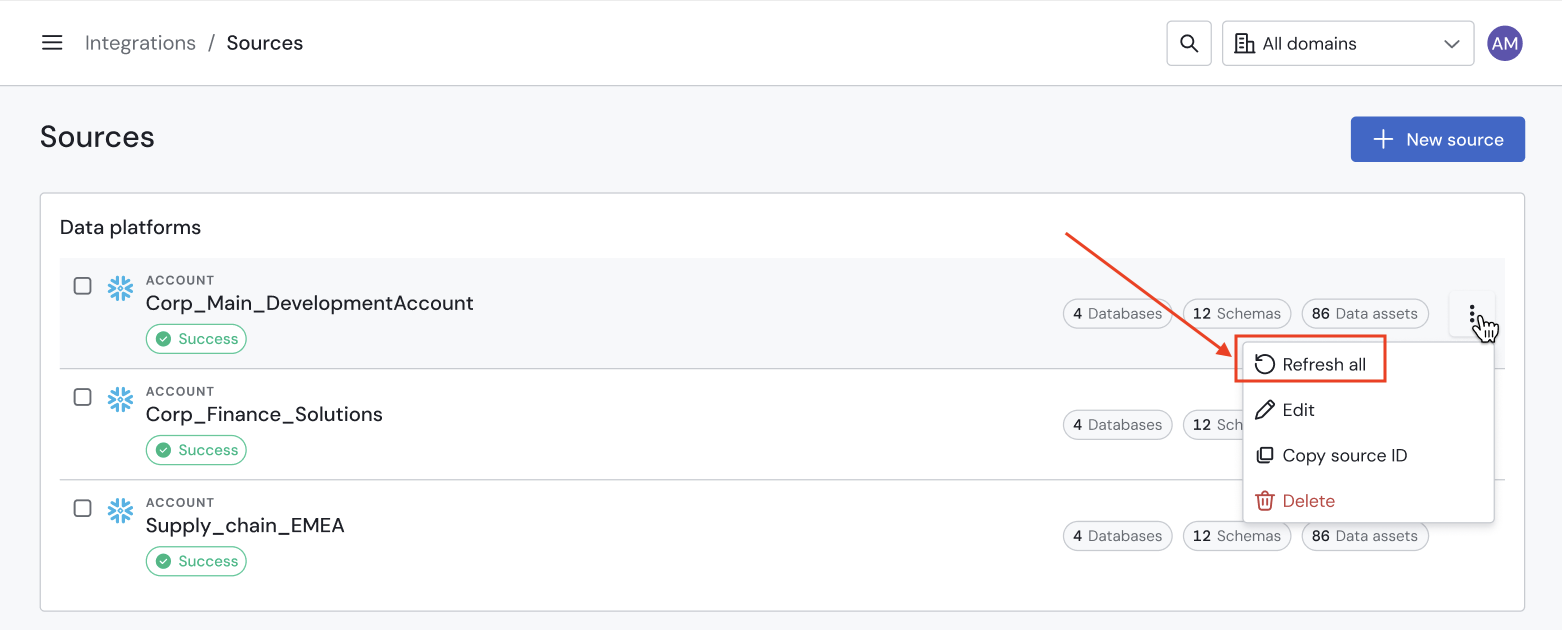
Triggering a full source refresh
2. Granular Refresh (Specific Databases or Schemas)
For a more targeted update, you can refresh specific parts of a source, such as a single database or a selection of schemas. This allows you to quickly update assets without waiting for a full source scan.
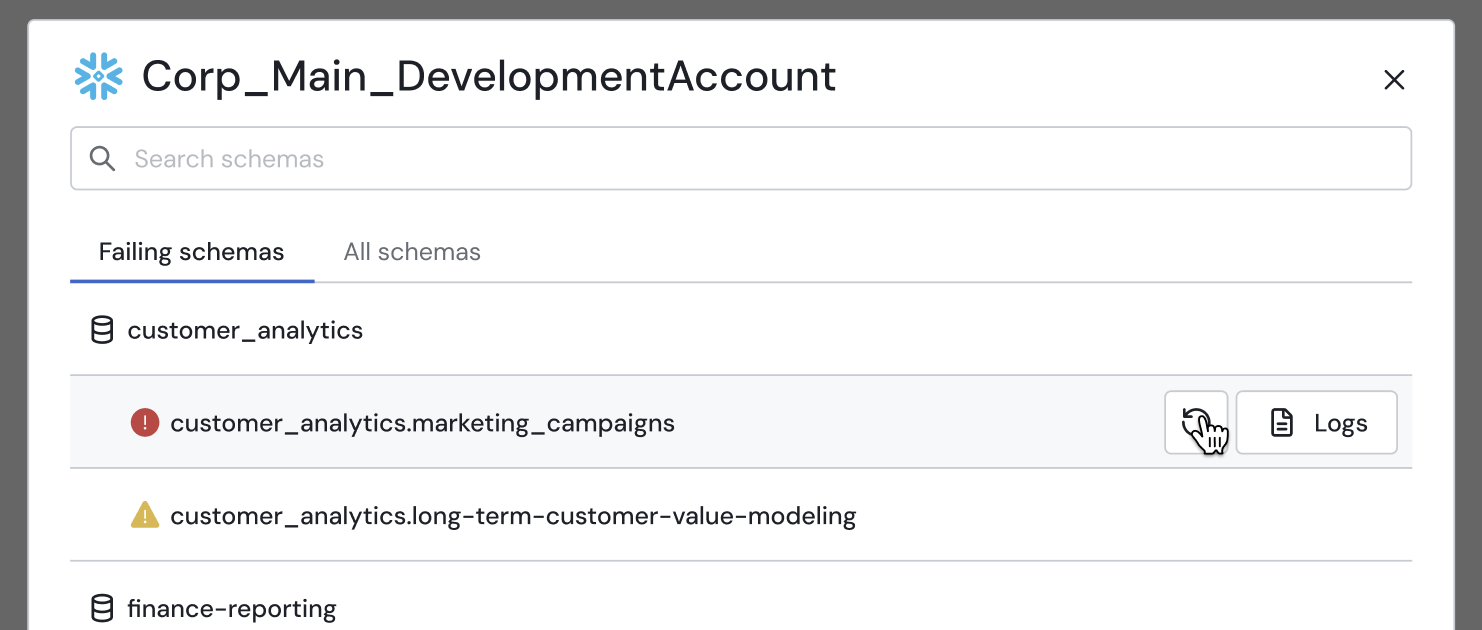
Refreshing a specific schema via the Source Details modal
Inspecting Source Details and Resolving Failures
To investigate the status of individual schemas within a source, click on the source's name in the list. This will open the Source Details modal, which is designed to help you diagnose and resolve any refresh failures.
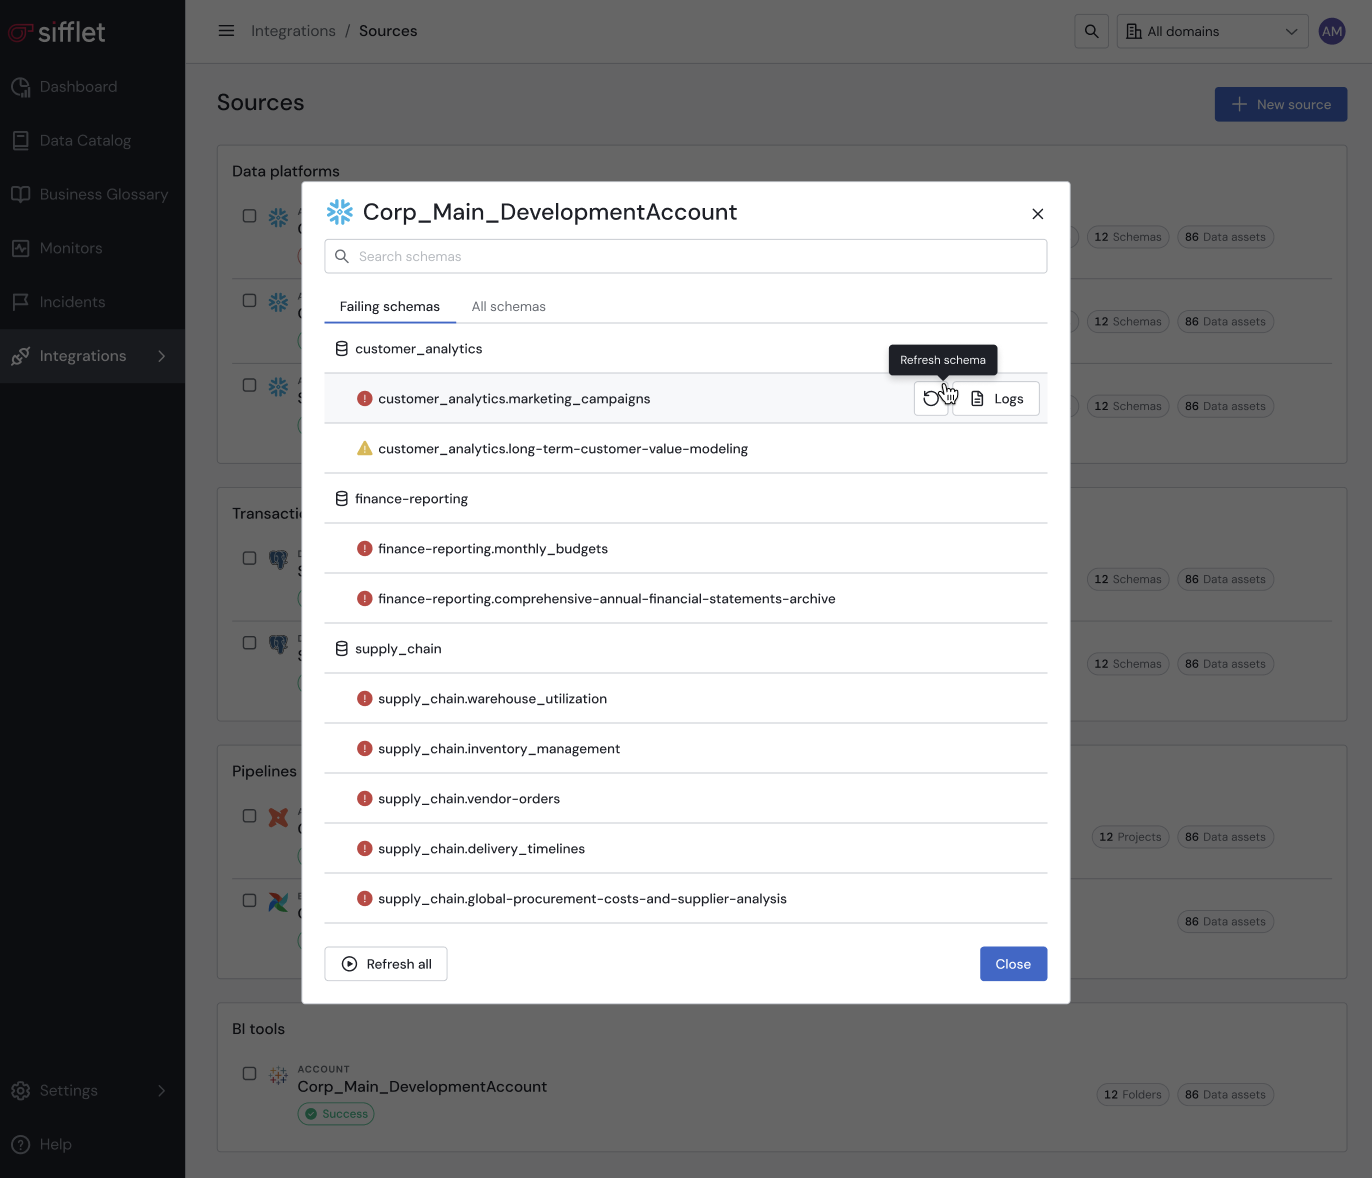
The Source Details modal
Navigating the Source Details Modal
The modal is organized into two tabs:
-
Failures Tab (Default View)
This tab immediately shows you a list of only the schemas that failed during the last refresh, allowing you to focus on what needs fixing. From here, you can:- Rerun all failures with a single click on the "Refresh all" button.
- Investigate errors by clicking the "Logs" button next to any failed schema to view its specific error logs.
- Search for a specific failed schema.
-
All Schemas Tab
This tab displays a complete list of all schemas within the source, along with their individual refresh statuses (e.g., Success, Failed). You can also use the search bar here to quickly find any schema, regardless of its status.
This workflow allows you to efficiently identify which parts of a source are failing, view the exact cause in the logs, and trigger a targeted rerun once the underlying issue is resolved.
Consolidating or Merging Sources
If you have multiple Sifflet sources pointing to the same data environment (e.g., two sources for one Snowflake account), you can merge them to simplify your setup.
The process involves reassigning all schemas to a single primary source:
- Choose a Primary Source: Decide which source you will keep. Ensure its credential has permission to access all schemas from the sources you intend to merge.
- "Detach" Schemas: Edit the configuration of the source you plan to remove. Deselect all of its schemas to detach them from this source. Save the changes.
- "Attach" Schemas: Edit the configuration of your primary source. Select those same schemas to attach them to its scope. Save the changes.
- Delete the Redundant Source: Once all schemas are managed by the primary source, you can safely delete the now-empty, redundant source.
No Impact on MonitoringThis merging process is designed to be seamless. All your existing monitors, assets, and their metadata history will be automatically mapped to the consolidated primary source. Your data observability will continue without interruption.
Deleting a Source
You can delete a source from the Source List page using the Source Actions menu.
Critical: Deleting a Source is IrreversibleDeleting a source permanently removes all associated assets from the Sifflet Catalog. This action also deletes all monitors, incidents, and metadata history related to those assets. This cannot be undone.
FAQ
- I manually refreshed my source, but I don't see new assets in the Catalog. What happened?
There could be several reasons:- The refresh is still running or failed: Check the source's refresh status via the Sources page.
- Insufficient permissions: If the run failed, the most common reason is that the credential Sifflet is using lacks the necessary permissions to discover new assets. Please review the specific documentation for your source type to ensure all required grants are in place.
- Some of my schemas are missing from my source. Why?
This is almost always a permissions issue. The environment-level credential you are using must have the necessary permissions (e.g.,USAGEin Snowflake) on all databases and schemas you want Sifflet to see. Update your credential's permissions in your data platform and then run a manual refresh in Sifflet. - How do I manage my credentials separately?
You can view, create, and manage all your credentials from the "Integrations" > "Credentials" page. This page provides a centralized view of all your credentials and which sources are currently using them.
Updated 9 months ago