Slack
Overview
Sifflet integration for Slack allows you to receive notifications in case of data quality issues on your most critical tables.
Set up the Integration
To set up the integration, go through the following steps:
- Go to
Settings>Collaboration Tools - Click on the
Connect to Slackbutton
"Connect to Slack" Button
- You should be redirected to a Slack page describing the permissions required by the Sifflet App and prompting you to grant these permissions for your workspace
- Select the workspace you want to integrate the Sifflet App with using the dropdown menu at the top right hand corner of the page
- Grant the Sifflet App permission to access the selected workspace clicking on the
Allowbutton

Slack Page
- You should be redirected to the
Collaboration Toolspage of the Sifflet application and you should see the name of your workspace on the Slack integration tile. This indicates your integration is properly configured.

Configured Workspace
Configure Channels
Public Channels
From the List
By default, Sifflet tries to pull the list of your public channels. To configure a channel, open the Slack channels dropdown menu, search for your Slack channel of interest, and click it.
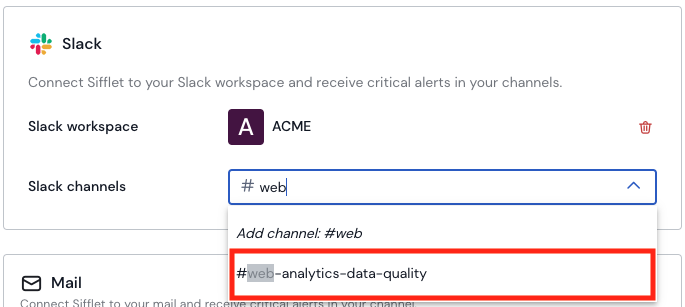
Configuring a Public Channel
The selected channel appears below, in the Configured Slack channels list. This indicates your channel is properly configured.
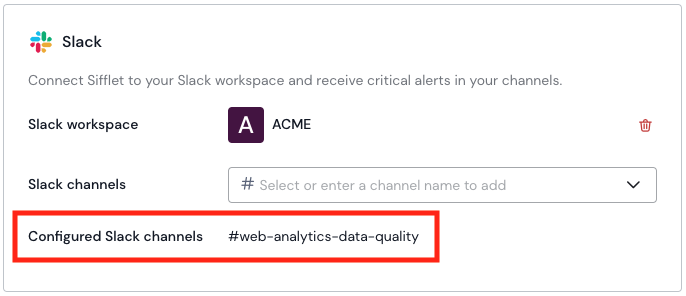
Example Configured Channel
Manually
In some cases, notably if your Slack workspace has a very large number of channels, Sifflet might not be able to pull all the list of Slack channels from your workspace.
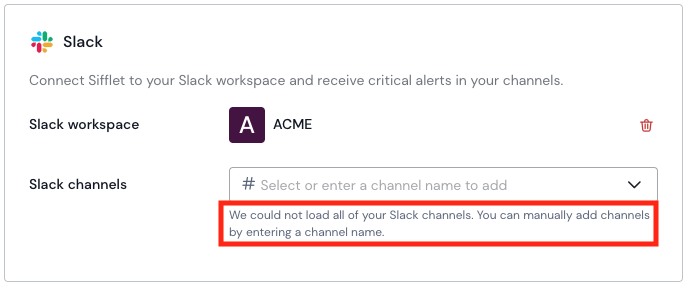
Configuring the Slack Integration for a Workspace With a Large Number of Channels
If you do not find the name of the Slack channel you are looking to configure in the list, you can directly type the name of your Slack channel and hit the Enter button or the Add channel: #<your-slack-channel-name> to configure your Slack channel.
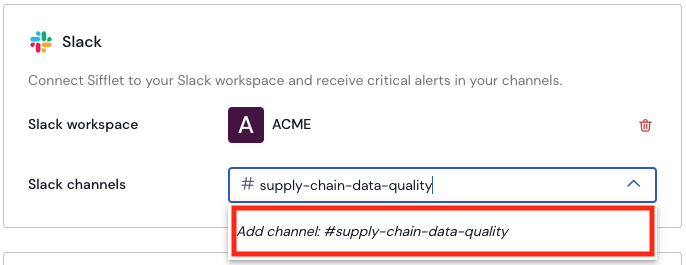
Configuring a Public Channel Manually
If you created a Slack channel after opening Sifflet Collaboration Tools page, the name of your channel might also not show up on the list of channels. You can then either add your channel manually as explained above, or refresh the page to have your channel name populate the dropdown menu.
Private Channels
To configure a private Slack channel, you first need to add the Sifflet App to your private Slack channel. To do so:
- Head to your Slack workspace and to the channel of interest
- Click on your channel name at the top of the page to
Get channel details
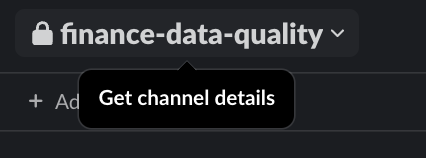
Get Channel Details
-
At the very bottom of the modal, look for your
Channel IDand click the icon to copy it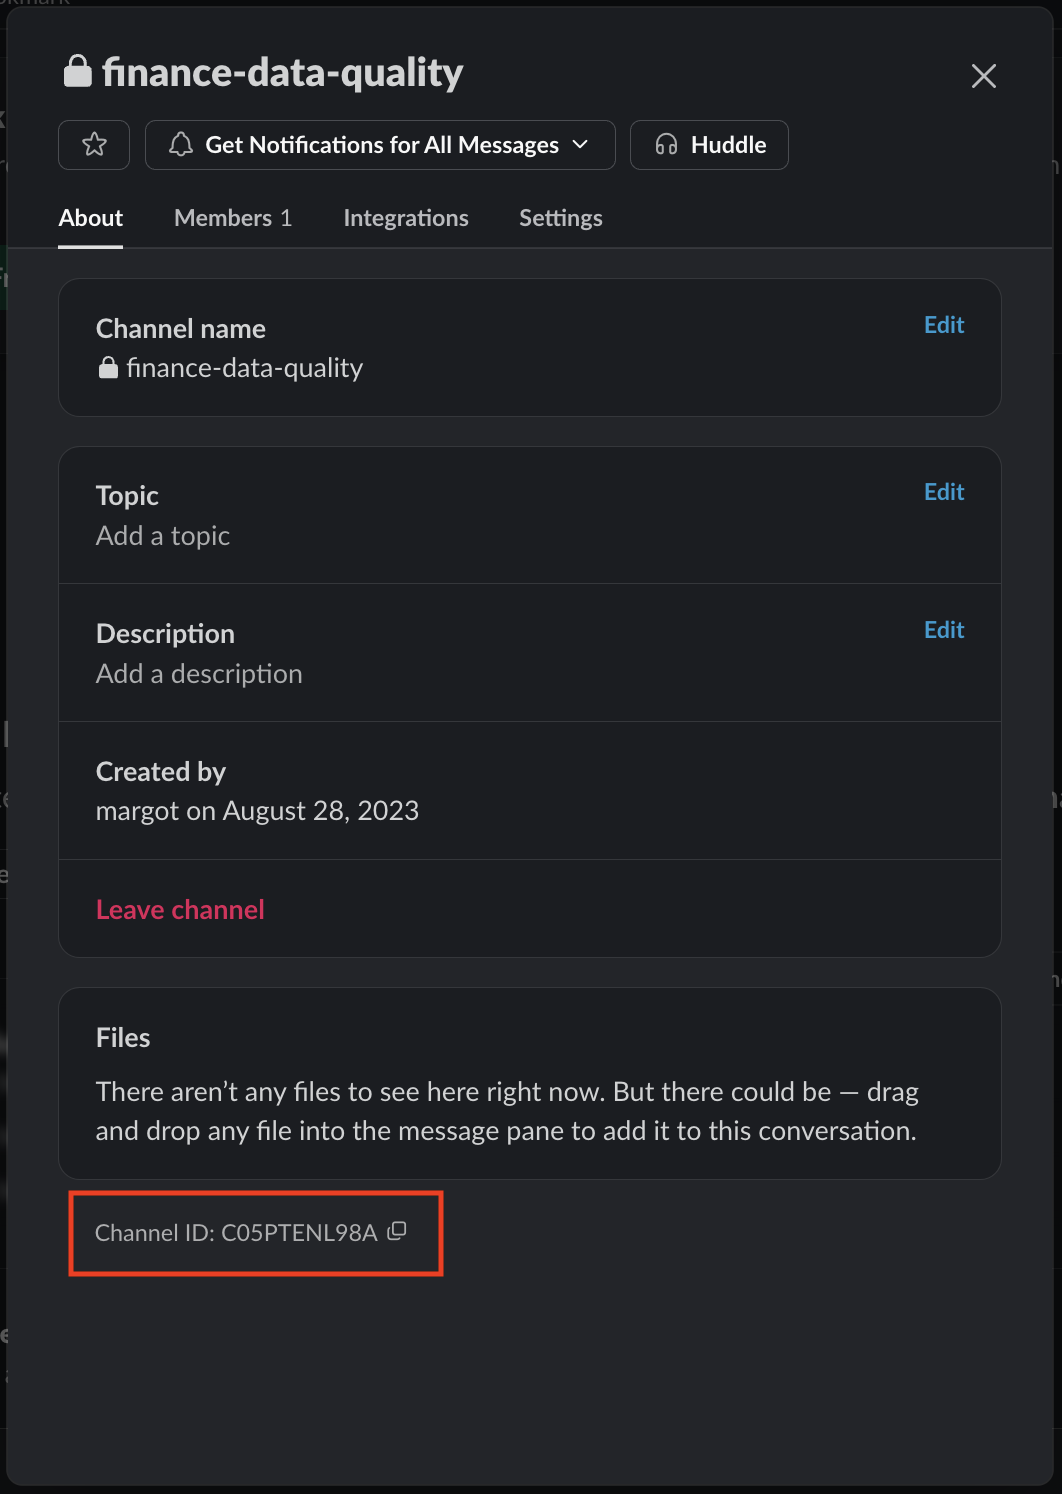
Copy Channel ID
-
Then click the
Integrationstab
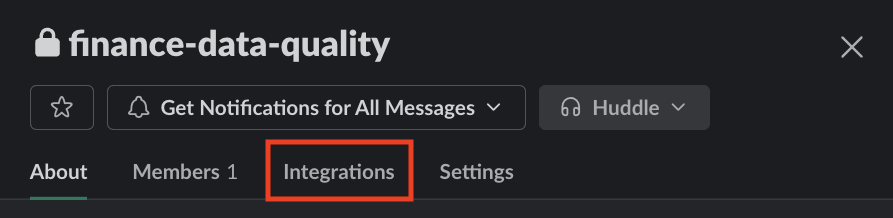
Click the "Integrations" tab
- Under the
Appssection, click theAdd an Appbutton
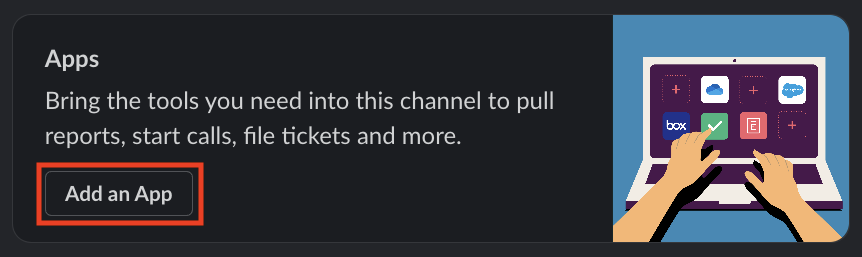
Click "Add an App"
If you already have apps configured on your channel, look for aAdd apps link instead.
- Look for the Sifflet App using your search bar, and click the
Addbutton
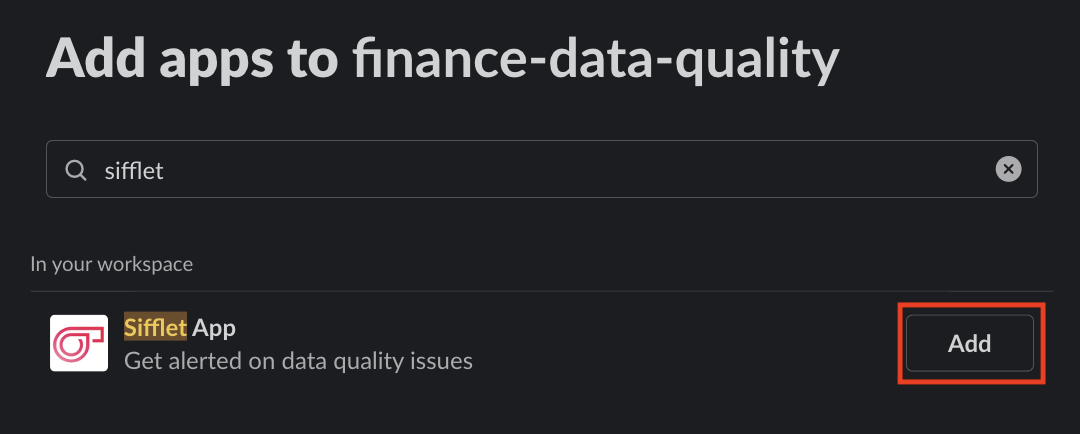
Look for the "Sifflet" app and click "Add"
- You can then head back to the
Collaboration Toolspage of your Sifflet application. - To configure a channel, open the
Slack channelsdropdown menu and paste the channel ID you previously copied. The channel id with(private channel)appended should show up as a menu entry. Click this entry.
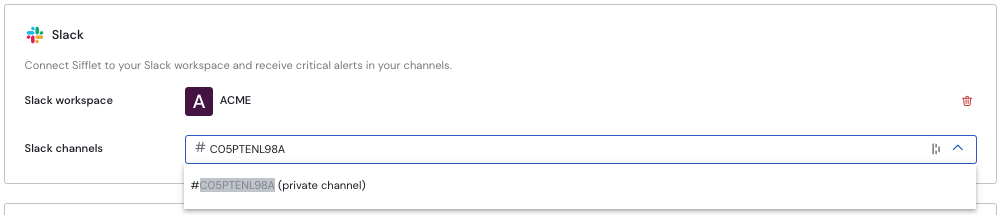
Configure a Private Channel
- The selected channel appears below, in the
Configured Slack channelslist. This indicates your channel is properly configured.
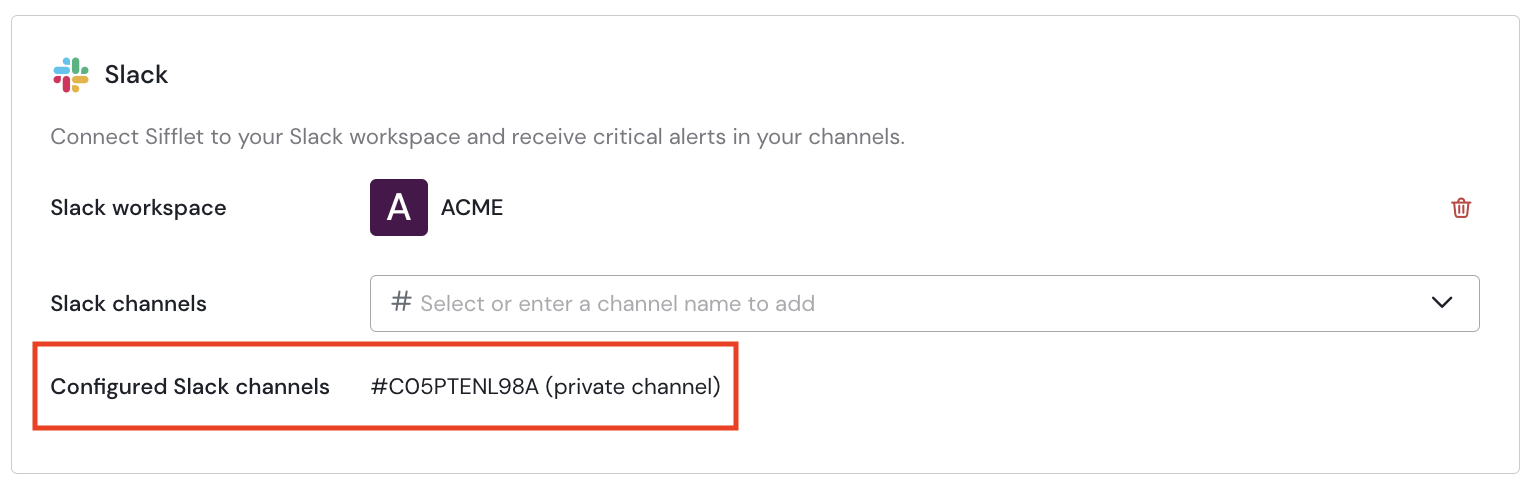
Configured Private Channel
Send Test Notifications
Once you have configured your Slack channel, you can hover its name and hit the paper airplane icon to send a test notification.
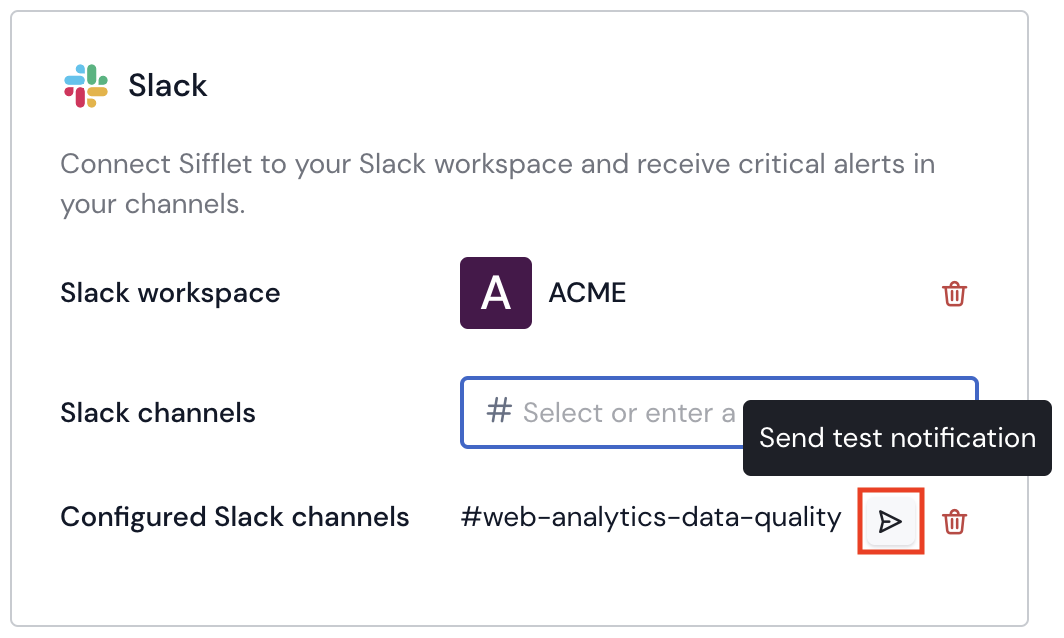
Send Test Notification
This can help you confirm whether or not Sifflet is able to properly send notifications to you configured Slack workspace and channel.
Use Channels in Monitors
Once you have configured your Slack channels, you can start using them in your monitors to receive notifications in case of data quality issues.
Public Channels
To use public channels in monitors, go to the Monitors page and click + New Monitor or open one of your existing monitors. If not done yet, turn on the Notify by Slack toggle in the Overview and notifications > Notification method section. Then, select the configured Slack channel of interest.
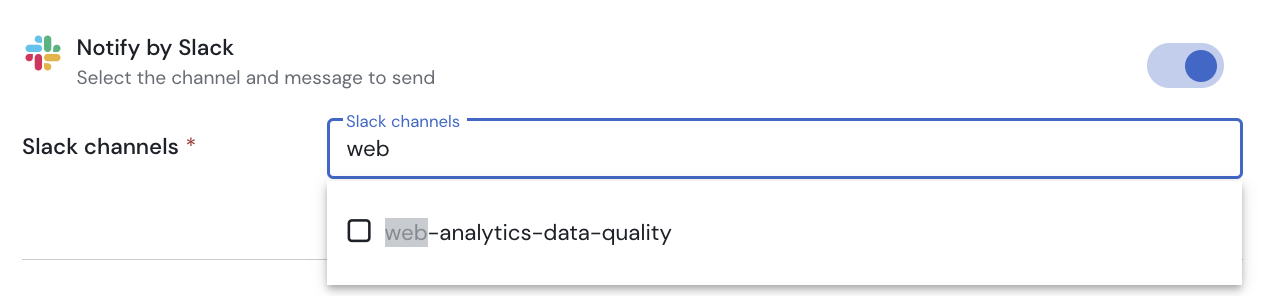
Use Configured Public Channel in Monitor
Private Channels
To use private channels in monitors:
- Head to your Slack workspace and to the channel of interest
- Click on your channel name at the top of the page to
Get channel details
- At the very bottom of the modal, look for your
Channel IDand click the icon to copy it -
Copy Channel ID
- Head back to the Sifflet application, to the
Collaboration Toolspage and make sure the copied channel ID shows up as aConfigured Slack channelssection of the Slack card. - Go to the
Monitorspage and click+ New Monitoror open one of your existing monitors. If not done yet, turn on theNotify by Slacktoggle in theOverview and notifications > Notification methodsection. Then, paste the previously copied channel ID and select the corresponding configured Slack channel.
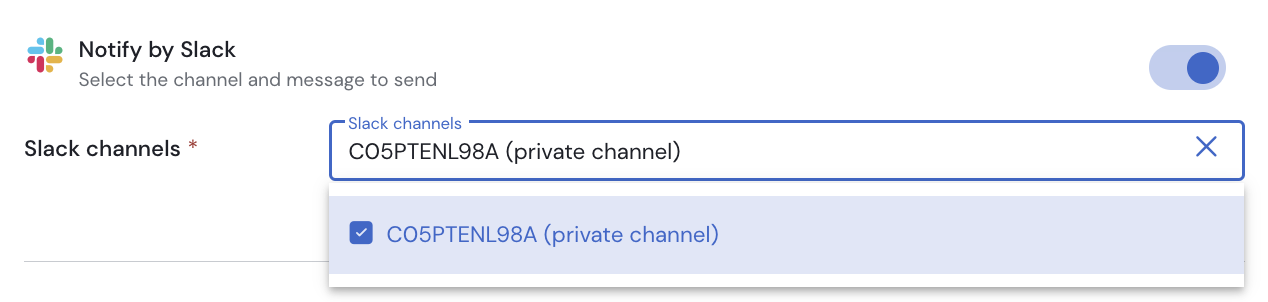
Use Configured Private Channel in Monitor
Delete Configured Channels
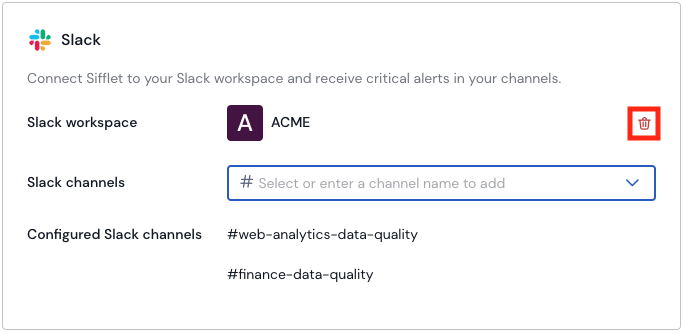
To delete a configured channel, hover the name of your channel, and click the red garbage icon.
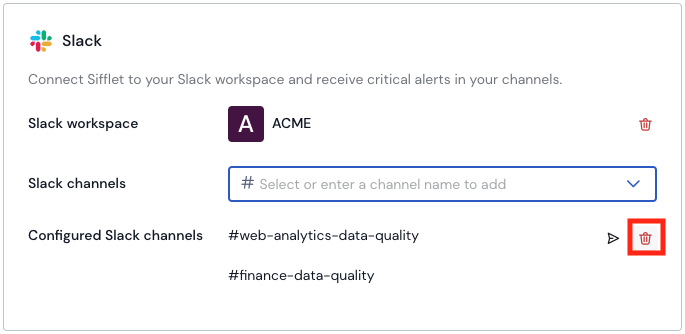
Delete Configured Channel
Removing a configured channel will automatically remove it from all monitors it is currently attached to.
Delete Configured Workspace
To delete your configured workspace, click the red garbage icon next to your workspace name.
Delete Configured Workspace
Removing a configured workspace will automatically remove configured channels from all monitors they are currently attached to.
Permissions & Privacy Policy
Bot Token Scopes
| Scope | Description | |
|---|---|---|
channels:read | View basic information about public channels in your workspace | Populate the list of public channels you can select from when configuring the integration in Sifflet (Sifflet application > Collaboration Tools page > Slack section) |
groups:read | View basic information about private channels that Sifflet App has been added to | Populate the list of private channels that Sifflet App has been added to and that you can select from when configuring the integration in Sifflet (Sifflet application > Collaboration Tools page > Slack section) |
chat:write.public | Send messages to channels @sifflet isn't a member of | Post messages (test and monitor notifications) to public channels the Sifflet App was not added to (useful only for public channels)
|
chat:write | Send messages as @sifflet | Post messages (test and monitor notifications) to public & private channels the Sifflet App was added to (mostly useful for private channels)
|
Privacy Policy
You can learn more about Sifflet privacy policy here.
Troubleshooting
I cannot add the Sifflet App to my Slack workspace
By default, any member of a Slack workspace can install an app. However, your organization might have turned on app approval in which case you might need admin approval to install new apps to your workspace. You can read more about this on Slack documentation.
Sifflet could not successfully connect to your Slack workspace, Slack error: <SLACK_ERROR_MESSAGE>
This error shows up whenever Sifflet is unable to connect to the workspace you selected. The Slack API endpoints used under the hood are oauth.v2.access and auth.test, you can read more about their potential errors and root causes here and here.
We could not load all of your Slack channels. You can manually add channels by entering a channel name.
This error message shows up whenever Sifflet is unable to collect all the list of public channels of the workspace. This can notably happen when the number of channels of the workspace is too large as it causes Sifflet to be temporarily rate limited by the Slack API. The Slack API endpoint used under the hood is conversations.list, you can read more about its potential errors and root causes here.
Whenever this error occurs, you can always try to add your channel by manually entering its name and clicking the Add channel: #<your-channel-name> option.
Sifflet cannot reach your #<CHANNEL_NAME> channel. Double-check the spelling, confirm that the Sifflet Slack App was added to your channel if it is a private channel, and try again.
This error shows up whenever Sifflet is unable to reach the channel you selected. The Slack API endpoints used under the hood are chat.scheduleMessage and chat.deleteScheduledMessage, you can read more about their potential errors and root causes here and here.
Sifflet could not successfully send a test message to the #<CHANNEL_NAME> channel in the <WORKSPACE_NAME> Slack workspace, Slack error: <SLACK_ERROR_MESSAGE>
This error shows up whenever Sifflet is unable to send a test notification to the channel you selected. The Slack API endpoint used under the hood is chat.postMessage, you can read more about its potential errors and root causes here.
I don't see the channel name I want to use in the list of channels in monitors
You first need to set up the integration and configure Slack channels before being able to use them in monitors.
To help users manage alerts more efficiently and reduce inbox clutter, slack notifications for failing monitors are now grouped into threads.
Updated 2 months ago