Azure Active Directory
This article shows how to configure Azure Active Directory (Azure AD) as the identity provider for single sign-on (SSO) on Sifflet.
In order to set up the SSO in Azure, please follow the following steps:
- Configure your Identity Provider (IdP)
- Configure the SSO in Sifflet
- Test your SSO
RequirementsIn order to enable the SSO in Sifflet, you will need:
- a Sifflet admin account
- an Azure admin account with the same email address as the one used in Sifflet
1- Configure your Identity Provider
The configuration of your IdP is done with the following steps:
a. Log in to Sifflet and retrieve some SSO details
b. Add the Sifflet App in Microsoft Azure
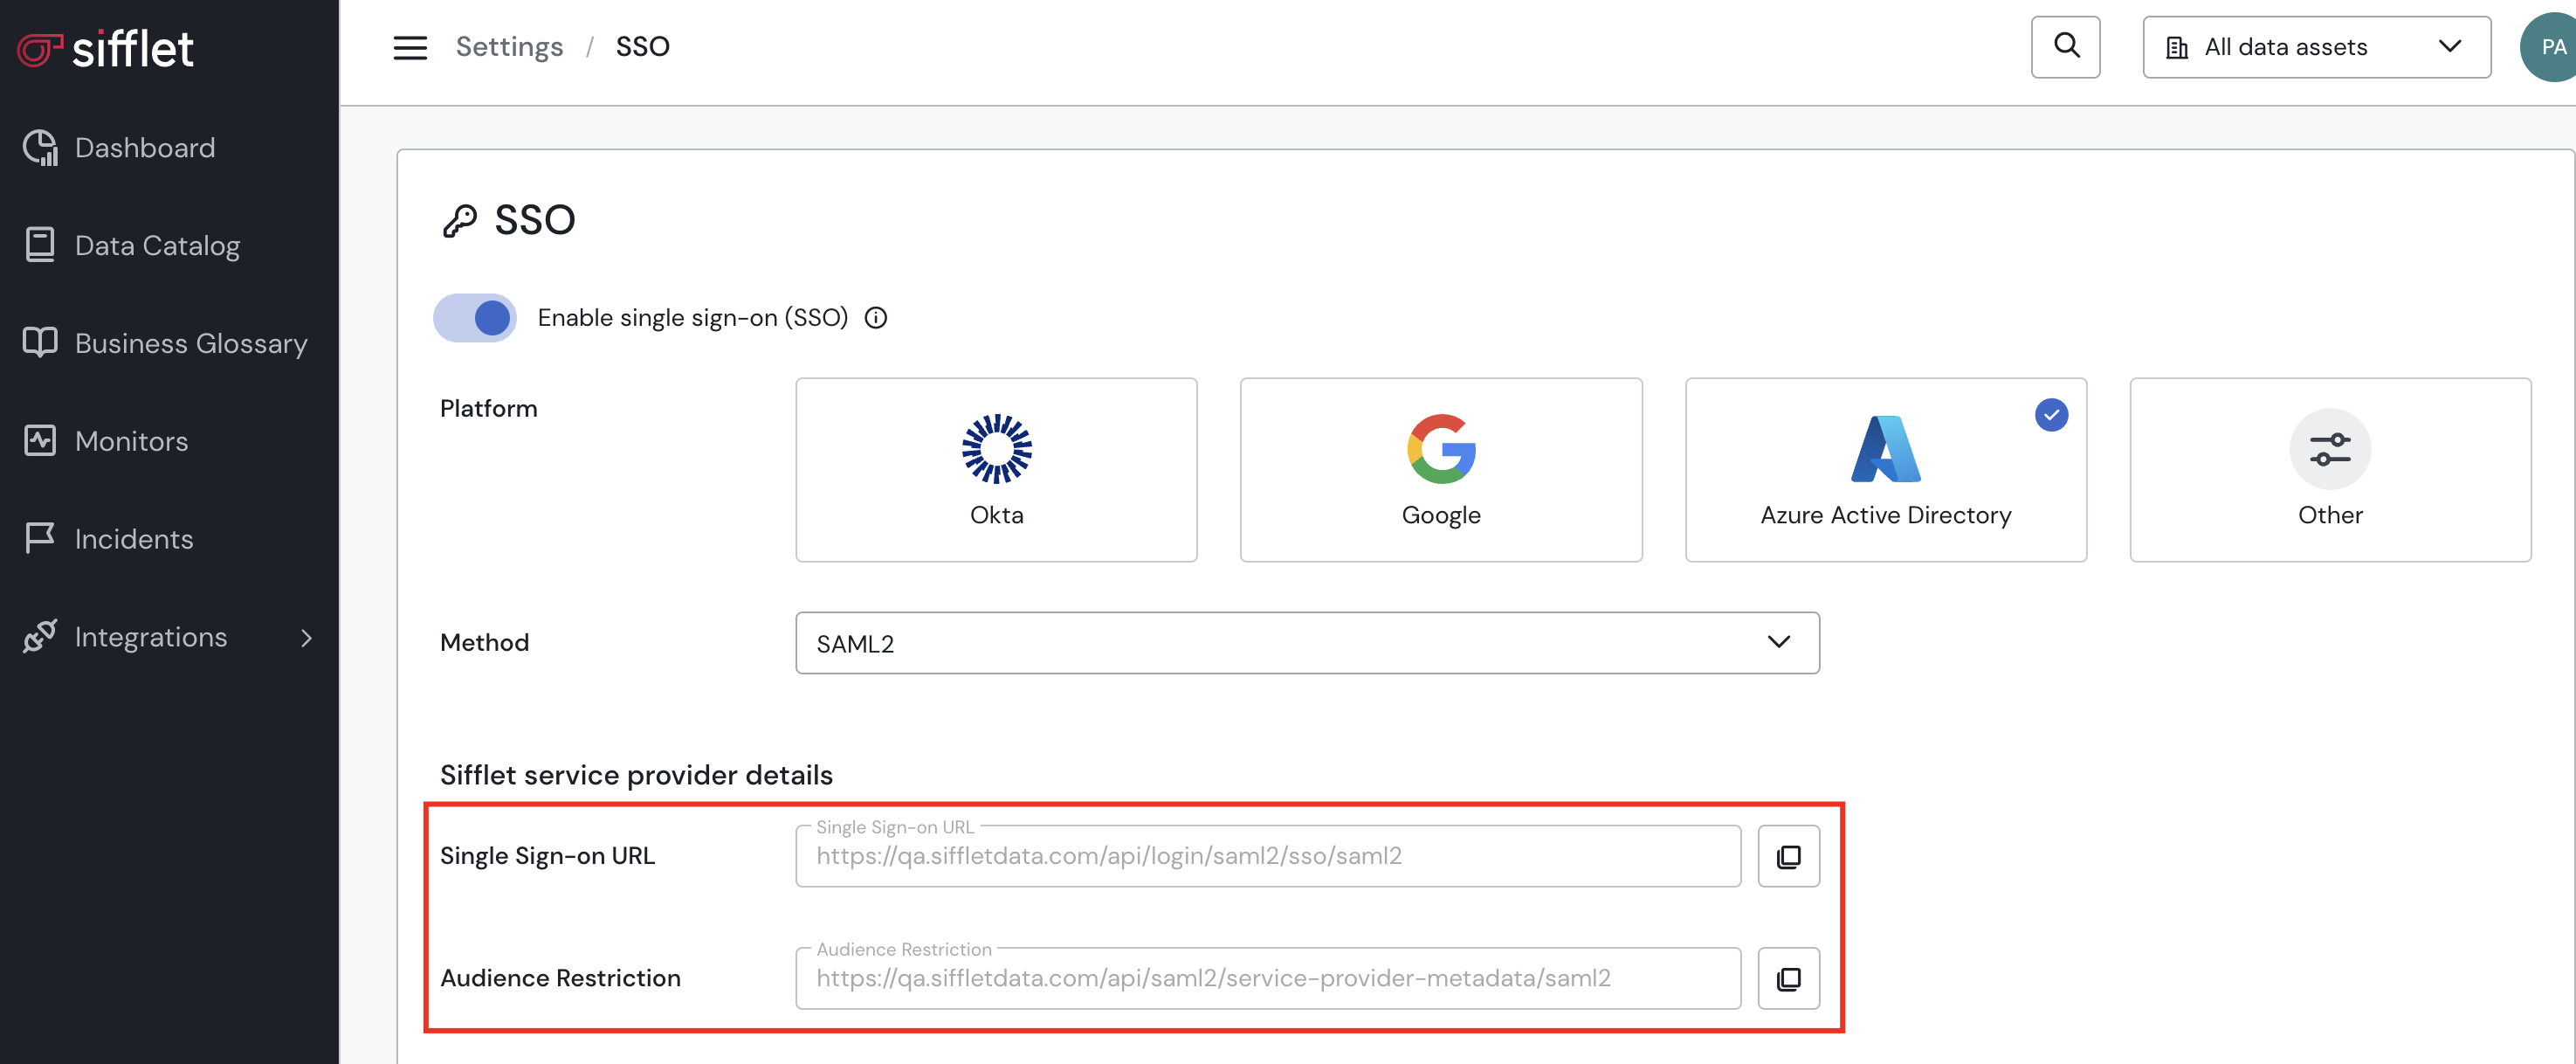
a. Retrieve the SSO details in Sifflet
- Connect to Sifflet with an Admin Account
- In Settings -> SSO -> Enable single sign-on (SSO)
- Choose your Platform (Azure Active Directory here)
- Save the information under "Sifflet service provider details", you will need it in the next section.
b. Create a dedicated application for Sifflet on Azure AD
Create your Sifflet application on Azure; to do so, follow the steps below or Microsoft's guide. Please note Microsoft's guide skips the (first) creation step of the application.
- Log in to Microsoft Entra Admin Centre
- Create an application: Identity -> Applications → Enterprise Applications → New application
- On the next screen, you can add the App:
- Set up a name, for instance "sso-sifflet"
- “Integrate any other application you don't find in the gallery (Non-gallery)”
- “Create”
- Within the registered app, click on the 'Single sign-on' tab.
- Click 'SAML' -> 'Edit'. Locate the parameters below, and fill them with the values previously saved in Sifflet.
- Identifier (Entity ID) → please use our Audience restriction, e.g.
https://{tenant}/api/login/saml2/service-provider-metadata/saml2 - Reply URL →please use our Single Sign-on URL, e.g.
https://{tenant}/login/saml2/sso/saml2
- Identifier (Entity ID) → please use our Audience restriction, e.g.
- Witin the ‘Set up Single Sign-On with SAML’ page:
- Add new claim
- name = email
- source attribute = user.mail
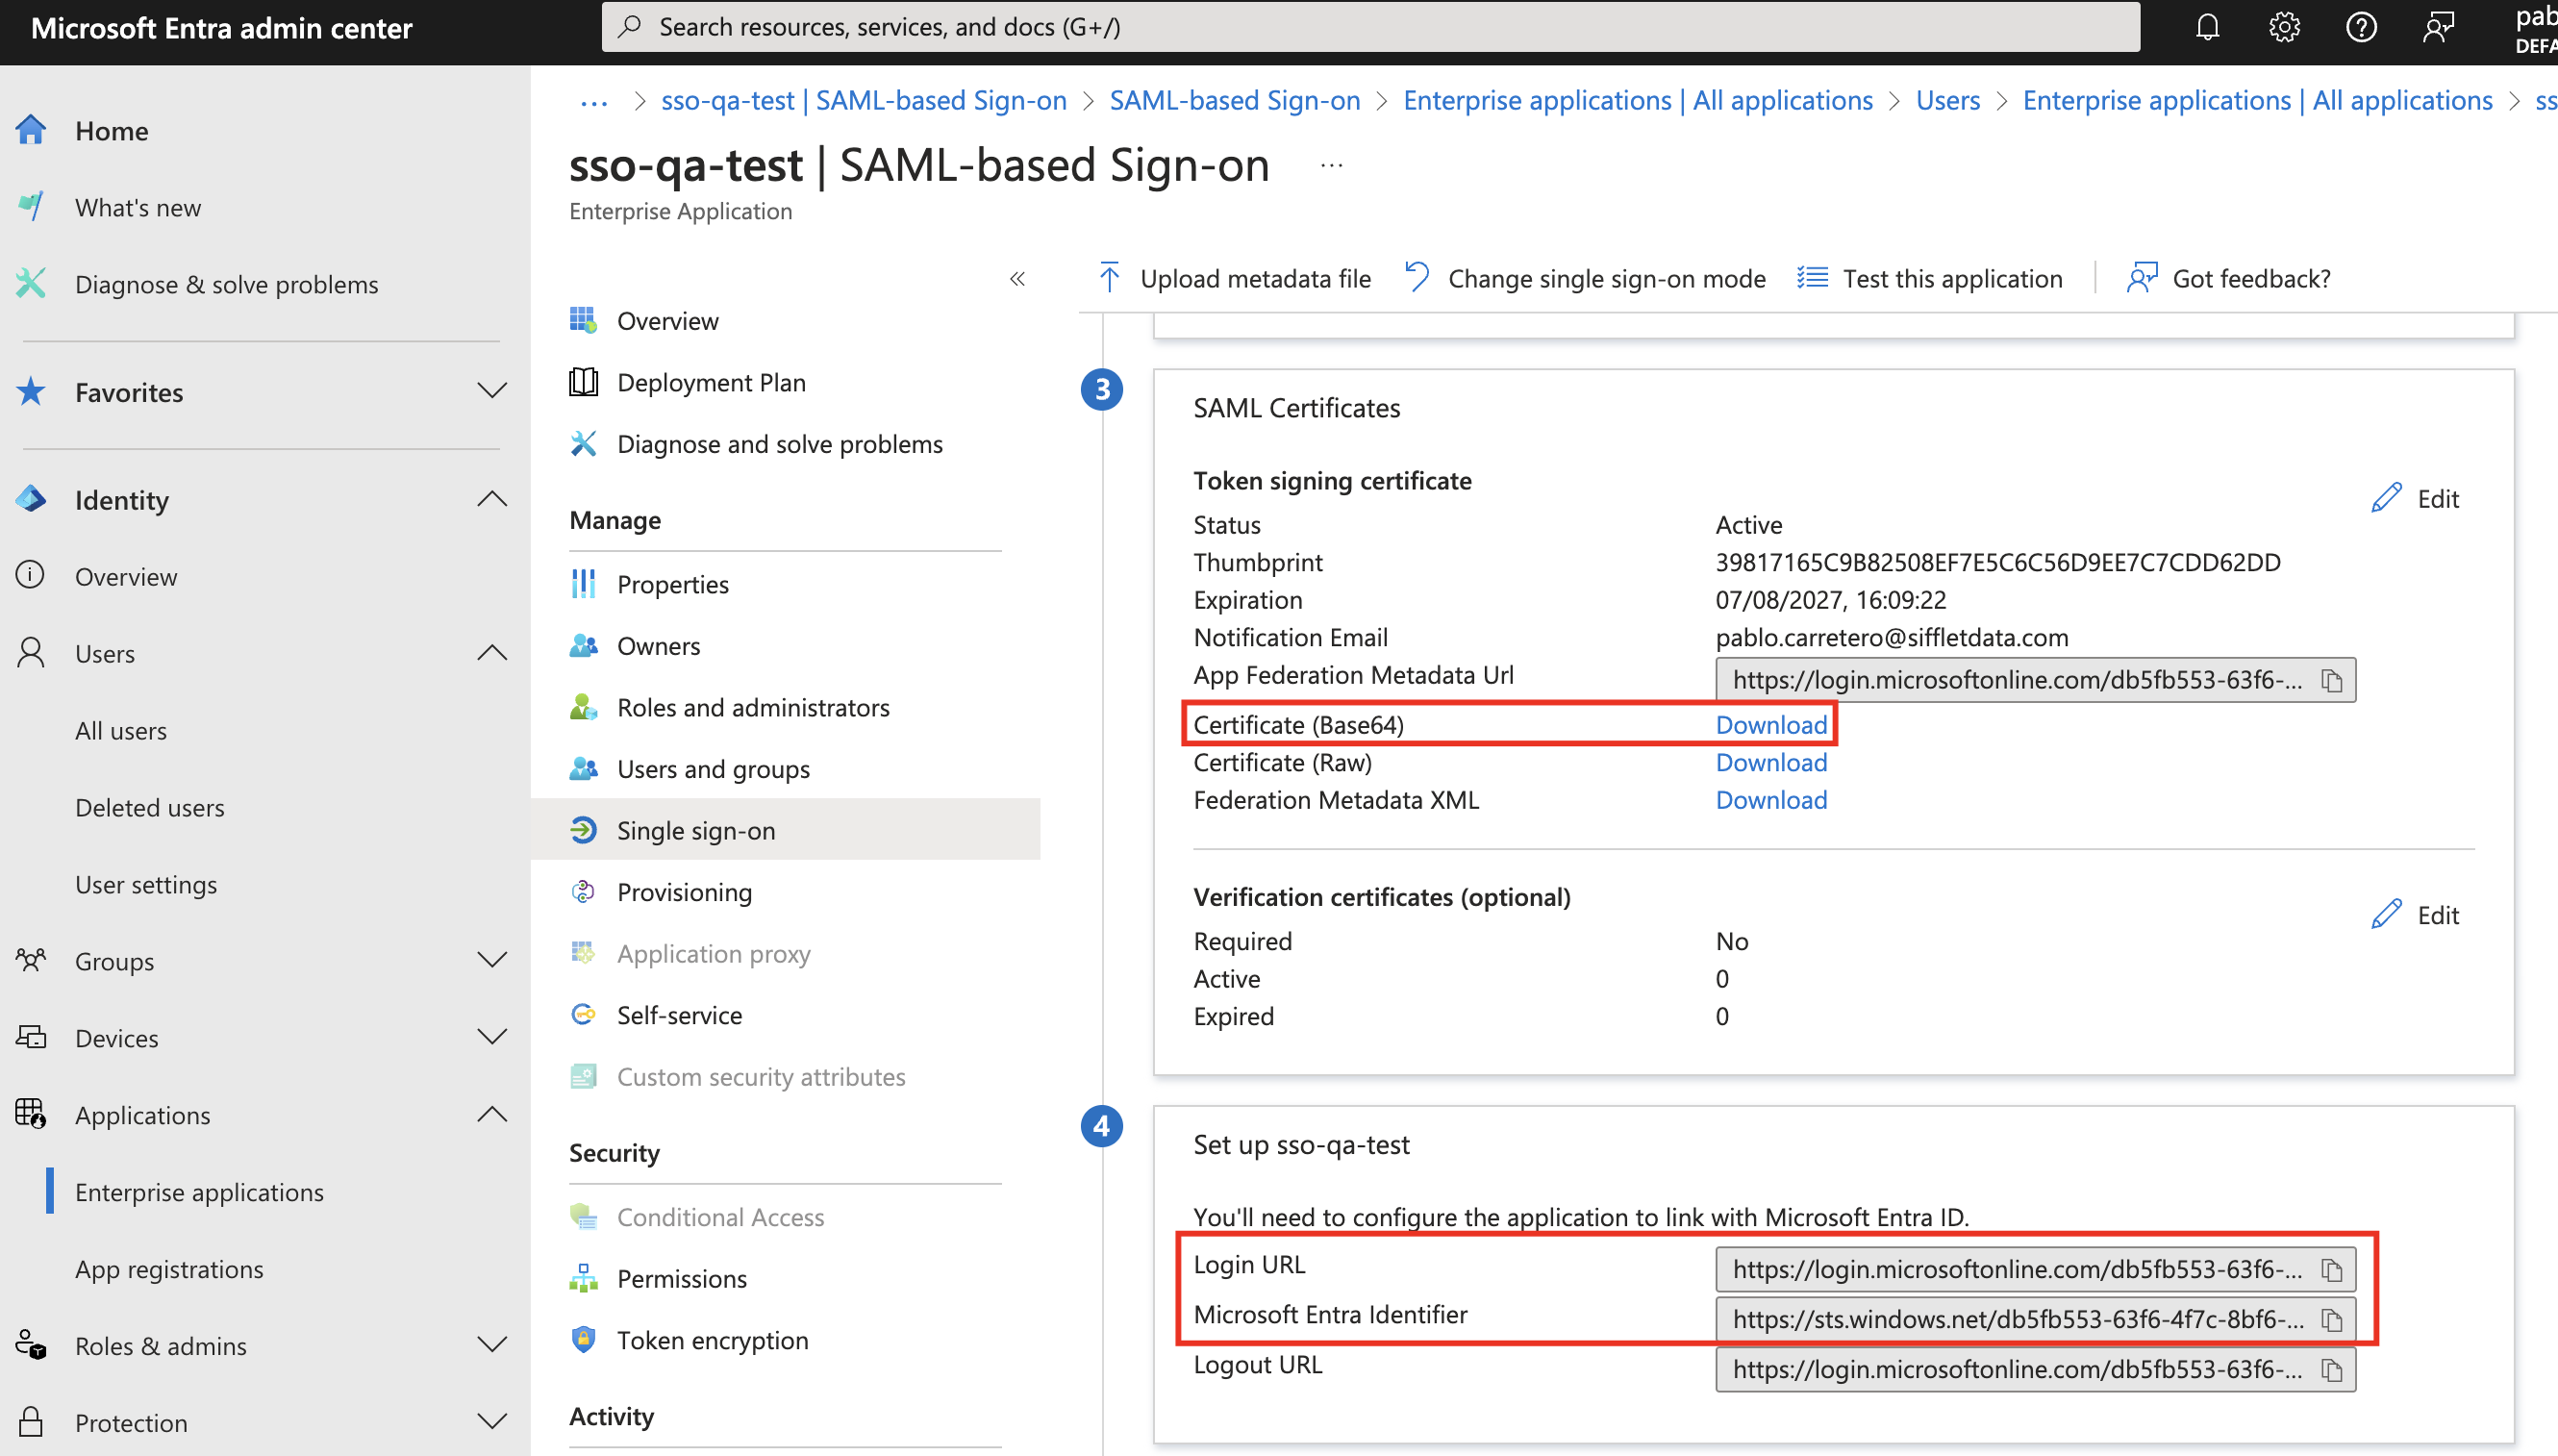
- And do not forget to download the “Certificate (base64)”, which will be used later
- Add new claim
- Finally, you can add Users and Groups to your Azure application
- To add users, within your application (e.g.
sso-sifflet) click on 'Users and groups' - Assign the users and groups of your choice
- To add users, within your application (e.g.
- Click 'SAML' -> 'Edit'. Locate the parameters below, and fill them with the values previously saved in Sifflet.
2- Configure the SSO in Sifflet
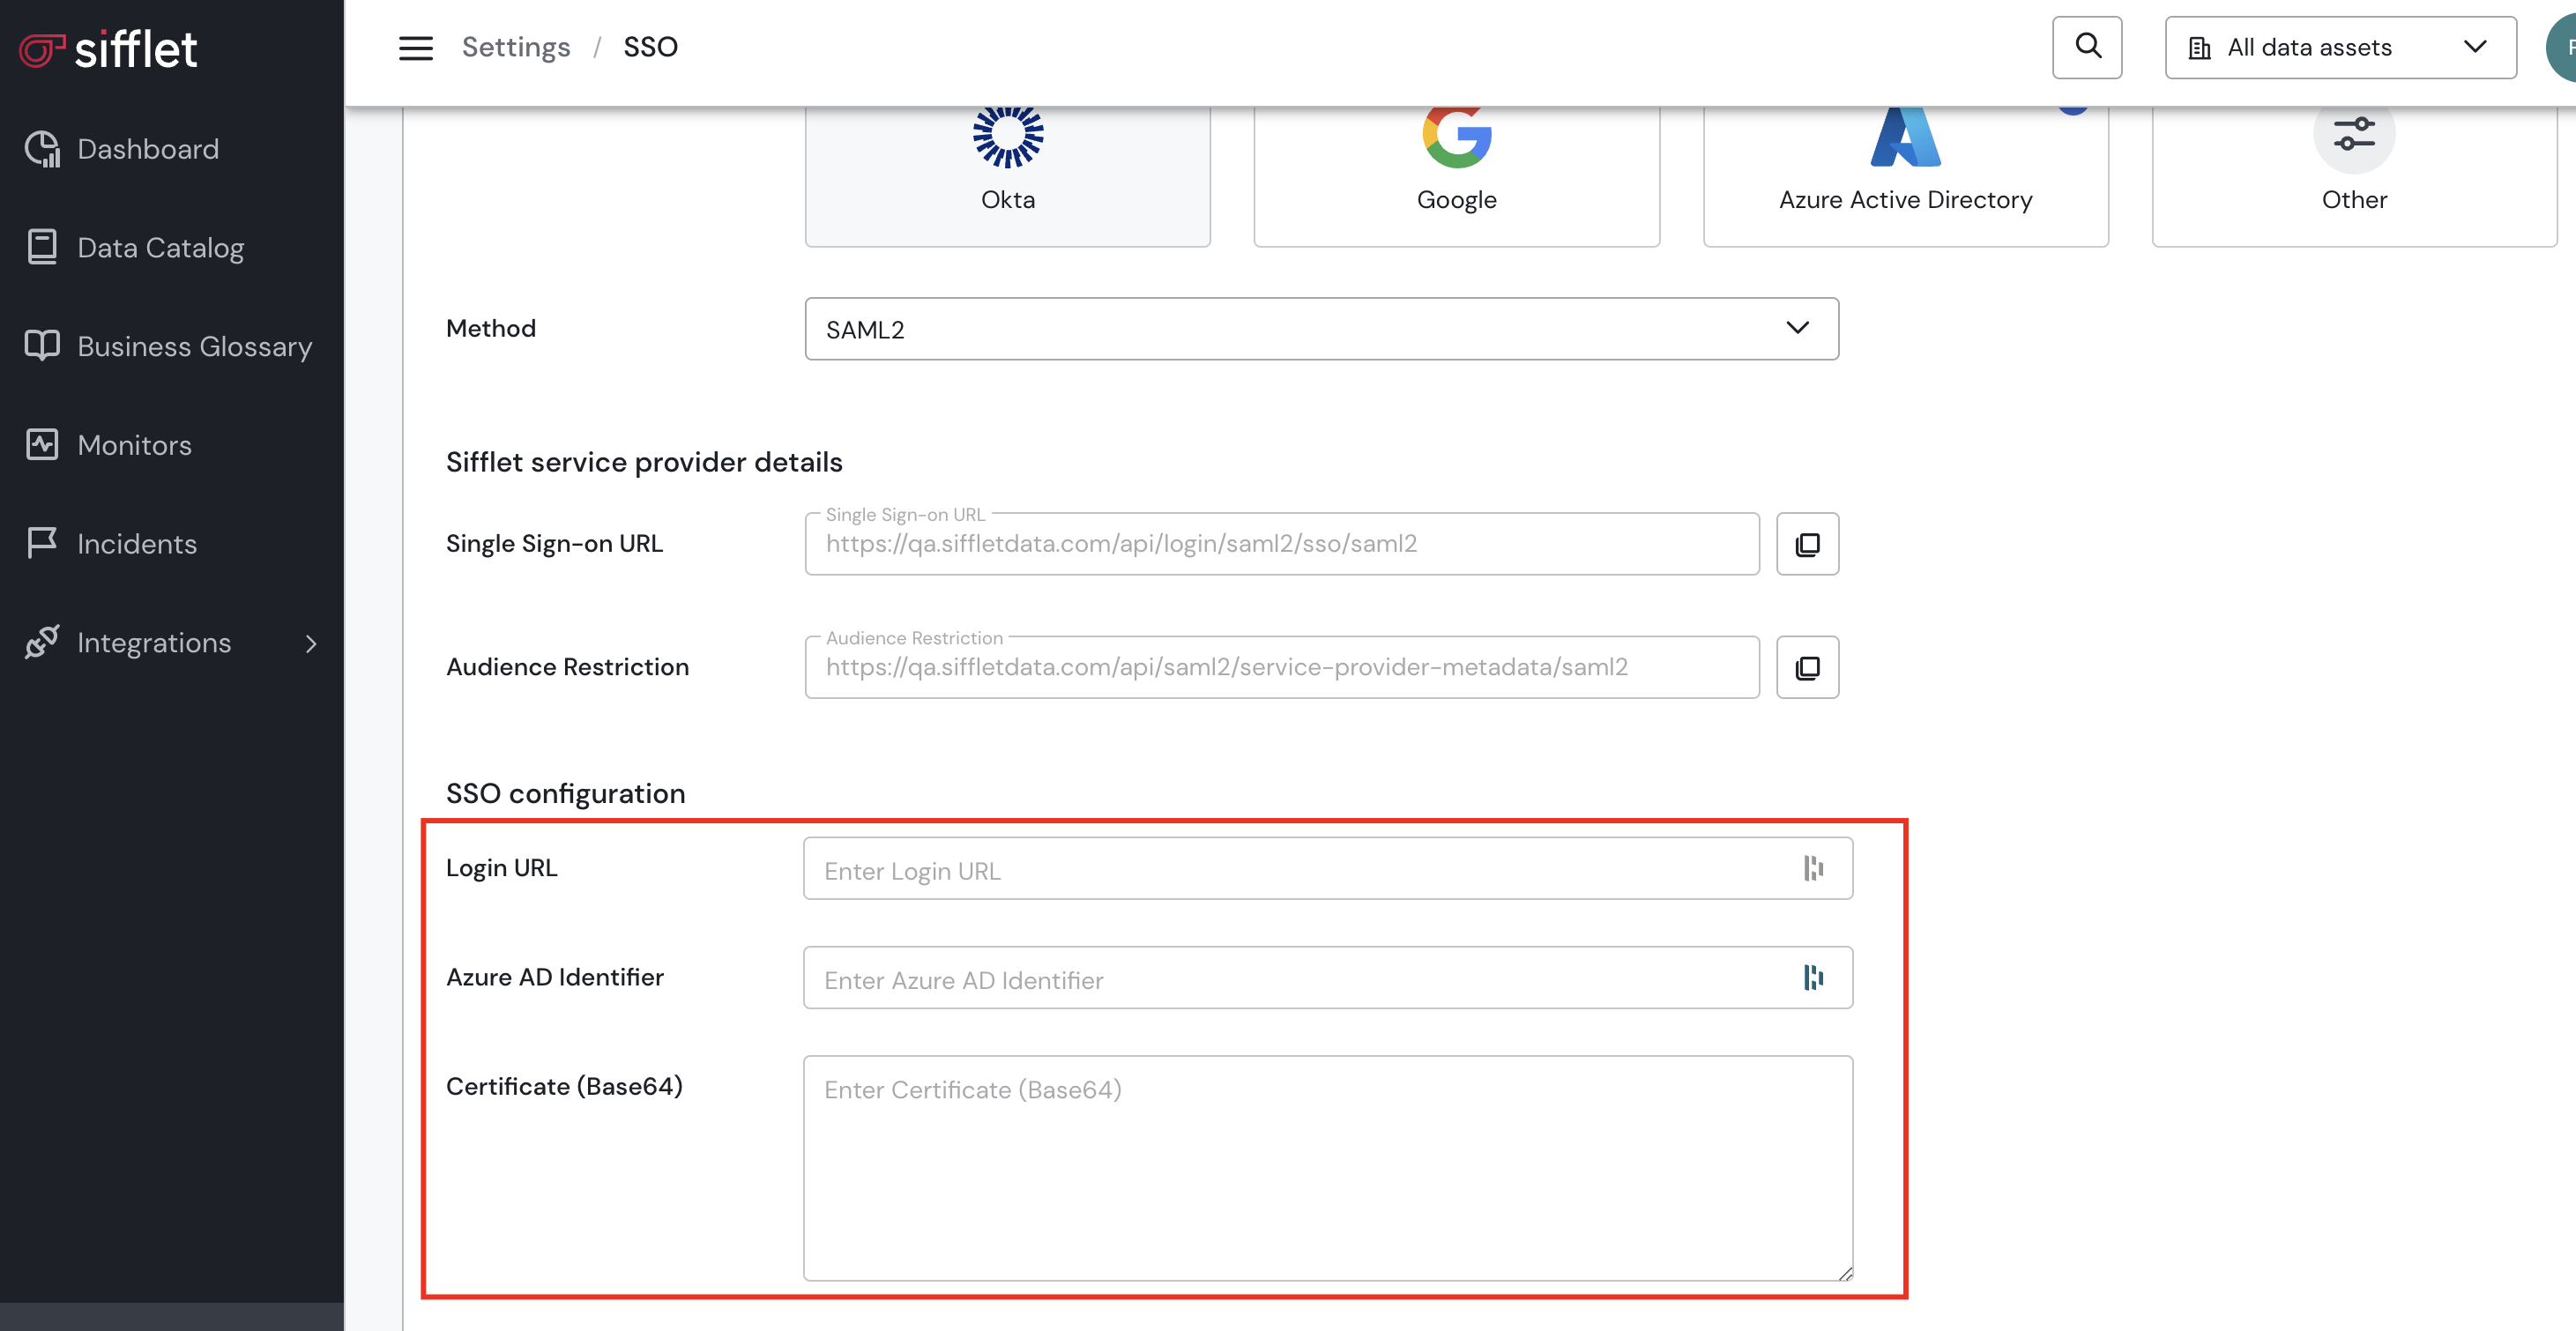
Now, let’s reference in Sifflet the details of the application we just created. Within Sifflet's SSO enablement page (where we initially obtained the Audience restriction and the Single Sign-on URL), copy the following values from the application you created:
- Login URL
- Microsoft Entra Identifier, which you will place within Siflet's Azure AD Identifier parameter
- Certificate (base64). Open the downloaded
.cerfile with a file editor and paste the content in Sifflet. Make sure to include the "-----BEGIN CERTIFICATE-----" and "-----END CERTIFICATE-----" strings within the file.
Which you can obtain from:
And should be placed:
3. Test your SSO
- You can now test your SSO by pressing the "Test" button on the bottom right of the page.

- If successful, don't forget to press on "Save" to activate the SSO effectively.

The configuration is done!
Updated 8 months ago