Power BI
By integrating Sifflet with Microsoft Power BI you'll be able to:
- Access the metadata of your Power BI assets (like reports and dashboards) in Sifflet
- Explore the upstream dependencies of your Power BI assets via the Sifflet lineage
- Monitor the data assets that matter the most based on your Power BI usage
- Leverage the Sifflet Insights browser extension to receive up-to-date data quality information when using Power BI

Power BI assets as part of the Sifflet lineage
To connect Sifflet to Power BI, you will need a Power BI account and a Microsoft Entra ID account (formerly Azure Active Directory), both with admin permissions. This will allow you to grant read-only access to Sifflet.
The main steps are the following:
- Create a Microsoft Entra App for Sifflet and generate a client ID and secret.
- Configure Power BI to allow Sifflet to communicate with Power BI's API.
- Add a Power BI source in Sifflet.
1. Create a Microsoft Entra App for Sifflet
In this step, you will create a service principal for Sifflet in Microsoft Entra ID. This will enable Sifflet to access Power BI service content and APIs.
Please follow steps 1 and 2 in the official Azure documentation:
- Creating a Microsoft Entra app
- Creating a Microsoft Entra security group
2. Allow the Sifflet service principal to access Power BI
To perform the first part of the configuration, you can follow steps 3 and 4 in the official Azure documentation:
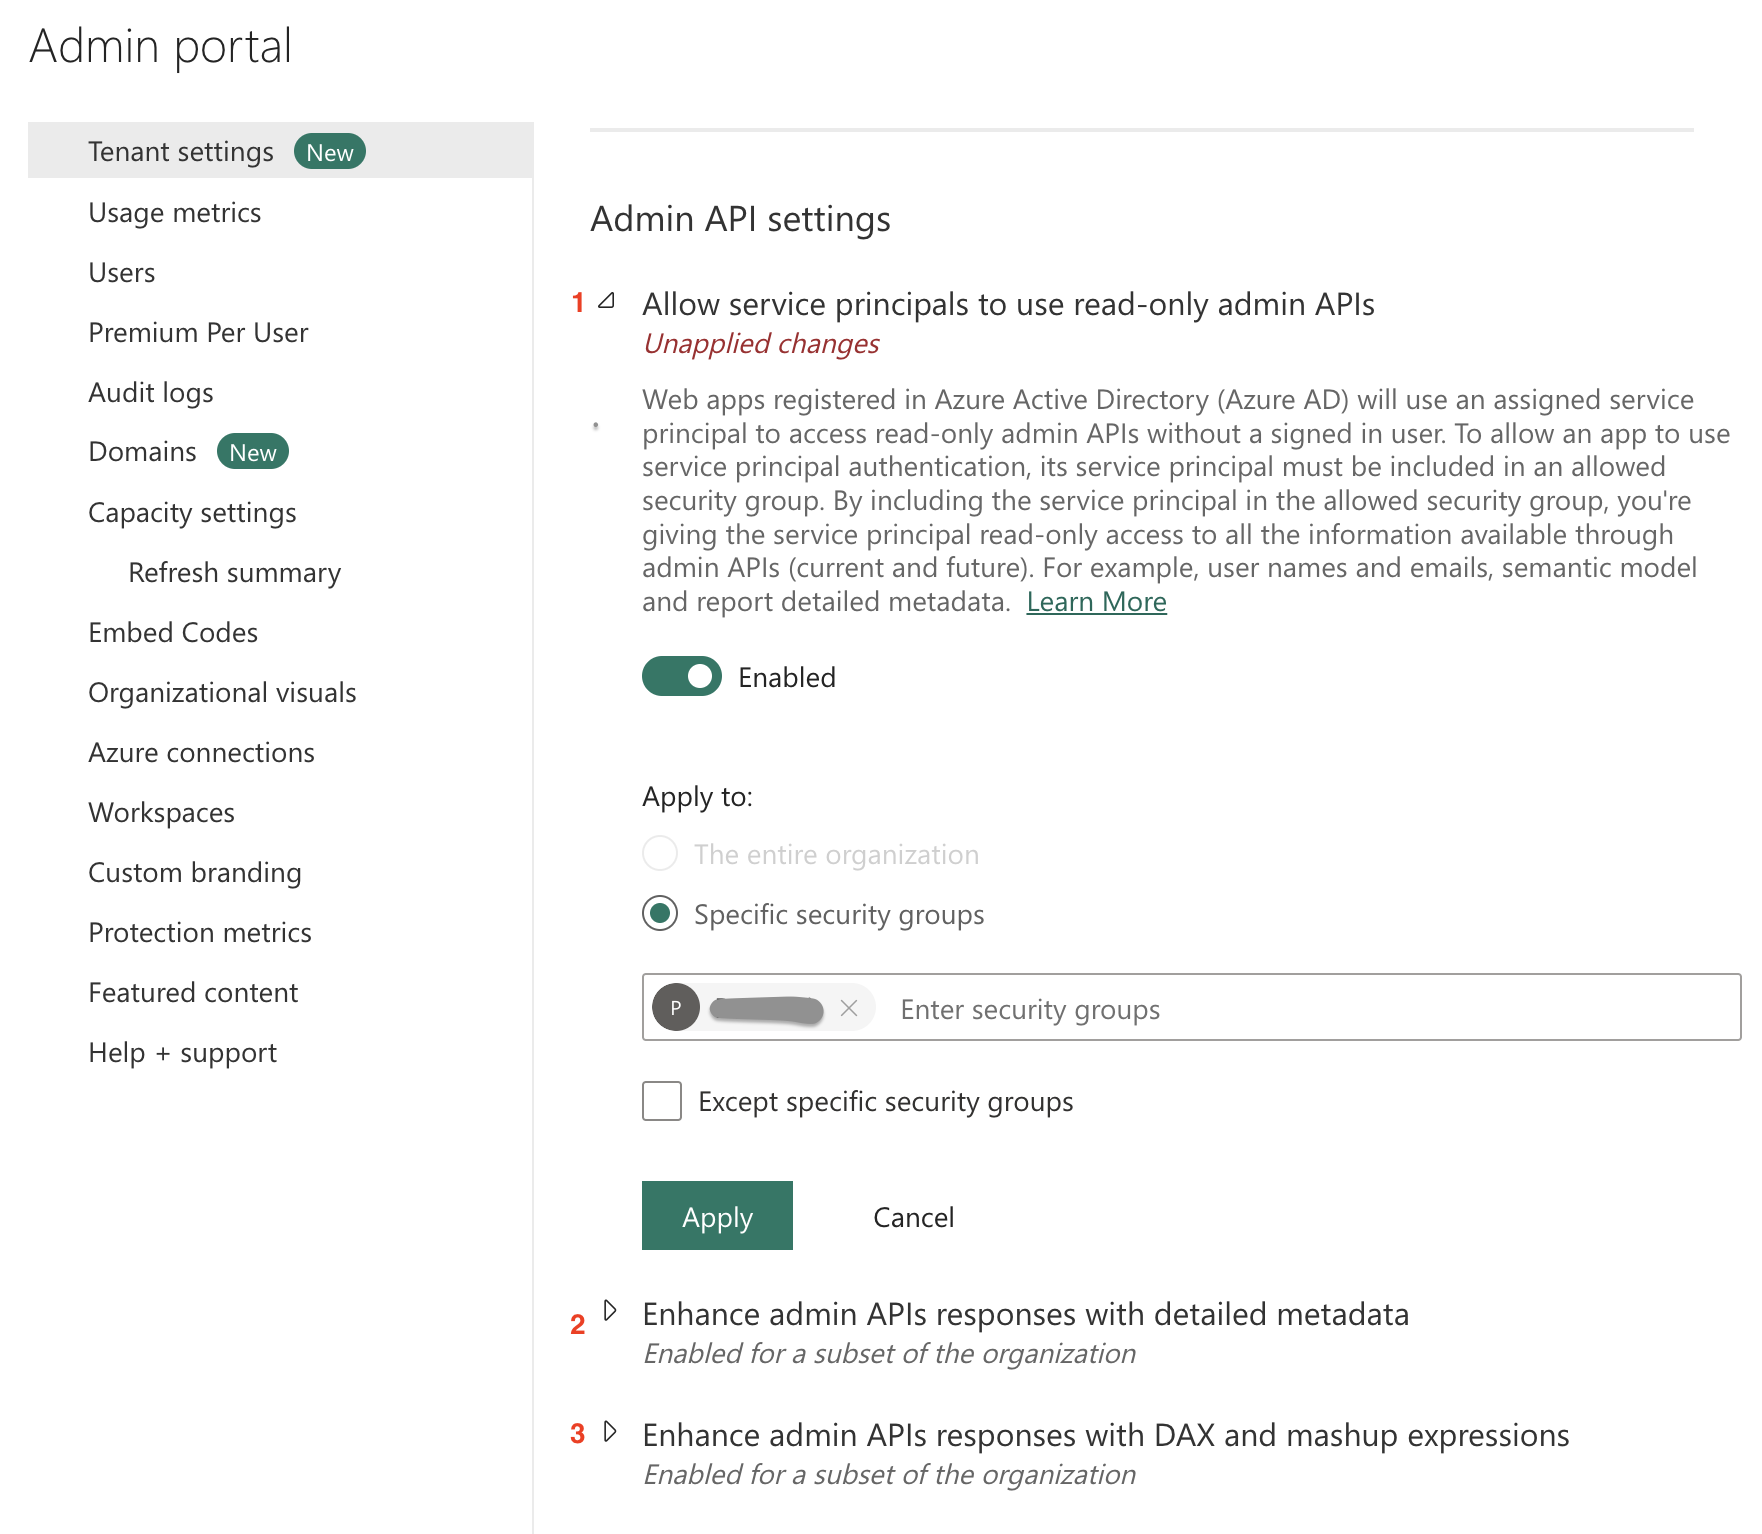
- Enabling the Power BI service admin settings
- Adding the service principal to your workspace
Adding the Sifflet service principal to your workspaceEnsure you add the previously registered App (service principal) to your workspace with the
Memberrole. This will allow Sifflet to resolve Dataset Parameters.
The second part consists of providing Sifflet with the correct level of admin API access (including metadata scanning).
In your Power BI Admin Portal, navigate to the Admin API Settings page (Admin portal > Tenant Settings > Admin API settings). You can then enable the following three APIs and grant the previously-created security group access to them:
- Allow service principals to use read-only admin APIs
- Enhance admin APIs responses with detailed metadata
- Enhance admin APIs responses with DAX and mashup expressions

3. Connect Sifflet to Power BI
Back to your Sifflet tenant:
-
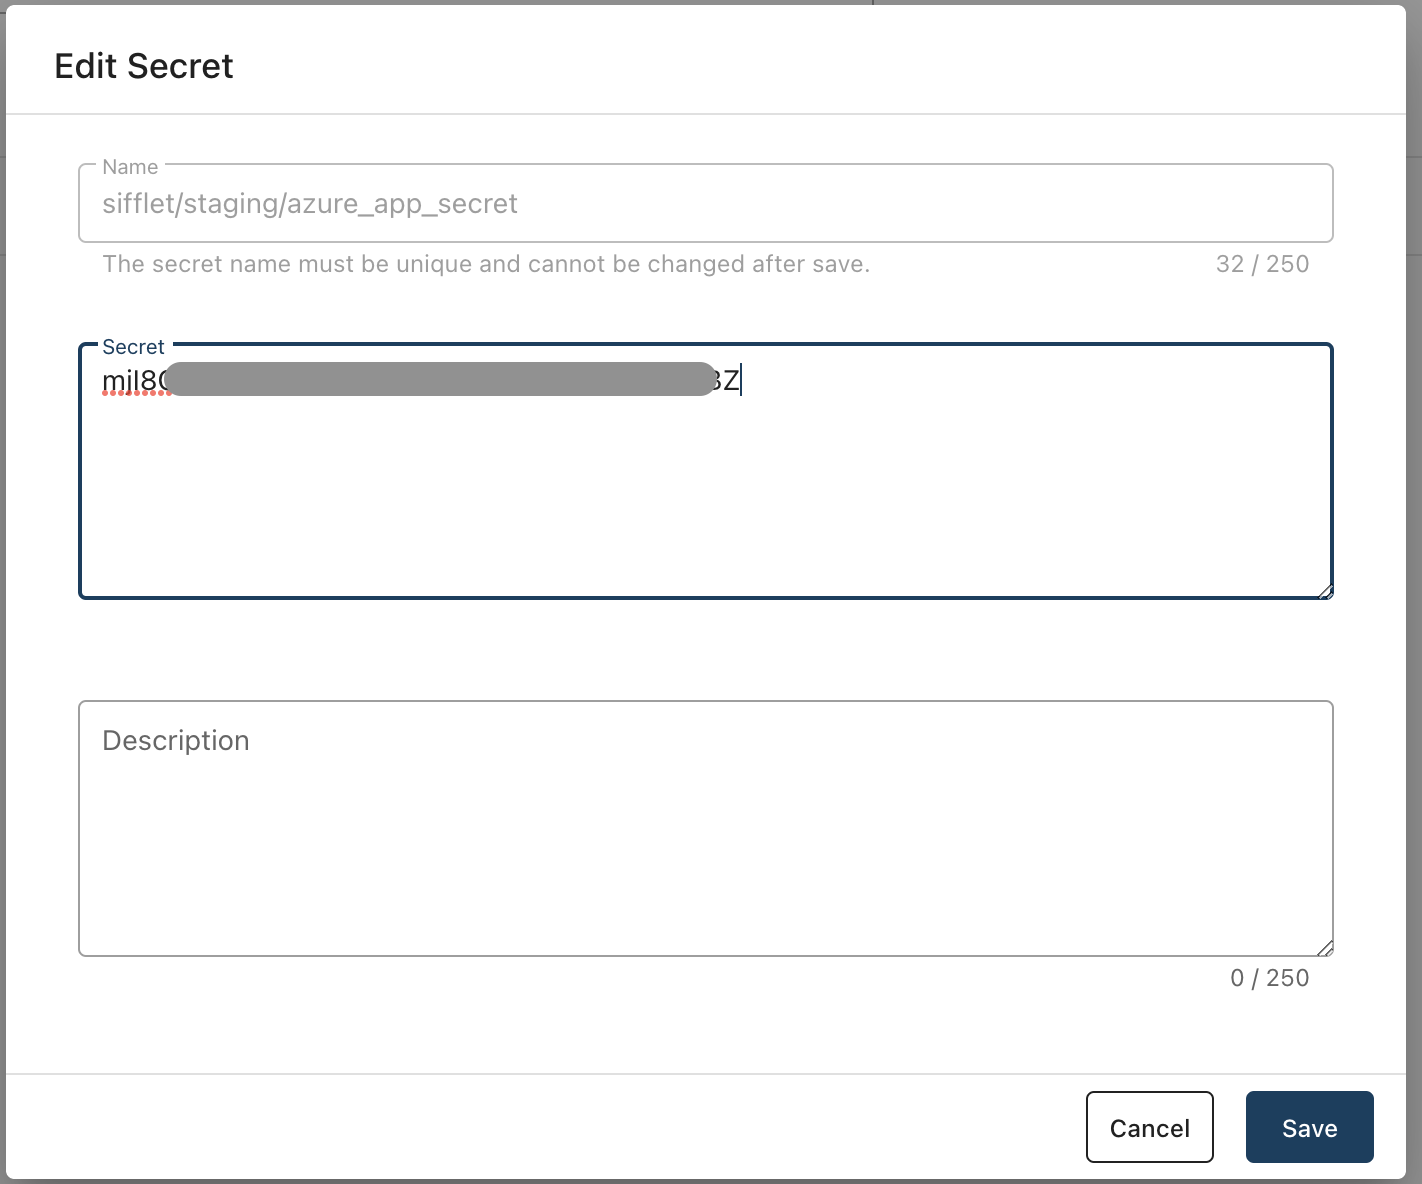
Create the Power BI secret that Sifflet will use to connect:
-
On the left panel, choose "Integrations" and then the "Credentials" submenu
-
Click on "New credential"
-
Provide the required information:
- Name of your credential
- The credential is the client secret of the App you previously created in Step 1. The format on Sifflet is just the secret itself:
-

-
Add the Power BI source:
-
On the left panel, choose "Integrations" and then the "Sources" submenu
-
Click on "New source"
-
Provide the required information:
-
Name of the datasource
-
Power BI Workspace ID: The Power BI Workspace ID can be found directly in the URL when using Power BI. For example, for
https://app.powerbi.com/groups/037b193e-74f4-4132-96ea-bcda6639f743, the Workspace ID is037b193e-74f4-4132-96ea-bcda6639f743. -
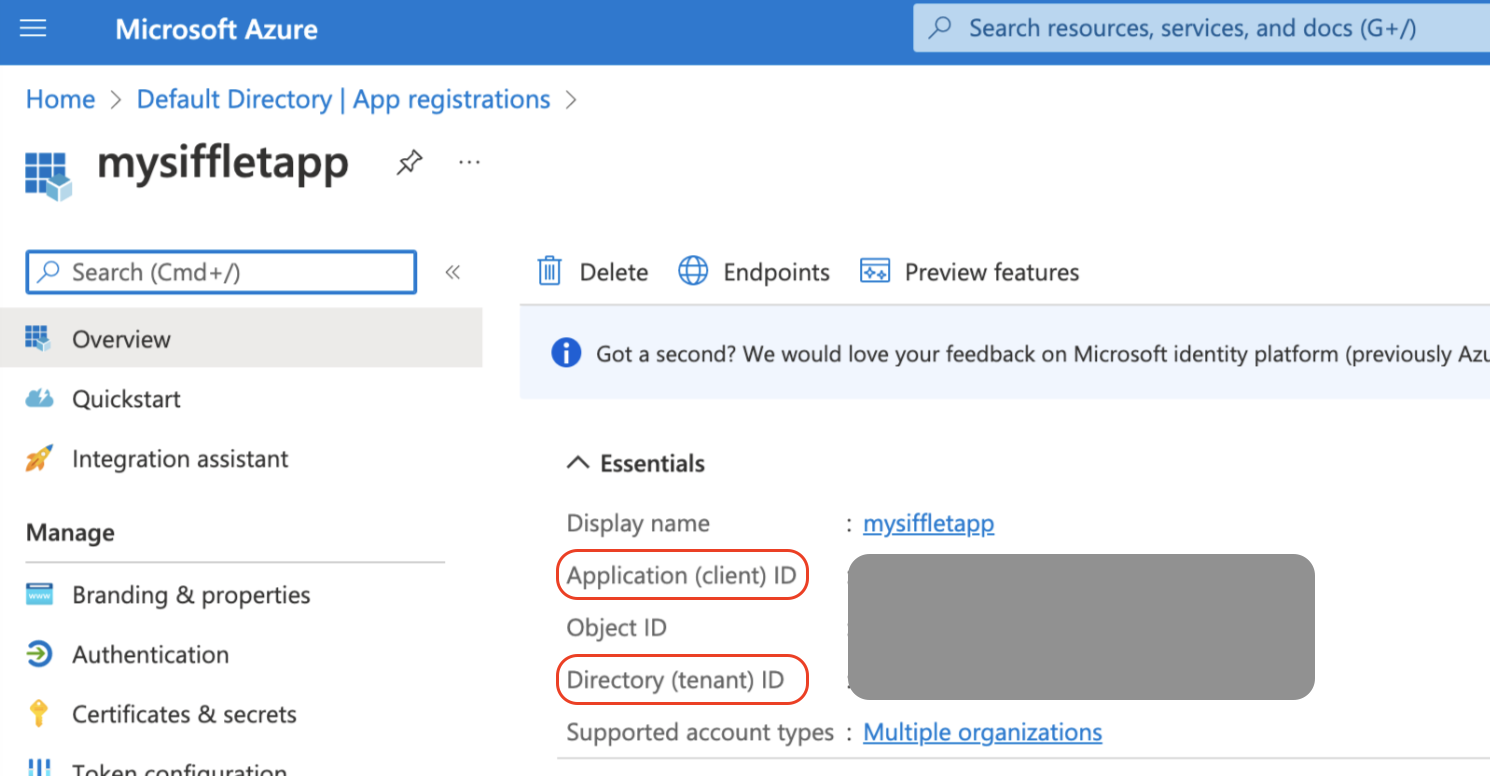
Azure AD tenant ID and Azure AD client ID: both can be found in the Overview of your app on Azure:

- Credential: choose the newly created credential
-
-
Sifflet Insights Browser Extension
Sifflet Insights browser extension supports the following Power BI asset types:
- Reports
- Dashboards
FAQ
Error message : "API is not accessible for application"
After triggering the Power BI integration, you may receive the following error message in the "Runs" tab:
Error encountered when trying to pull Power BI remote state, cause = Error encountered when trying to get scan response for workspace id 403 Forbidden: "{"Message":"API is not accessible for application"}", scan id {1}Sifflet requires access the Power BI API. Please ensure to enable the Power BI service admin settings.
Updated 3 months ago
