Azure Synapse
Azure Synapse coverage and related capabilitiesOnly Azure Synapse SQL dedicated Pool is supported.
This integration covers all the catalog and monitoring features (including all monitors types).
The automated lineage is not supported.
You can integrate with Synapse by following these steps:
- Create an Azure Entra Enterprise Application and a client secret
- Create an SQL user in Synapse with the correct permissions
- Create a Synapse Datasource in Sifflet
1- Create an Azure Entra Enterprise Application and a client secret
Create an Azure Entra Enterprise Application
- Go to the Azure Portal
- Go to Entra ID
- Go to Enterprise Applications
- Click on “New Application”
- Click on “Create your own application”
- Select “Integrate any other application you don't find in the gallery (Non-gallery)” and choose a name for the application. You should see this:
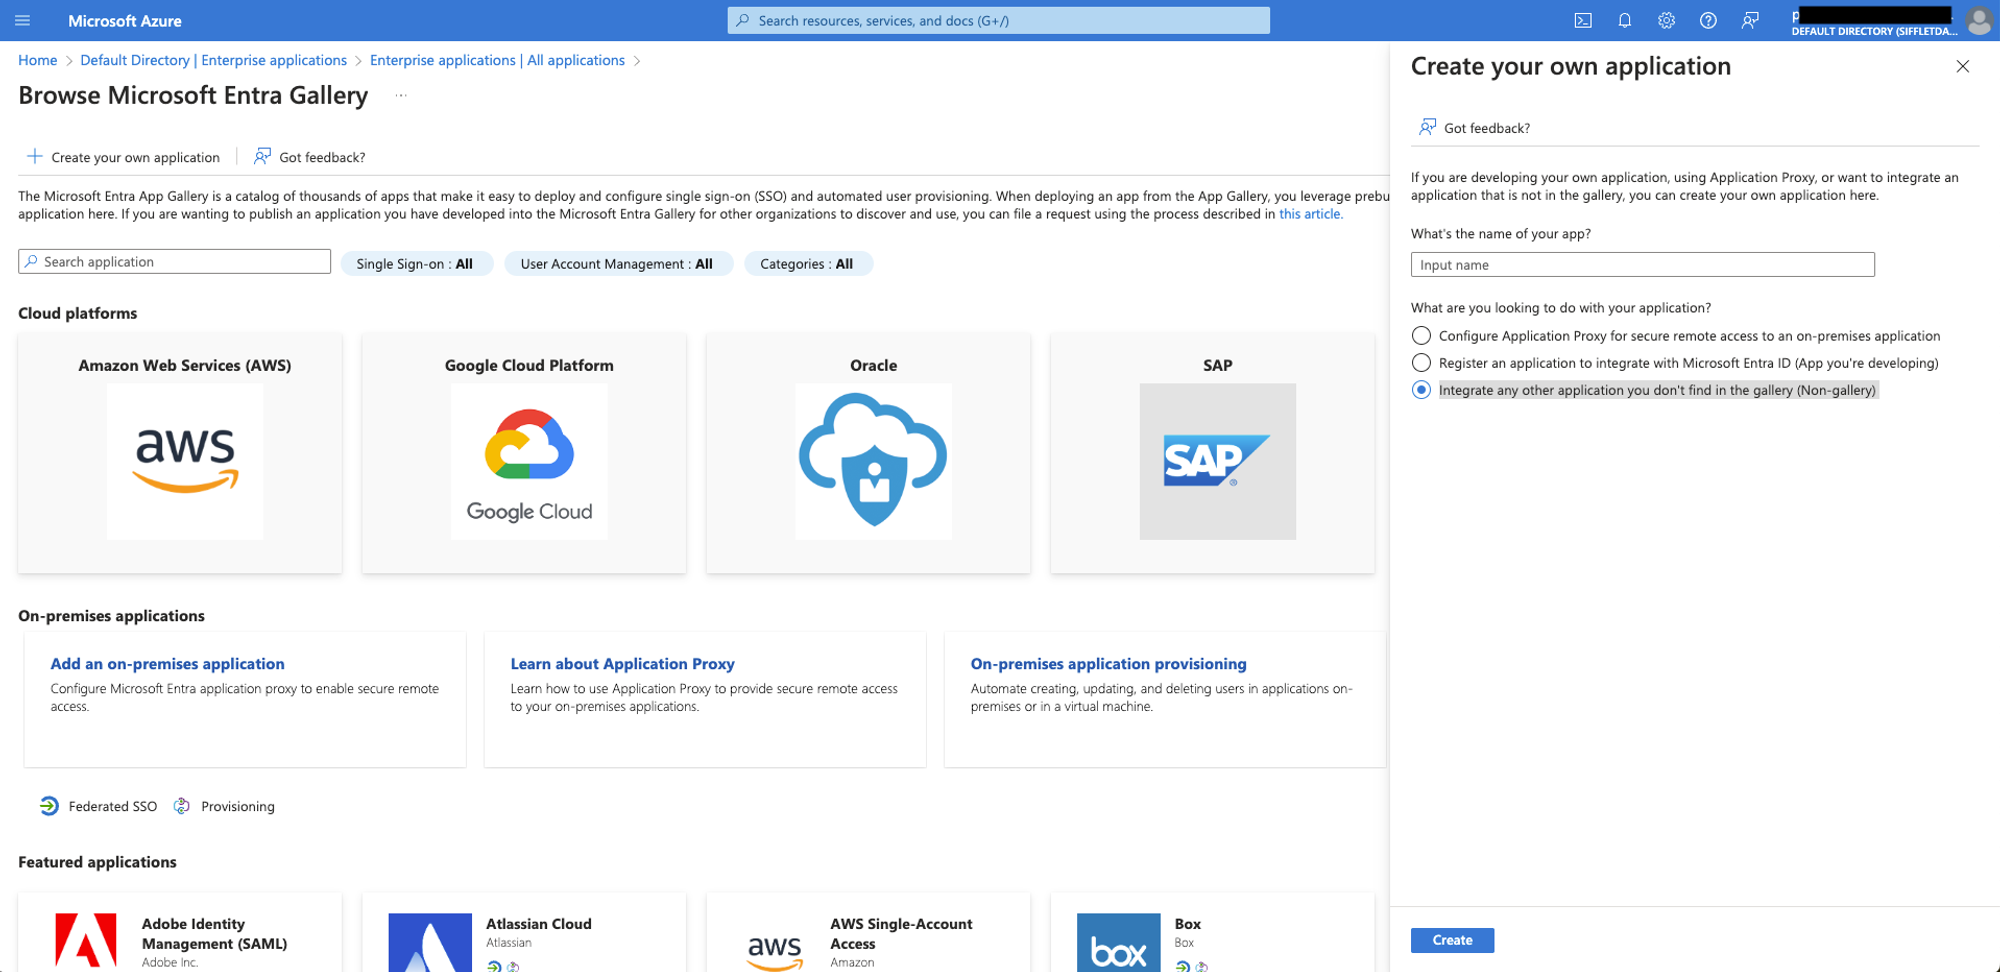
- Click on Create
- Save the Enterprise Application Name and ID for later
Create a Client Secret for the Enterprise Application
- Go to the Azure Portal
- Go to Entra ID
- Go to App registrations
- Click on “All applications”
- Click on the application that you’ve just created. You should see this:
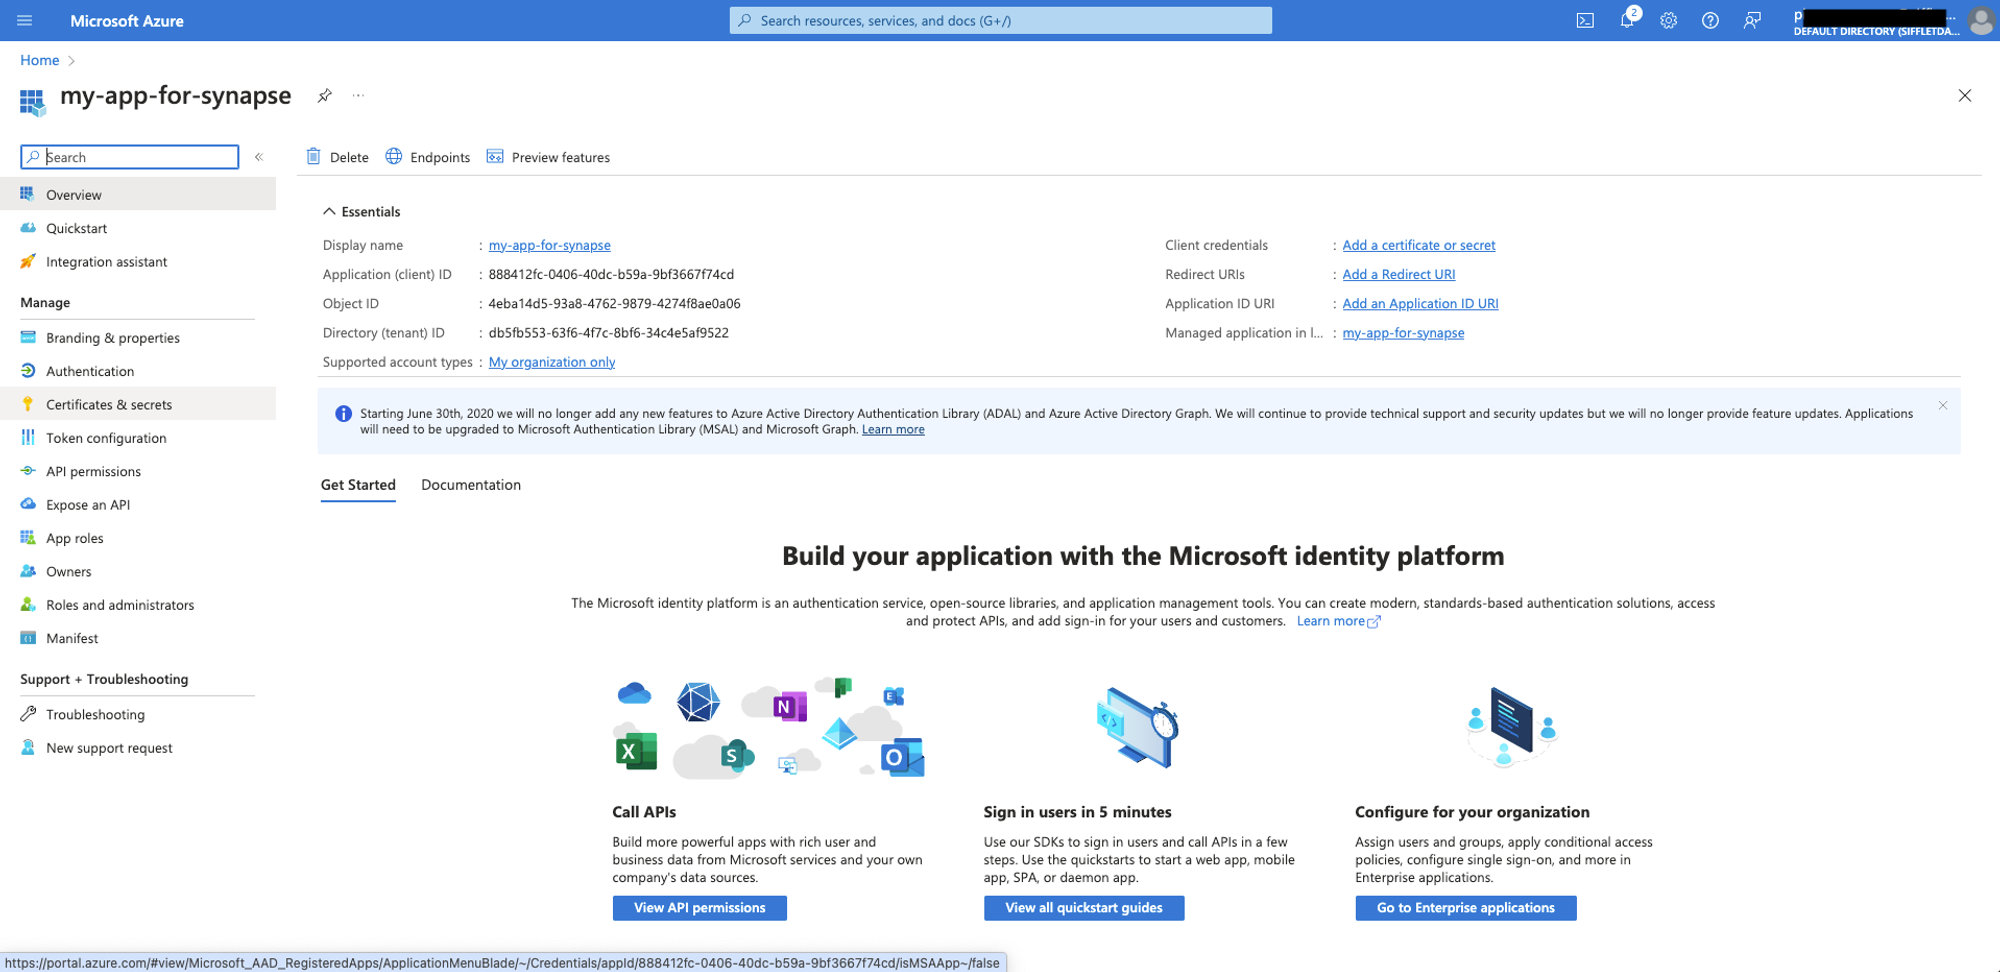
- Click on “Certificates & Secrets”
- Click on “New client secret”
- Click on “Add”
- Save the Secret Value for later
2- Create a SQL user in Synapse with the right permissions
Do the following steps:
- Open Synapse Studio and run the following query in the SQL Dedicated Pool that you want to connect to Sifflet:
CREATE USER [my-enterprise-app-name] FROM EXTERNAL PROVIDER; - Run the following query to give the “db_datareader” role to the user:
EXEC sp_addrolemember 'db_datareader', 'my-enterprise-app-name';
3- Create a Synapse data source in Sifflet
To Create a Synapse data source in Sifflet, you will need:
- The Enterprise Application ID
- The Enterprise Application Client Secret Value
Create the Secret
To add the JSON key file to Sifflet secrets, please follow the below steps:
- In "Integration" --> submenu "Secrets", create a new secret
- In the "Secret" area, copy-paste the same content present in the JSON key file
{"user":"<my-enterprise-app-id>", "password":"my-client-secret"}
Add the datasource
You can refer to this page on adding a data source in Sifflet for more detailed information.
- In Integration --> click on "+ New"
- Fill out the necessary information collected above
- The host is built like this:
<name-of-your-synapse-workspace>.sql.azuresynapse.net(e.g. synapse-sifflet.sql.azuresynapse.net)
- The host is built like this:
Troubleshooting
Depending on your system's configuration, you may not see the schemas in the master database in Sifflet.
If that is the case and that's an issue for you, verify the default permissions include access to the 'master' database.
If the issue persists, please contact your dedicated support representative.
Updated 3 months ago