Okta
To set up the SSO in Okta, please follow the following steps:
- Configure your Identity Provider (IdP)
- Configure the SSO in Sifflet
- Test your SSO
RequirementsIn order to enable the SSO in Sifflet, you will need:
- a Sifflet admin account
- an Okta admin account with the same email address as the one used in Sifflet
1- Configure your Identity Provider
The configuration of your IdP is done with the following steps:
a. Log in to Sifflet and retrieve some SSO details
b. Add the Sifflet App in Okta
c. Assign the users to this App
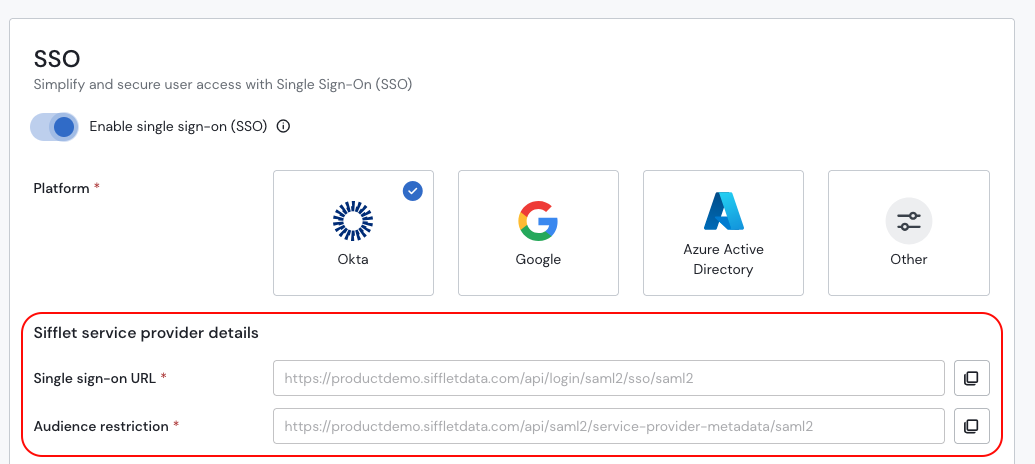
a. Retrieve the SSO details in Sifflet
- Connect to Sifflet with an Admin Account
- In Settings -> SSO
- Toggle "Enable Single Sign-On (SSO)"
- Choose your Platform (Okta here)
- Save the information under "Sifflet Configuration", you will need it in the next section.
b. Add the Sifflet App in Okta
- Log in to Okta
- In Applications -> Create App Integration, choose the SAML 2.0 option

- On the following screen, you can add the App name, for instance "Sifflet"
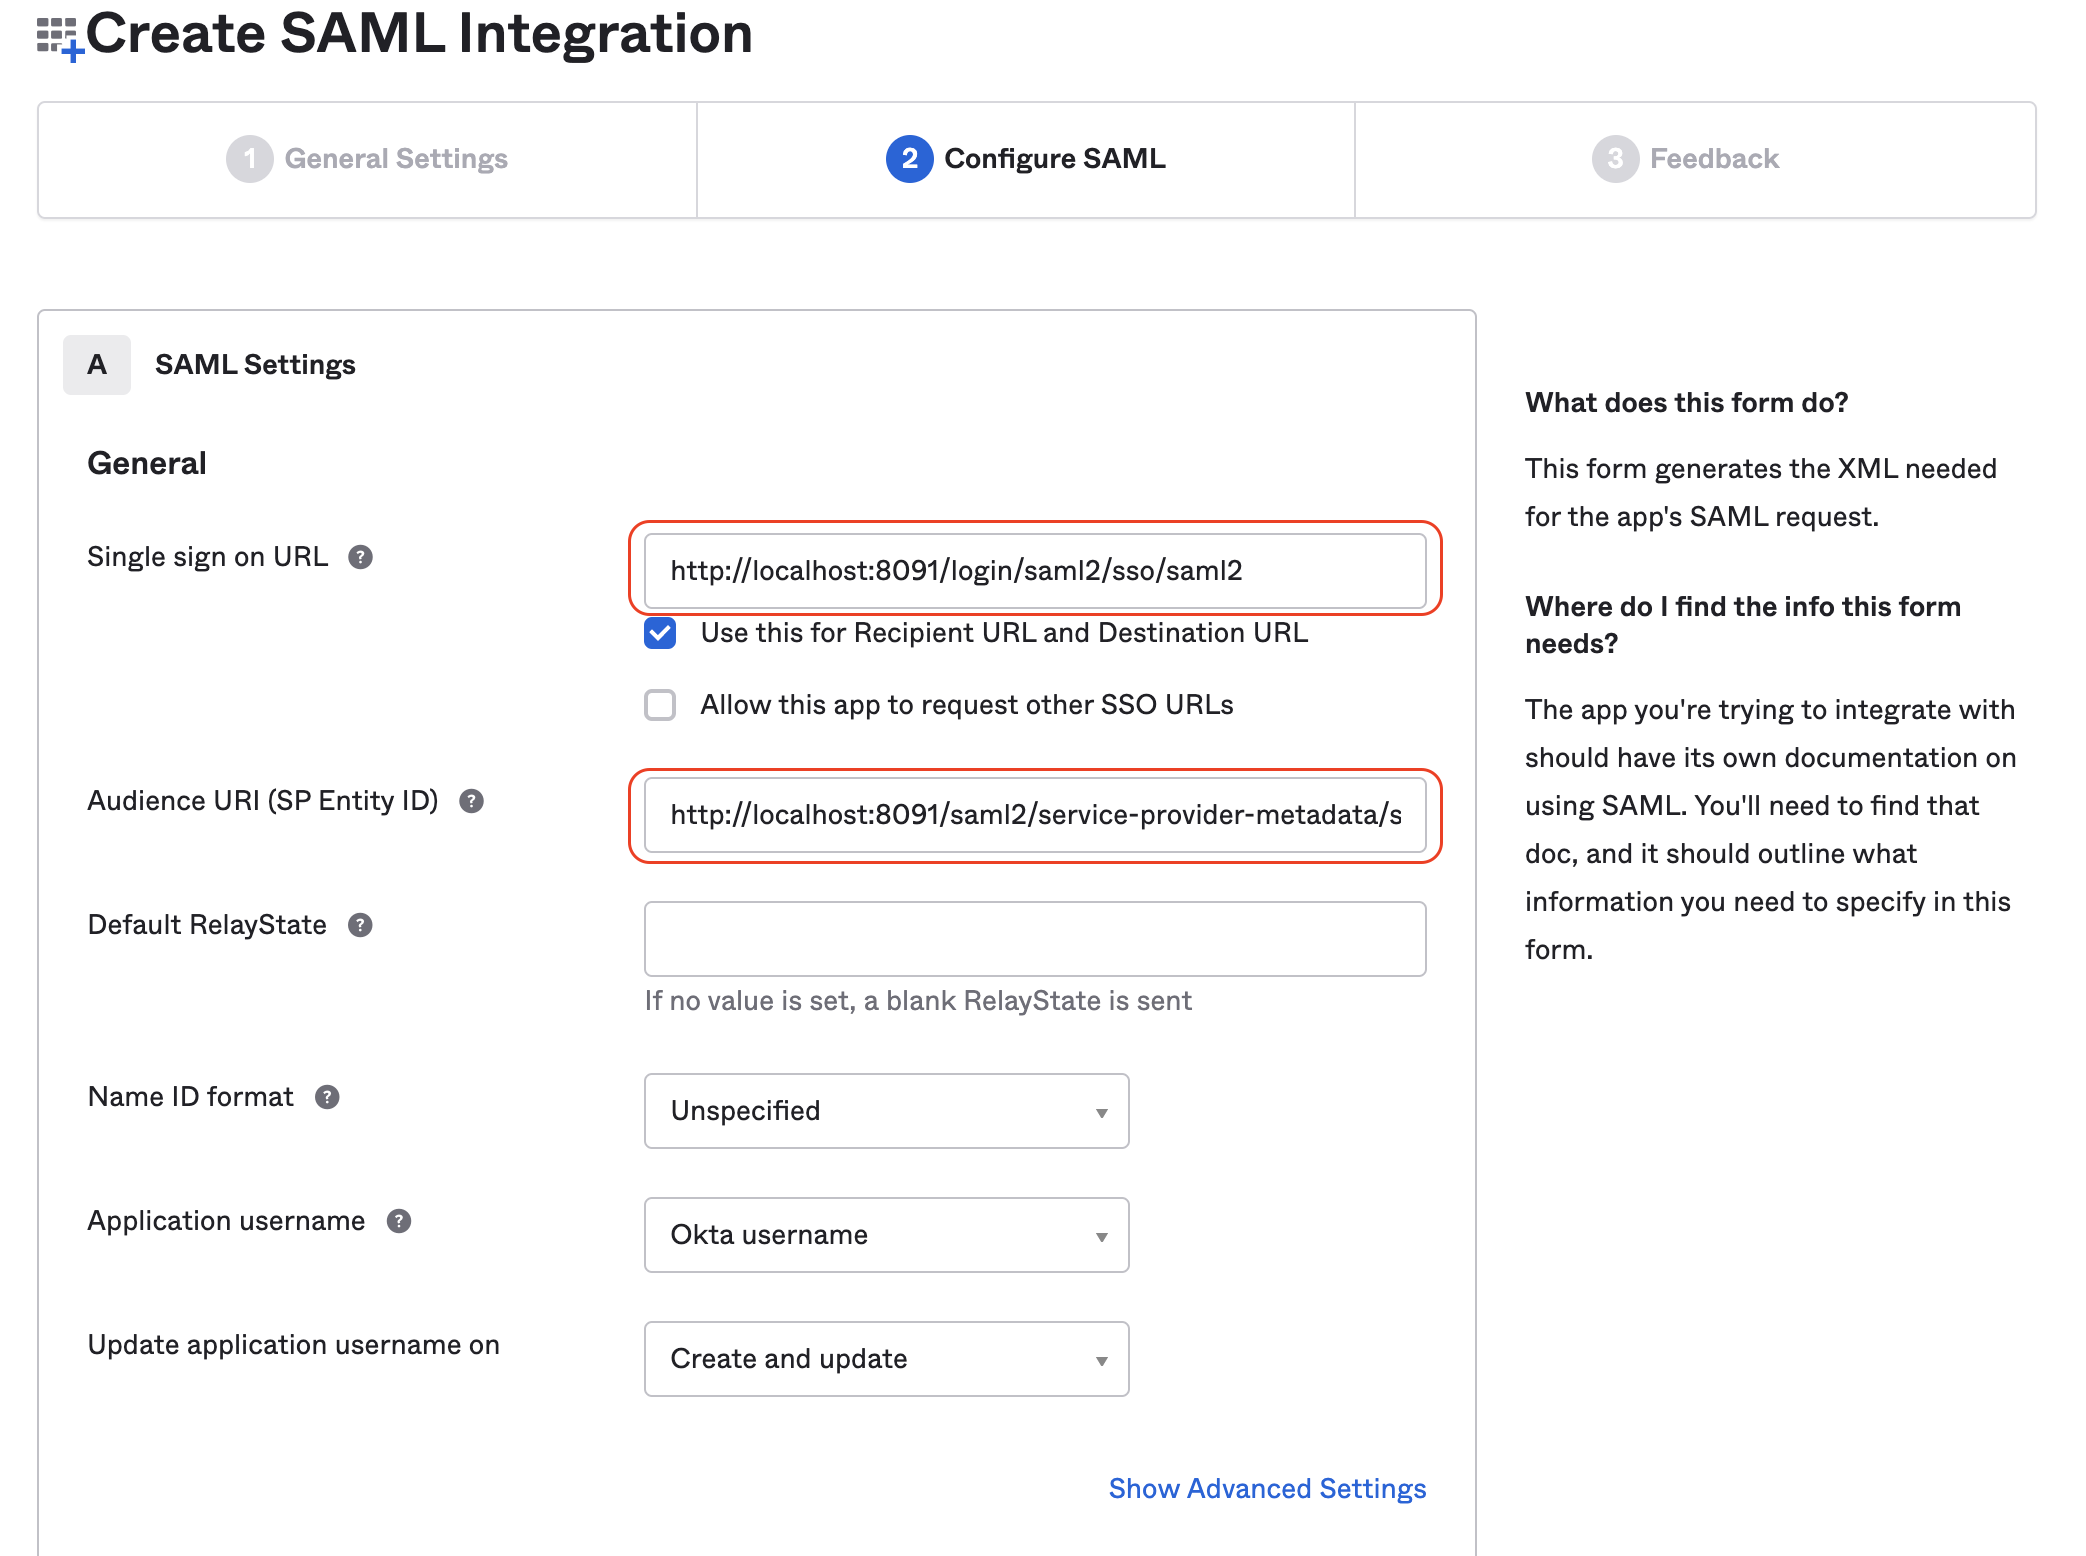
- On the "Configure SAML" screen, you will need to report the information saved from the last section:
Single sign on URL: must match the link inSingle Sign on URLon SiffletAudience URI (SP Entity ID): must match the link inAudience Restrictionon Sifflet- Make sure that the option "Use this for Recipient URL and Destination URL" is ticked
- On the Next screen, you can choose the option "I'm an Okta customer adding an internal app" then click on Finish to create the Sifflet app
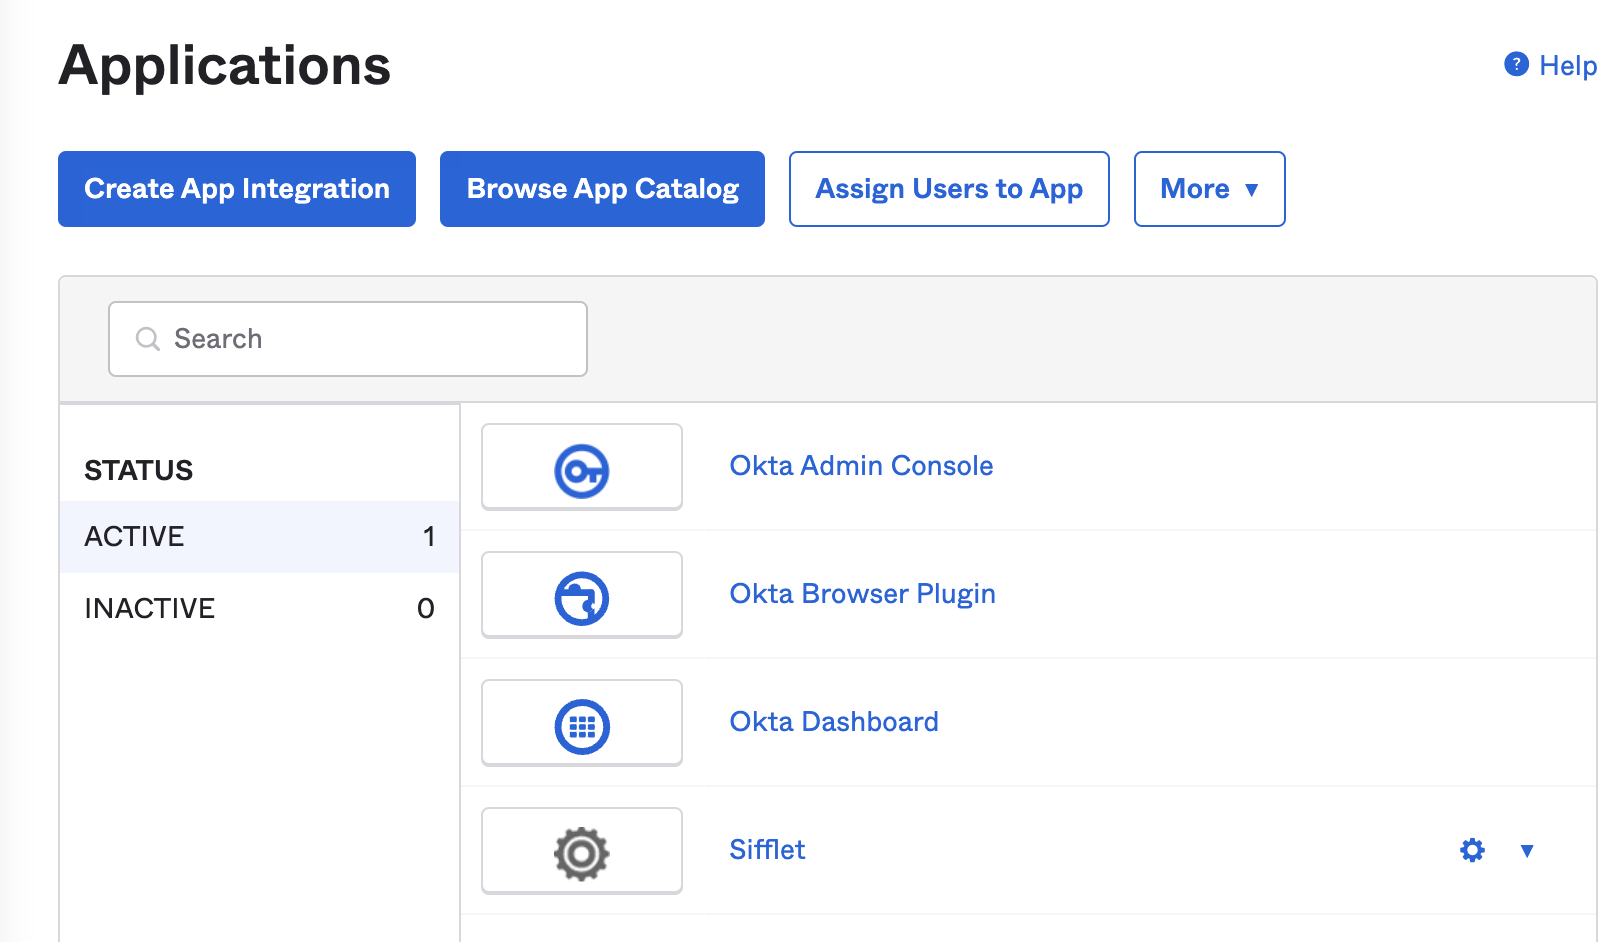
The Sifflet App should appear in your "Application" screen
c. Assign the users to this App
The last step is now to add all users that you want to grant access to Sifflet to this app. Depending on your internal organisation, you can:
- create or use an existing Group and then assign this group to the App
- assign the app directly to users
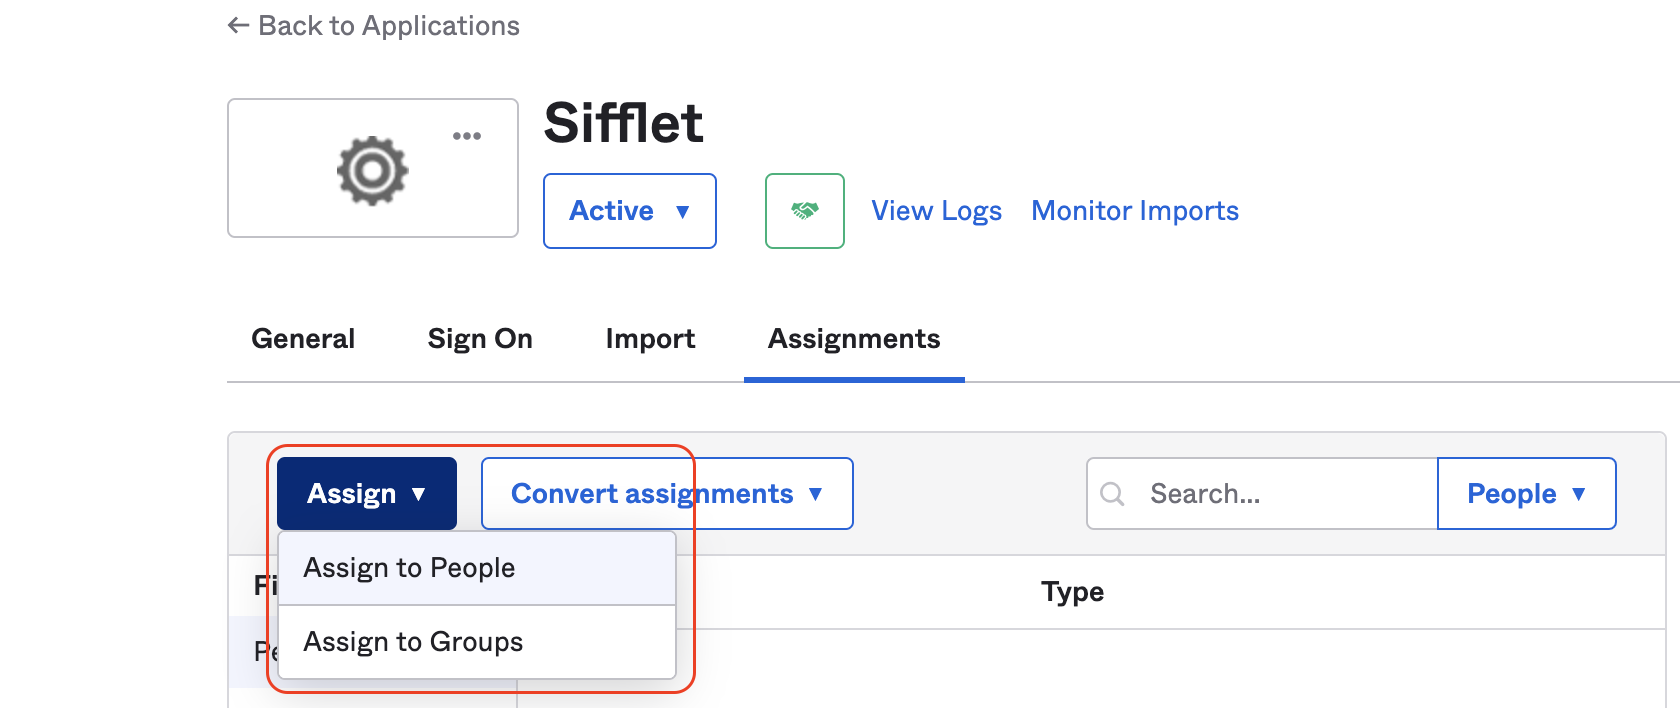
On the Sifflet app, you can assign users or groups
2- Configure the SSO in Sifflet
- In Okta, in the newly created Sifflet App, on the tab "Sign on", click on "View SAML Setup instruction"

- You will then need to report the following information in Sifflet SSO's page:
Identity Provider Single Sign-On URLIdentity Provider IssuerX.509 Certificate
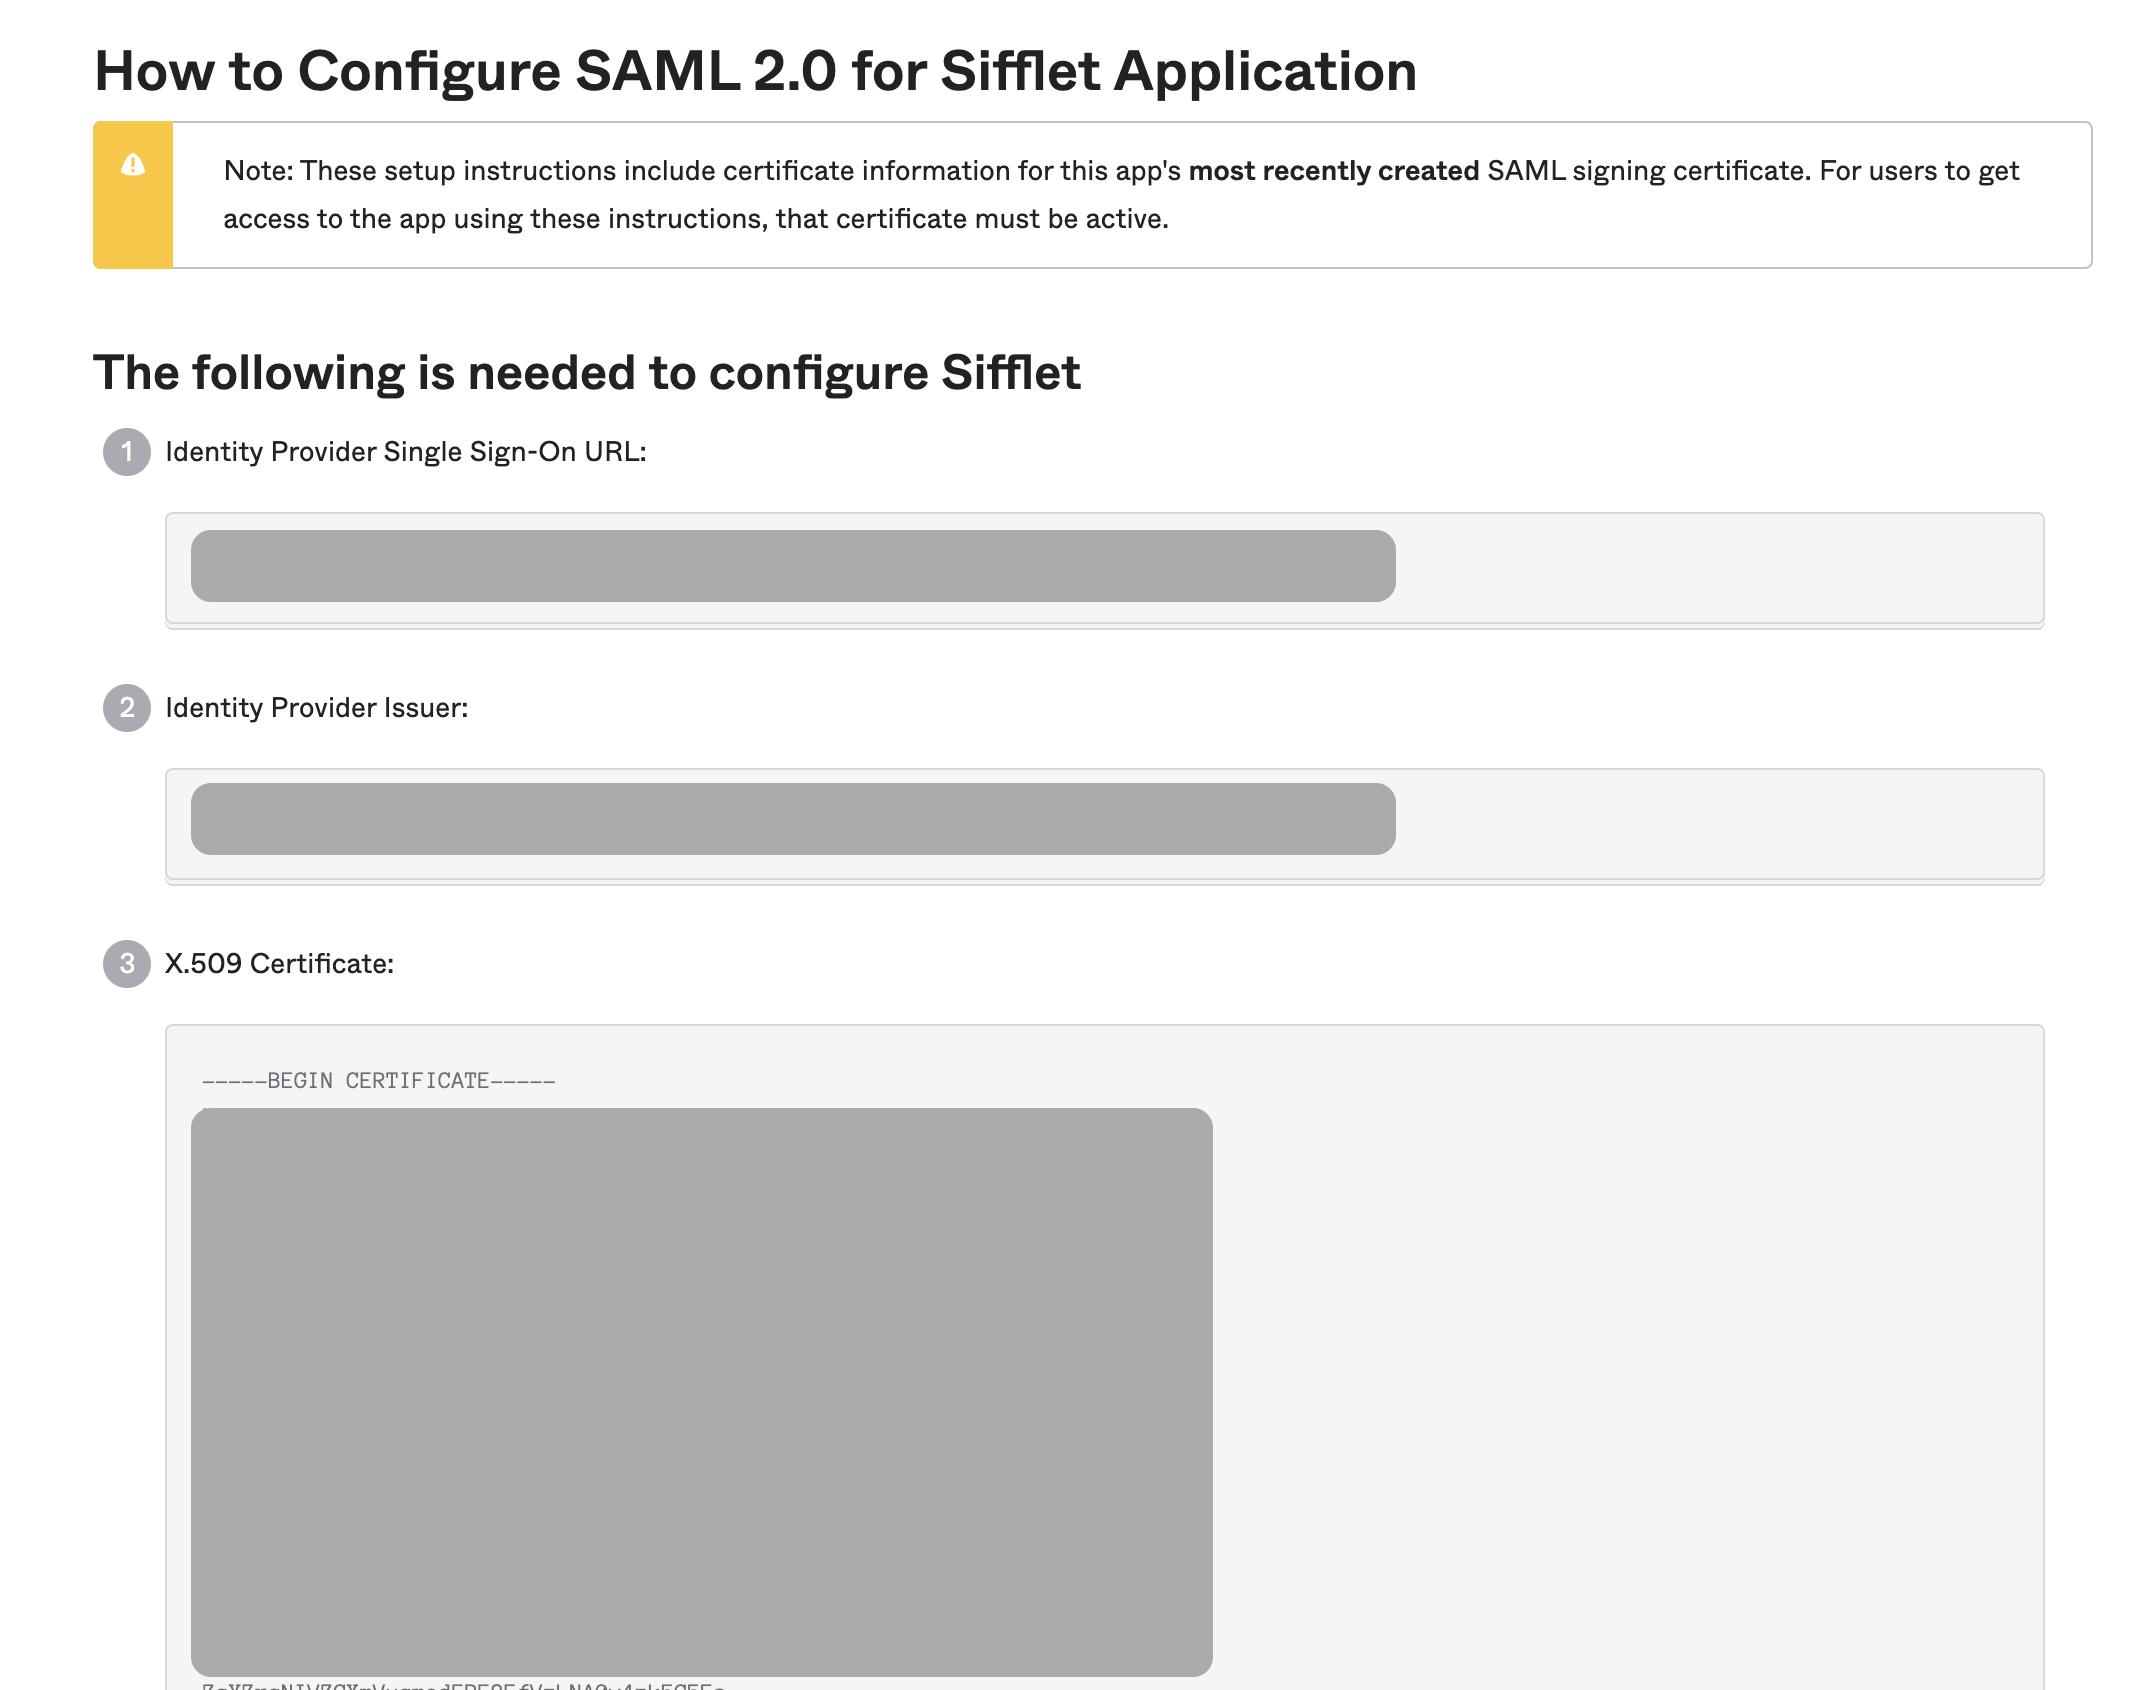
SSO details in Okta
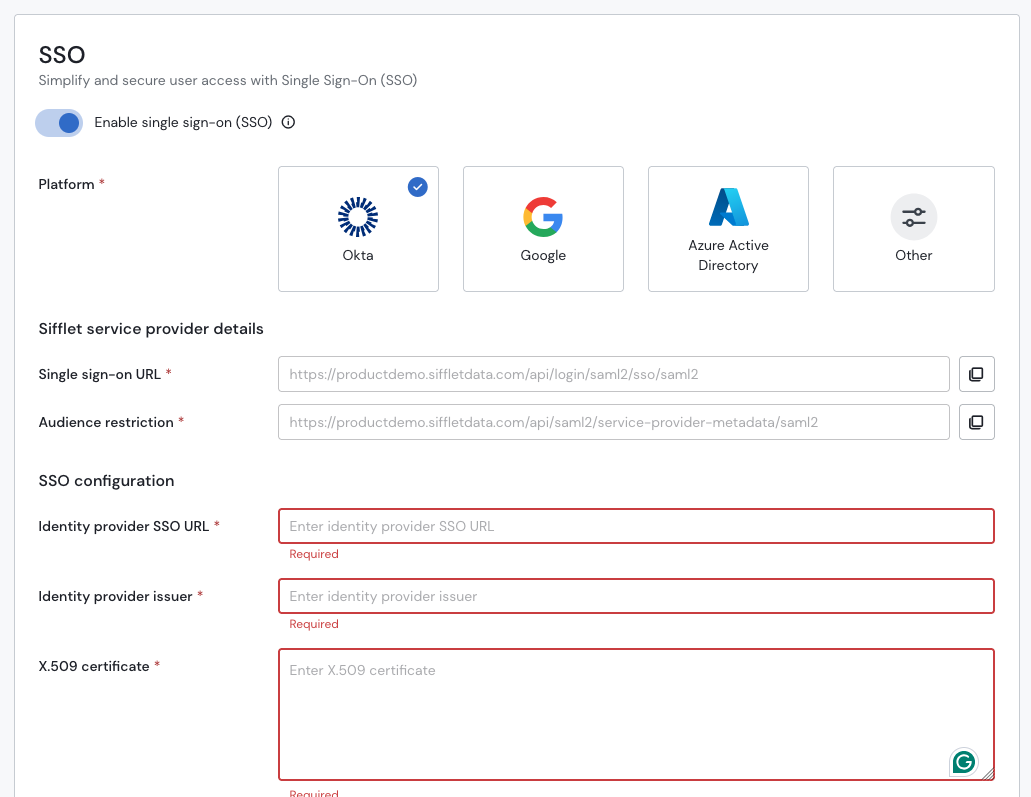
Report the information from Okta here
- Test your SSO
- You can now test your SSO by pressing the "Test" button on the bottom right of the page

- If successful, don't forget to press "Save" to effectively activate the SSO.
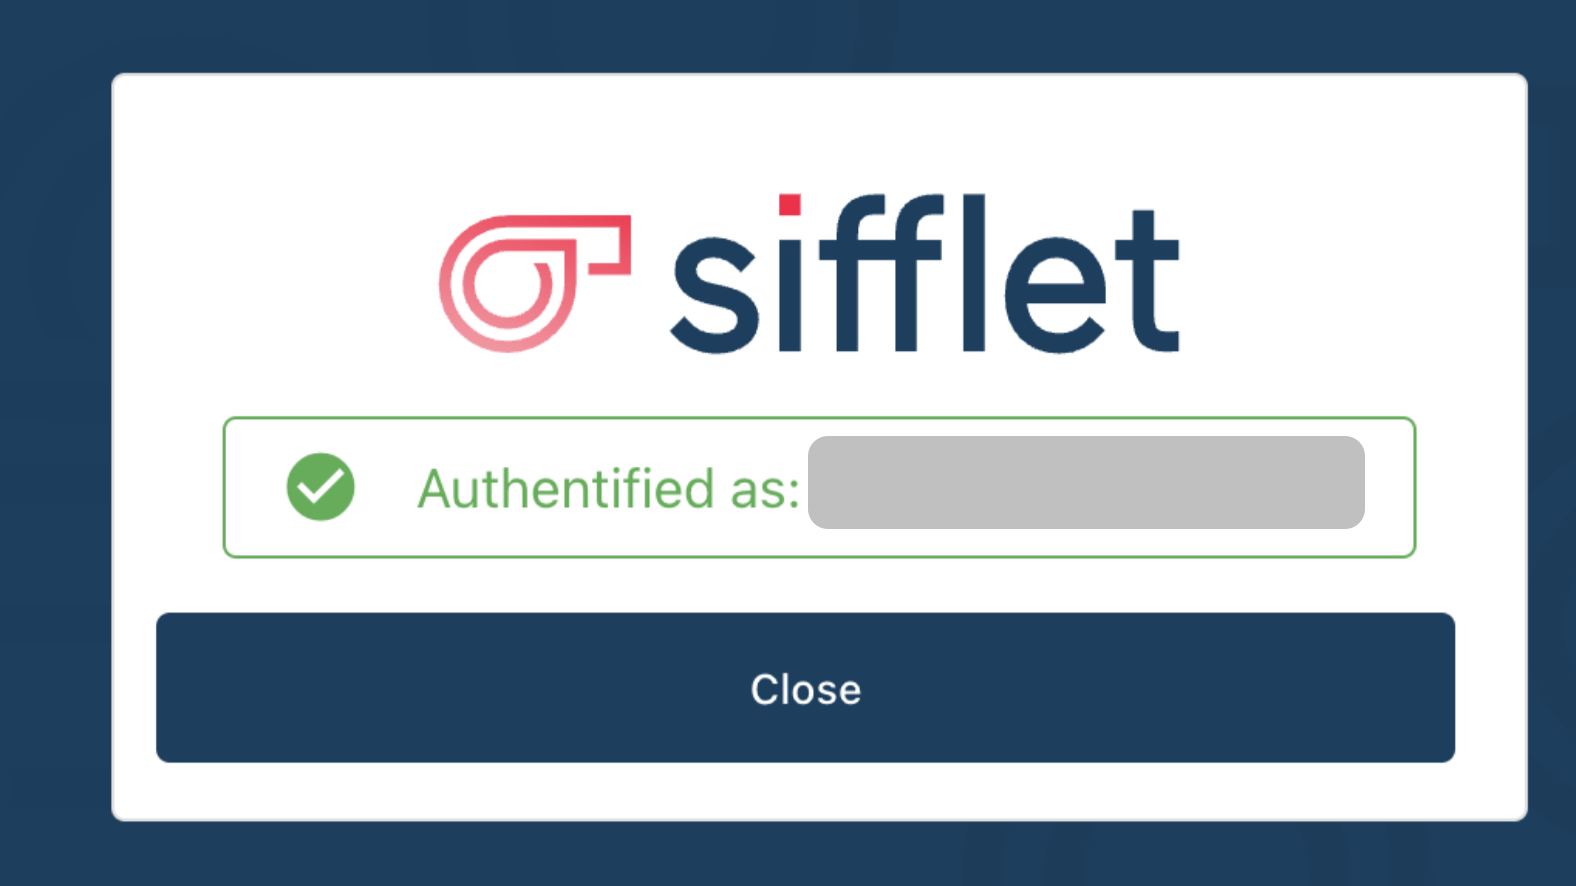
The configuration is done !
On your next login, you will see the following login screen:

FAQ
1. After clicking Test button in Sifflet, why do I see the following error ?
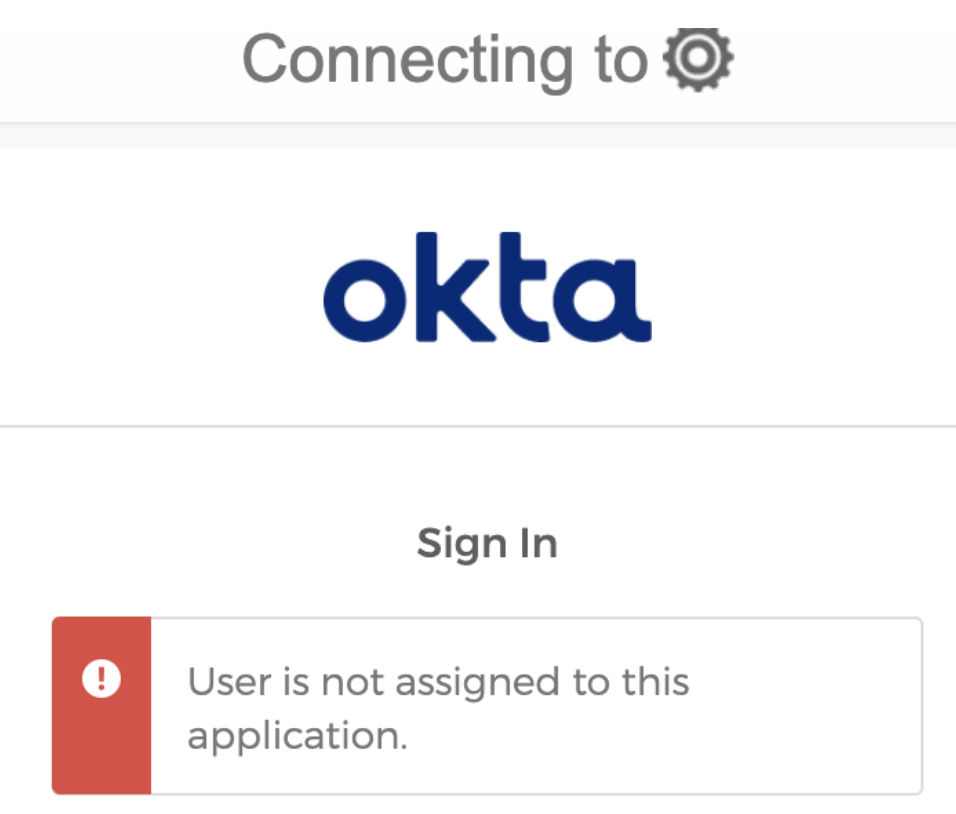
Usually, it means that the current email address you are using in Sifflet is not an authorised user in Okta. Please reach out to your Okta admin to add it to the Sifflet Application.
2. I am a new Sifflet user, after signing in Sifflet with the SSO, I do not see the SSO Settings.
When you sign in with the SSO as a new user, an account is created with your email. The default permission is "Viewer" which doesn't allow you to see the SSO settings.
If you had already signed in in the past, you will keep the same level of permissions.
Updated 3 months ago
