Apache Airflow
Connect Sifflet to Apache Airflow to bring your data orchestration metadata into Sifflet's unified data observability platform. This allows you to monitor pipeline execution alongside data quality and lineage.
Why Connect Sifflet and Airflow?
Key Benefits:
-
Monitor DAG Status: Once integrated, Sifflet displays your Airflow DAGs in the catalog and lineage. You can quickly check the status (success/failure) of the latest run for each DAG directly throughout Sifflet (in the catalog, the asset page, and the lineage).

Airflow DAG status in the Sifflet catalog.
-
End-to-End View: Understand how your Airflow tasks impact data downstream in warehouses and BI tools through integrated lineage.
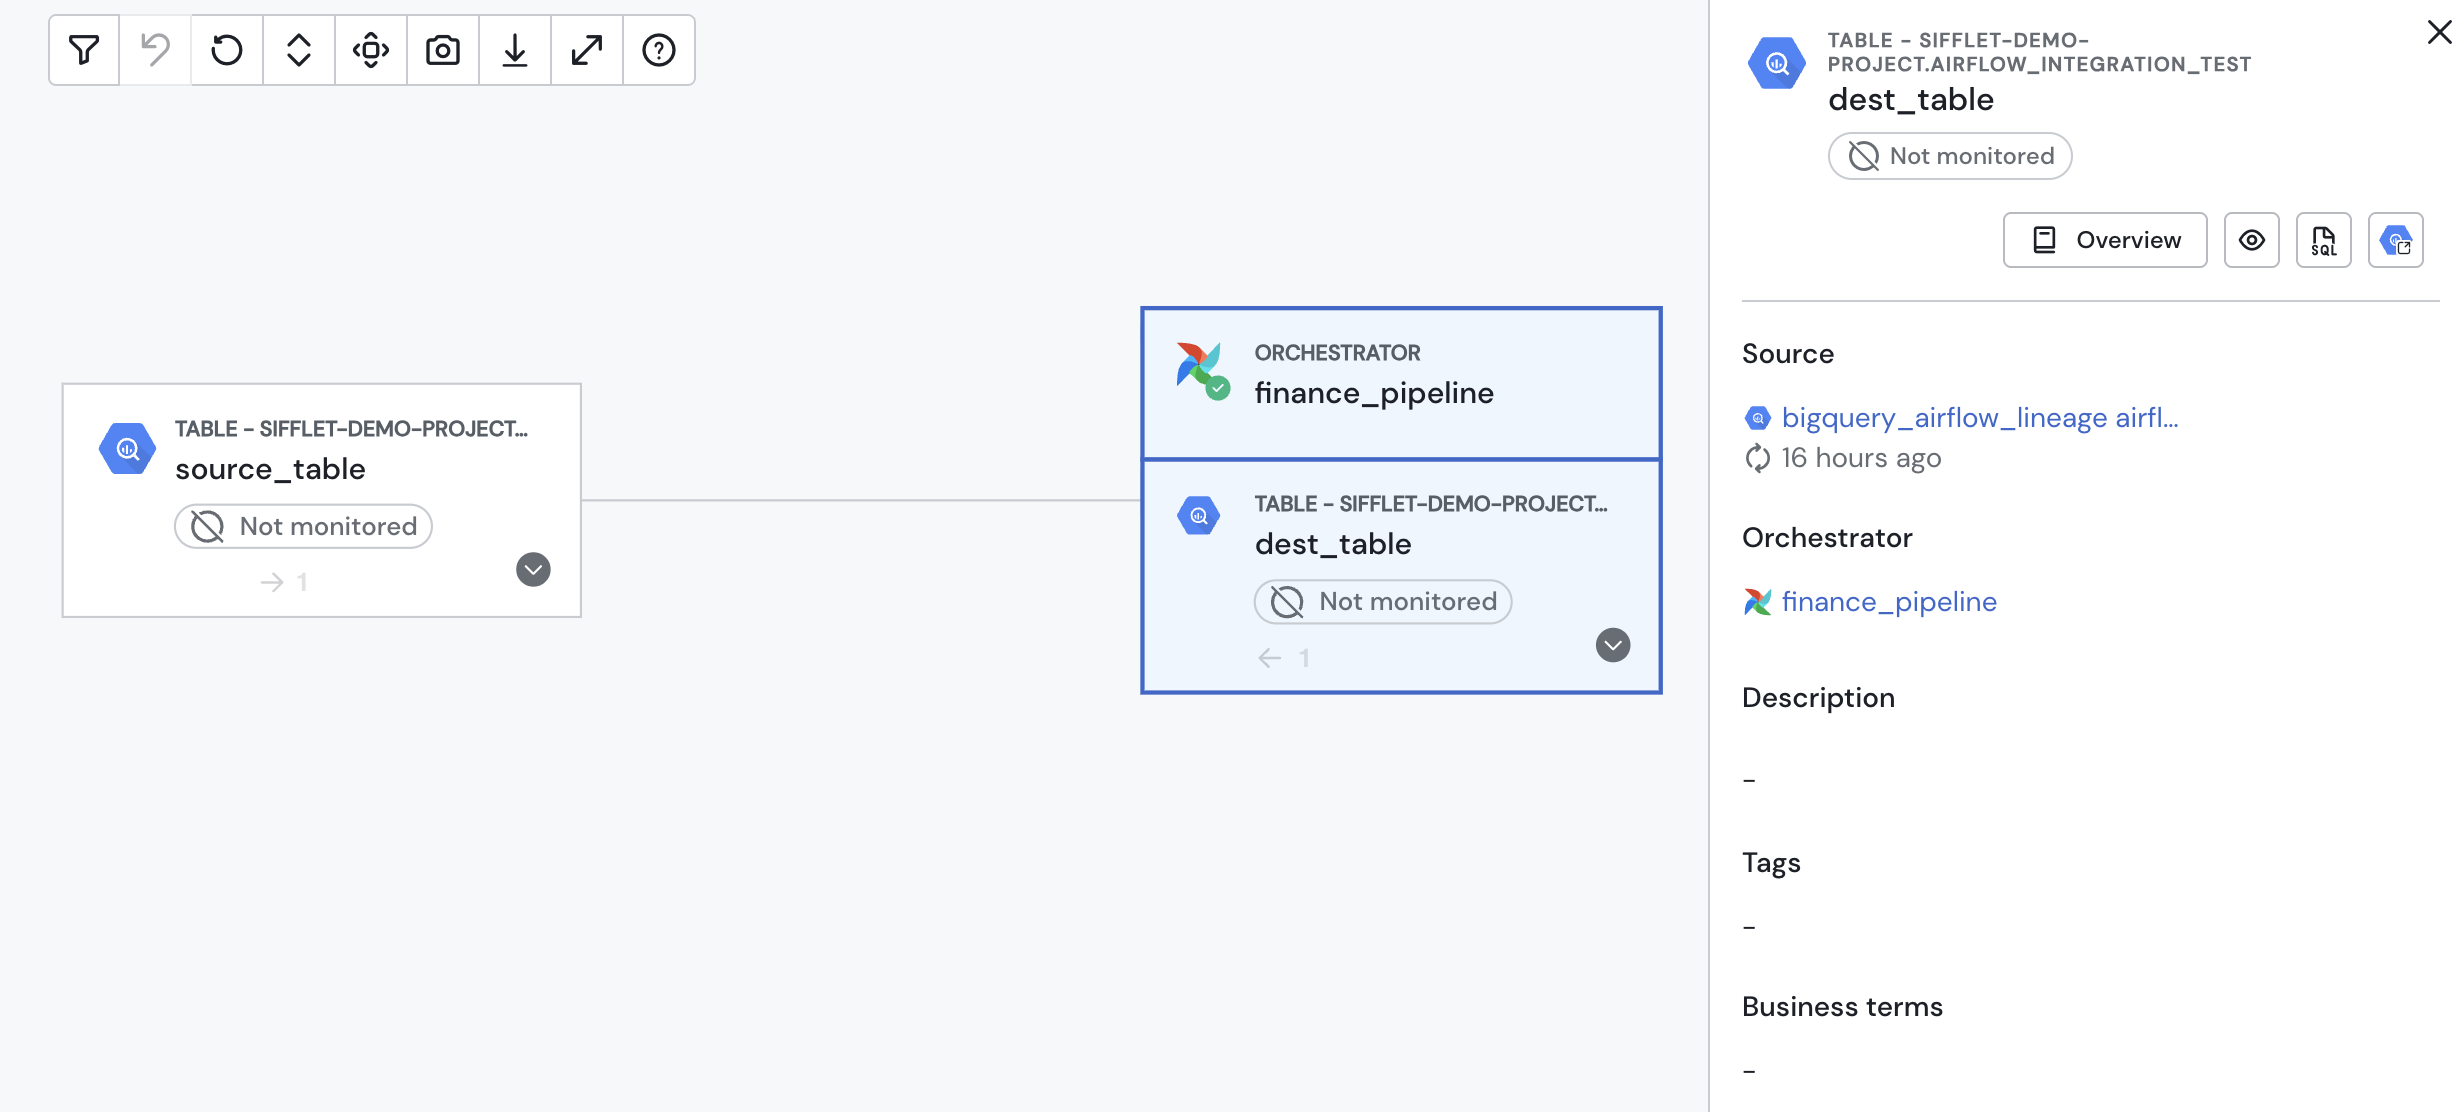
Airflow DAGs in the Sifflet lineage.
-
Centralized Overview: View critical Airflow metadata alongside other data assets, eliminating the need to switch between different tools.
Airflow custom operatorsThis page focuses on bringing Airflow metadata into Sifflet. To trigger Sifflet actions from Airflow, please refer to our custom Airflow operators documentation here.
This page covers integrating Sifflet with a self-hosted Airflow instance. If, on the other hand, you're using a cloud-managed variation, you can refer to its separate page:
Integration Guide
Follow these three steps to connect Airflow and Sifflet:
- Create a read-only user in Airflow for Sifflet.
- Enable basic authentication in your Airflow instance.
- Connect to Sifflet by creating a credential and a new Airflow source.
Supported Airflow versionsWe currently support any self-hosted Airflow instance (version 2.0.0+) in addition to cloud-managed variations (Amazon MWAA on AWS and Cloud Composer on GCP).
1. Create a Read-Only User
First, create a dedicated user for Sifflet in Airflow with a "Viewer" role. Choose a strong, unique username (e.g., "sifflet_user") and password. Make sure to save these credentials, as you will need them later.

Sample configuration for a Sifflet user in Airflow
2. Enable Authentication
Our Airflow integration offers 2 authentication mechanisms: basic authentication or OAuth2 Client Credentials authentication flow. You can choose either one.
2.1 Basic Authentication
By default, basic authentication is disabled in Airflow. To enable it so that Sifflet can access your Airflow instance via the API, you'll need to update your Airflow configuration.
You can check your current authentication backends with the following command:
$ airflow config get-value api auth_backendsTo enable basic authentication, add the following to your Airflow configuration file:
[api]
auth_backends = airflow.api.auth.backend.basic_auth
2.2 OAuth2 Client Credentials authentication flow (beta)
You should have the following information prepared and accessible to be able to configure OAuth2 authentication in your Airflow integration:
- authorization URL
- client id
- client secret
- scopes
3. Connect to Sifflet
Now, you're ready to connect to Sifflet.
Add an Airflow Credential
- In Sifflet, navigate to "Credentials" and click on "New Credential".
- In the "Credential" section within the credential creation form, paste the JSON corresponding to your choice of authentication mechanism below, replacing values enclosed in
<>with the credentials for the read-only user you created in step 1:
For Basic authentication:
{
  "user": "<username>",
  "password": "<password>"
}
For OAuth2:
{
  "oauth_provider":"Airflow Client Credentials",
  "client_id":"<client id>",
  "client_secret":"<client secret>",
  "scope":"<list of scopes>",
  "authorization_url":"<authorization URL>"
}
Create a New Airflow Source
To complete the connection, create a new Airflow source via the Integrations page.
In the source creation page, you'll need three pieces of information:
- Host: The full URL of your Airflow instance (e.g.,
http://xxxxx.yy). - Port: The port for Airflow's REST API (usually
8080). - Credential: The credential you just created.
Updated 22 days ago