

Notification Rules
Overview
Notification rules help you manage alerts globally from one central place. Instead of configuring notifications monitor by monitor, you can create one incident notification rule that applies to a group of assets or monitors and automatically routes alerts to the right channels. This makes notifications easier to maintain, more consistent, and scalable as your monitoring grows. Additionally, incident notification rules automatically create incidents for the failures of all the monitors they apply to.
Notification rules decide where notifications go. What you receive depends on whether a failure creates or joins an incident: see the Notifications overview and the Notification catalog.
How Notification Rules Work
Each rule defines two main elements:
- The scope the rule covers
- The destinations that receive notifications
Who Can Use Notification Rules
- Admins can create, edit, and delete notification rules across all domains.
- Domain Editors can create, edit, and delete notification rules only for domains or subdomains they manage.
Domain Editors can only use channels, templates, and ticketing tools already configured by an Admin.
- Other roles have view-only access.
How to Create Incident Notification Rules
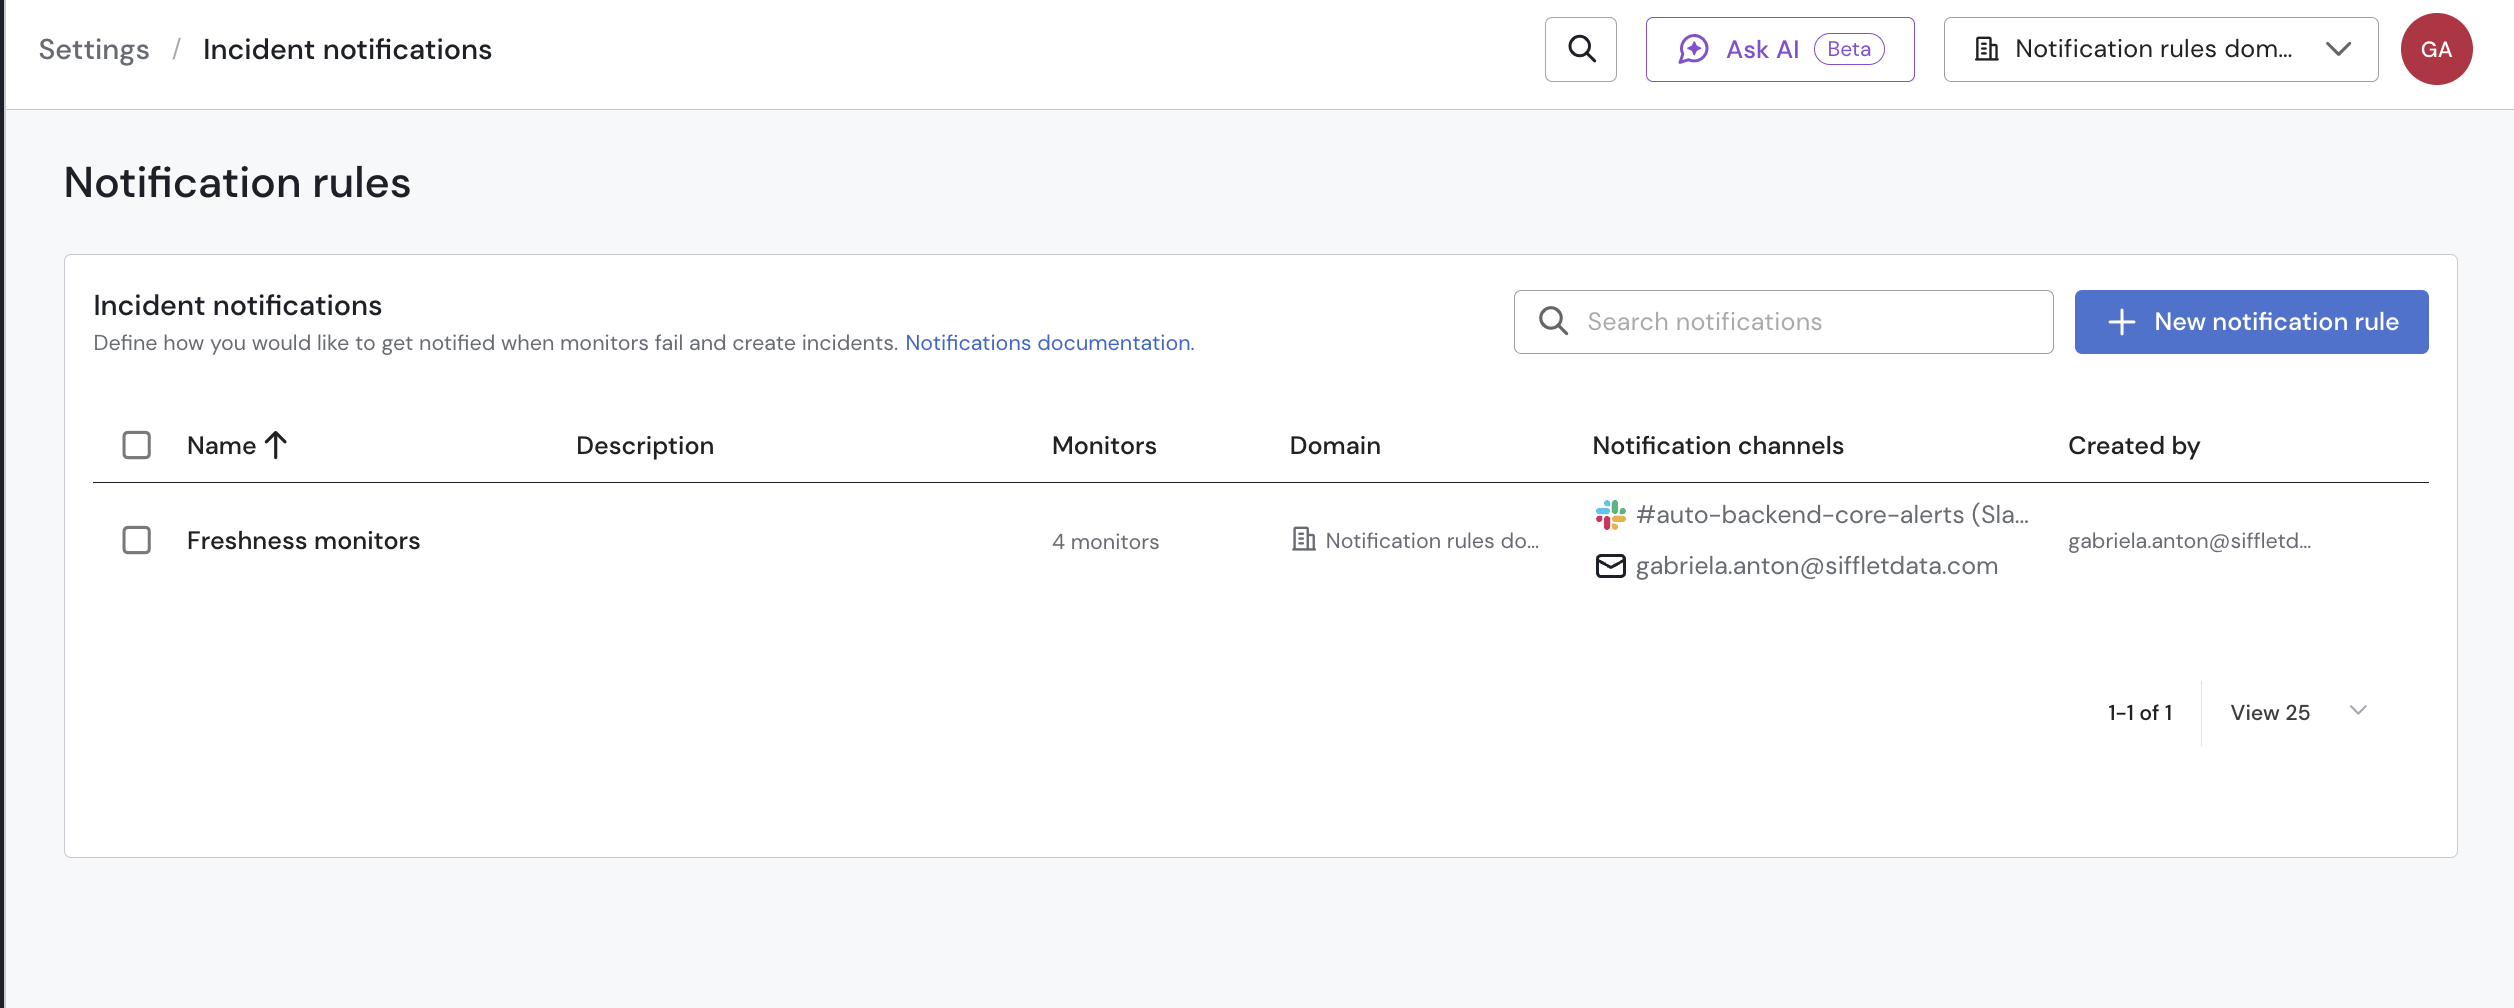
- Go to Settings > Notification Rules.
This page shows all existing rules, their notification channels, and how many monitors they each apply to.
- Click New notification rule.
Step 1: Choose What the Rule Covers
Start by selecting the scope:
- One Domain or one Subdomain
- All assets, specific assets, or data product assets
Step 2: Choose Monitor Scope
- Select all the monitors
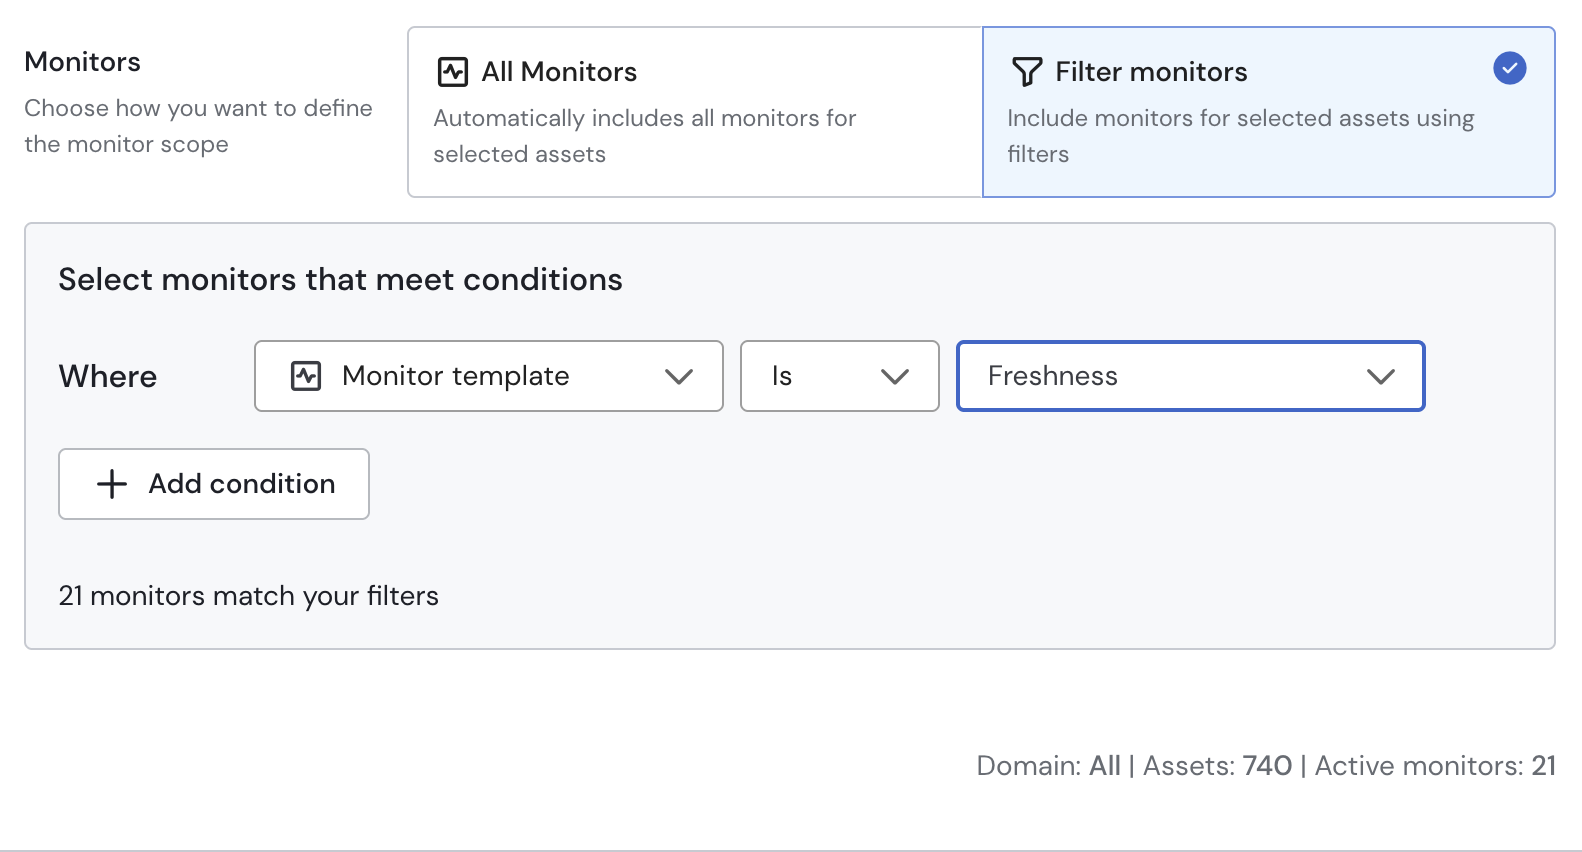
Or filter monitors by:
- Tags — target monitors with specific tags, such as
PII,Finance, orRevenue. - Monitor template — target monitors built from specific templates, such as
FreshnessorVolume. - Severity — target specific severity levels, such as
CriticalorHigh.
Selecting "All Monitors" includes dbt test monitors. In this case, dbt monitors — for which the notification rules apply — create incidents when failing, regardless of the incident creation parameter in the dbt integration settings.
Example
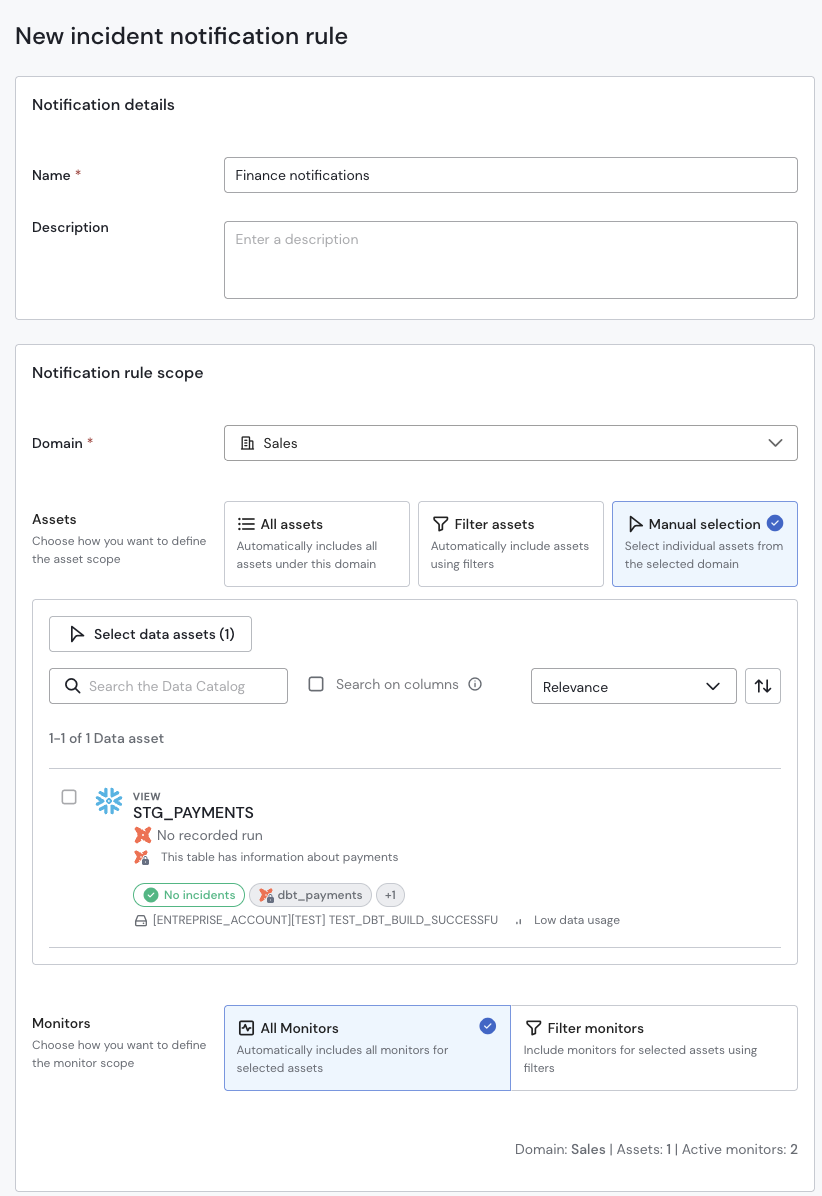
You manage the Sales domain and want alerts only for payment tables.
Create a rule for:
- Domain: Sales
- Assets: payment_transactions, invoices, refunds
- Monitor template: Freshness and Volume
Example
Filter for monitors
Step 3: Choose When the Rule Triggers (coming soon)
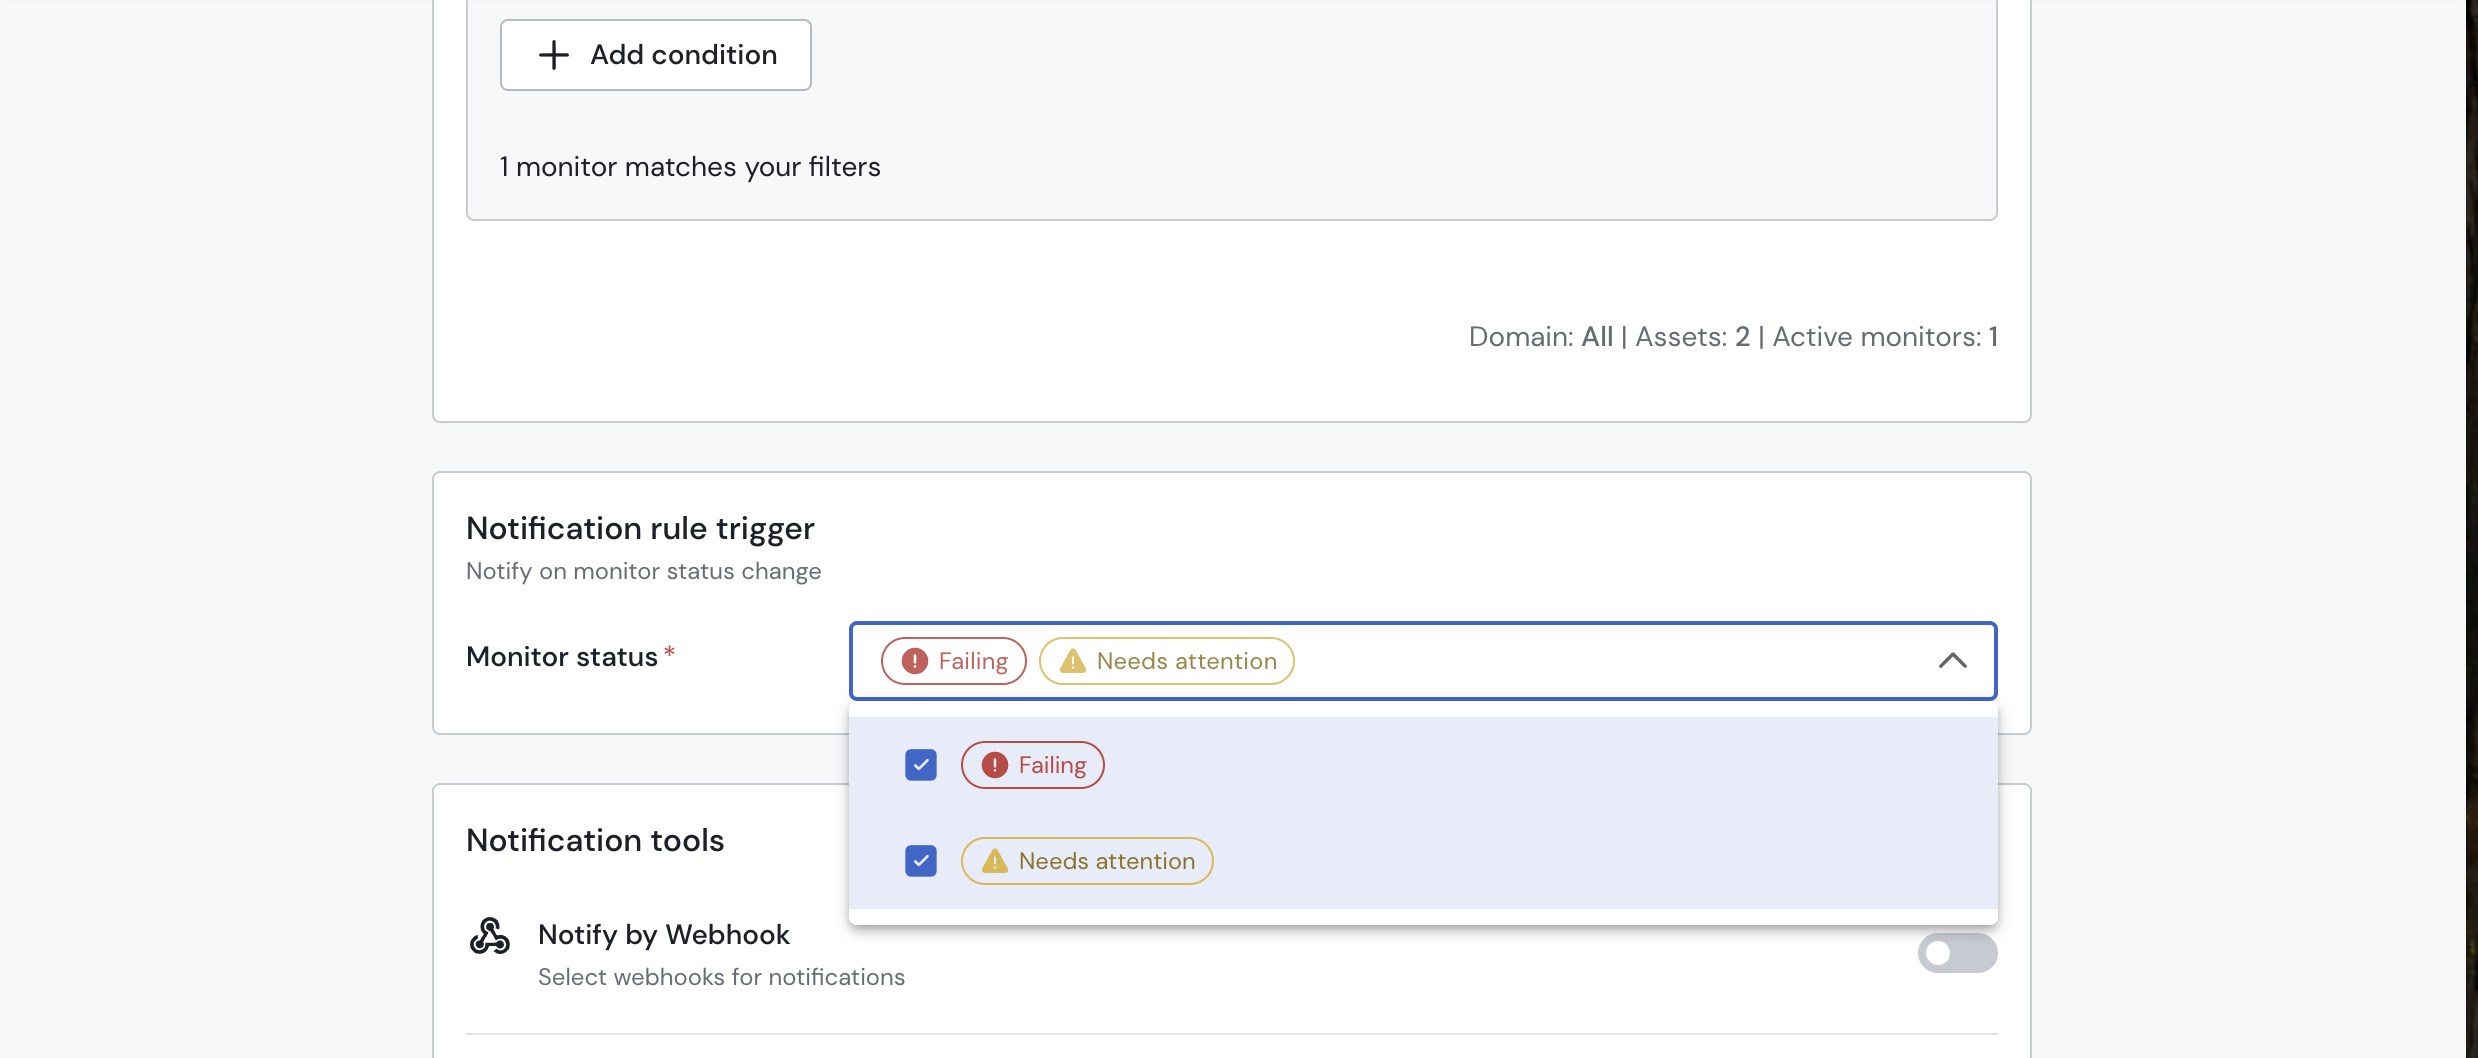
- Failing: the monitor ran and found an issue with your data
- Needs attention: the monitor couldn’t run properly because of a technical issue.
By default, both statuses are selected. You can remove one to narrow the rule, but at least one status must always stay selected.
Example
Use this filter to send each type of issue to the right people, for example Failing alerts to your data owners and Needs attention alerts to your data engineering team.
Create two rules on the same monitors:
- Rule 1:Failing → Slack
#data-quality - Rule 2:Needs attention → Slack
#data-engineering
Monitors in Needs attention status send notifications but don’t create or join an incident. Check the Notification catalog and Notifications overview explain what you receive depending incident-centric or monitor-centric notifications.
Step 4: Choose Where Notifications Go
You can send notifications to destinations already configured by your Admin.
Notification Tools
- Slack
- Microsoft Teams
- Google Chat
- Webhook
Ticketing Tools
- Jira
- ServiceNow
You can select only one template per ticketing tool per rule.
Important information for ticketing toolsDomain Editors can only use Admin-provided ticket templates, but they can edit allowed custom fields. Always send a test ticket before saving to confirm the integration, project, and fields work correctly.
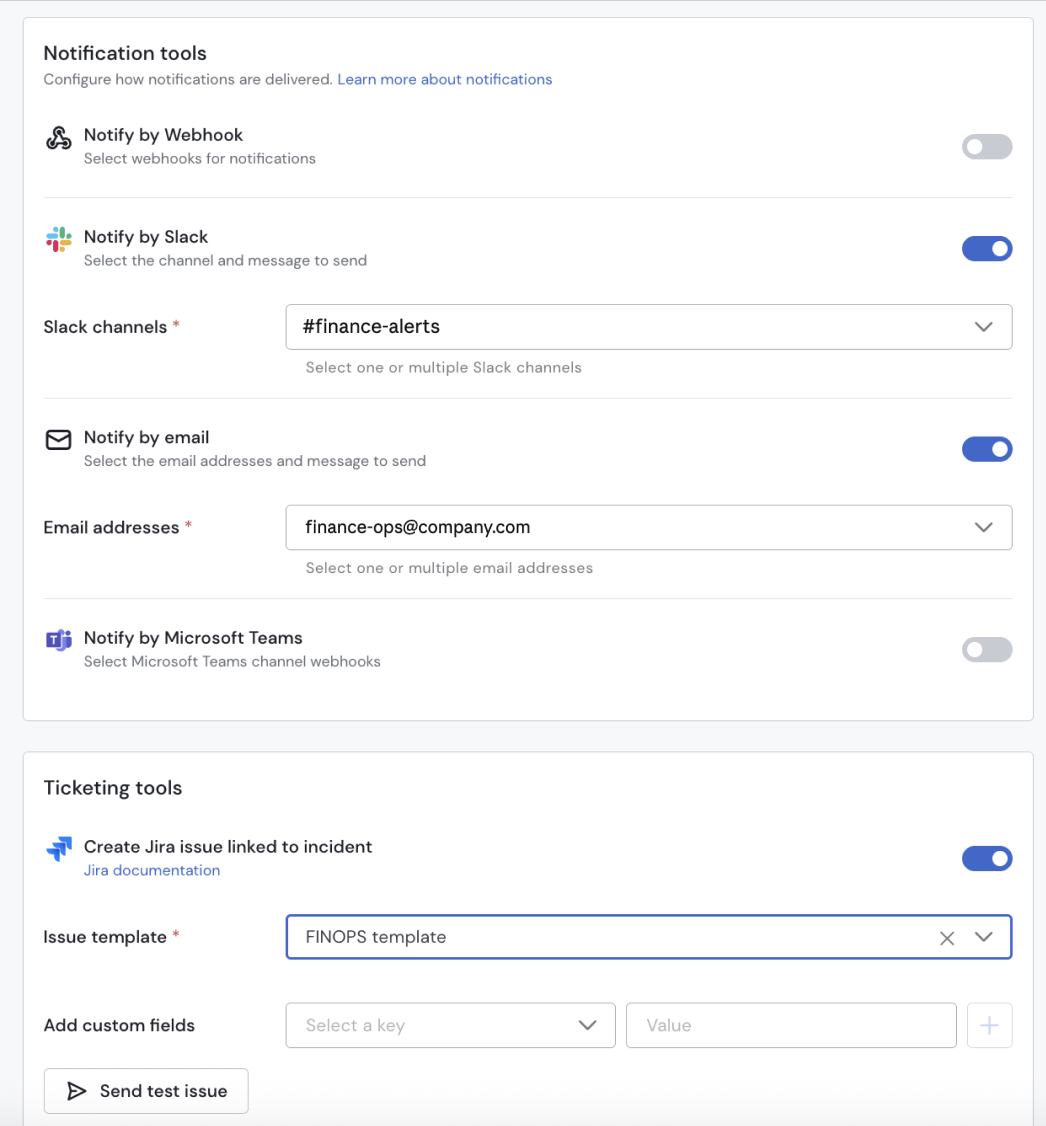
Example
Send alerts for Sales monitors to:
- Slack: #finance-alerts
- Email: [email protected]
- Jira: FINOPS template
Step 5: Save the Rule
Once saved, the rule applies automatically to all matching monitors.
If a monitor fails:
- Sifflet sends notifications to the selected destinations
- Sifflet creates an incident by default on monitors associated with this notification rule (you can disable this setting directly from the monitor configuration)
This helps centralize alerting and resolution.
ExampleA freshness monitor on
payment_transactionsfails and matches the Finance rule:
- Slack alert sent
- Jira ticket created
- Incident created in Sifflet
Notification Rules Logic
Using Rules with New Monitors
When creating a new monitor:
- Sifflet automatically applies matching notification rules.
- You do not need to configure notifications manually.
Example
You create a new freshness monitor on refunds inside Finance. If your Finance rule already covers that asset, the monitor inherits the rule instantly.
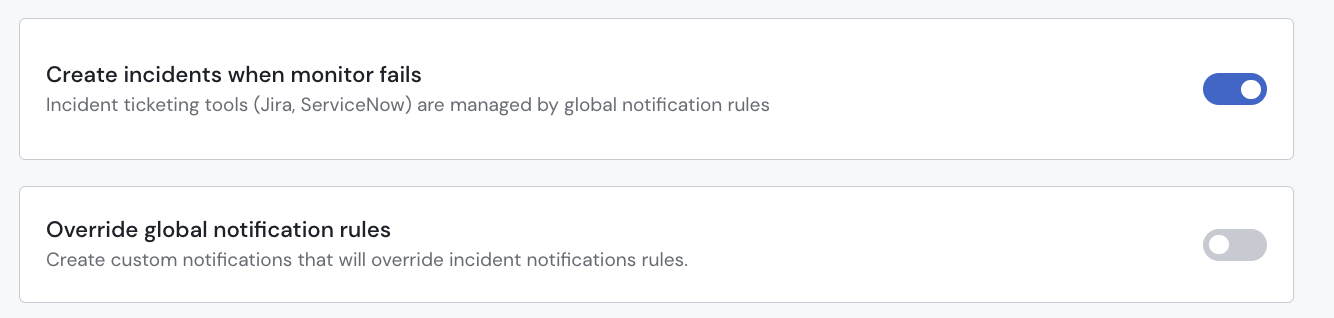
The create incident setting is enabled by default on all new monitors, regardless of notification configuration.
Custom Notifications
Monitors created before the feature release that already had notification settings retain their existing configuration and appear as custom notifications.
If needed, you can override inherited rule behavior for an individual monitor. Use this when one monitor needs special handling.
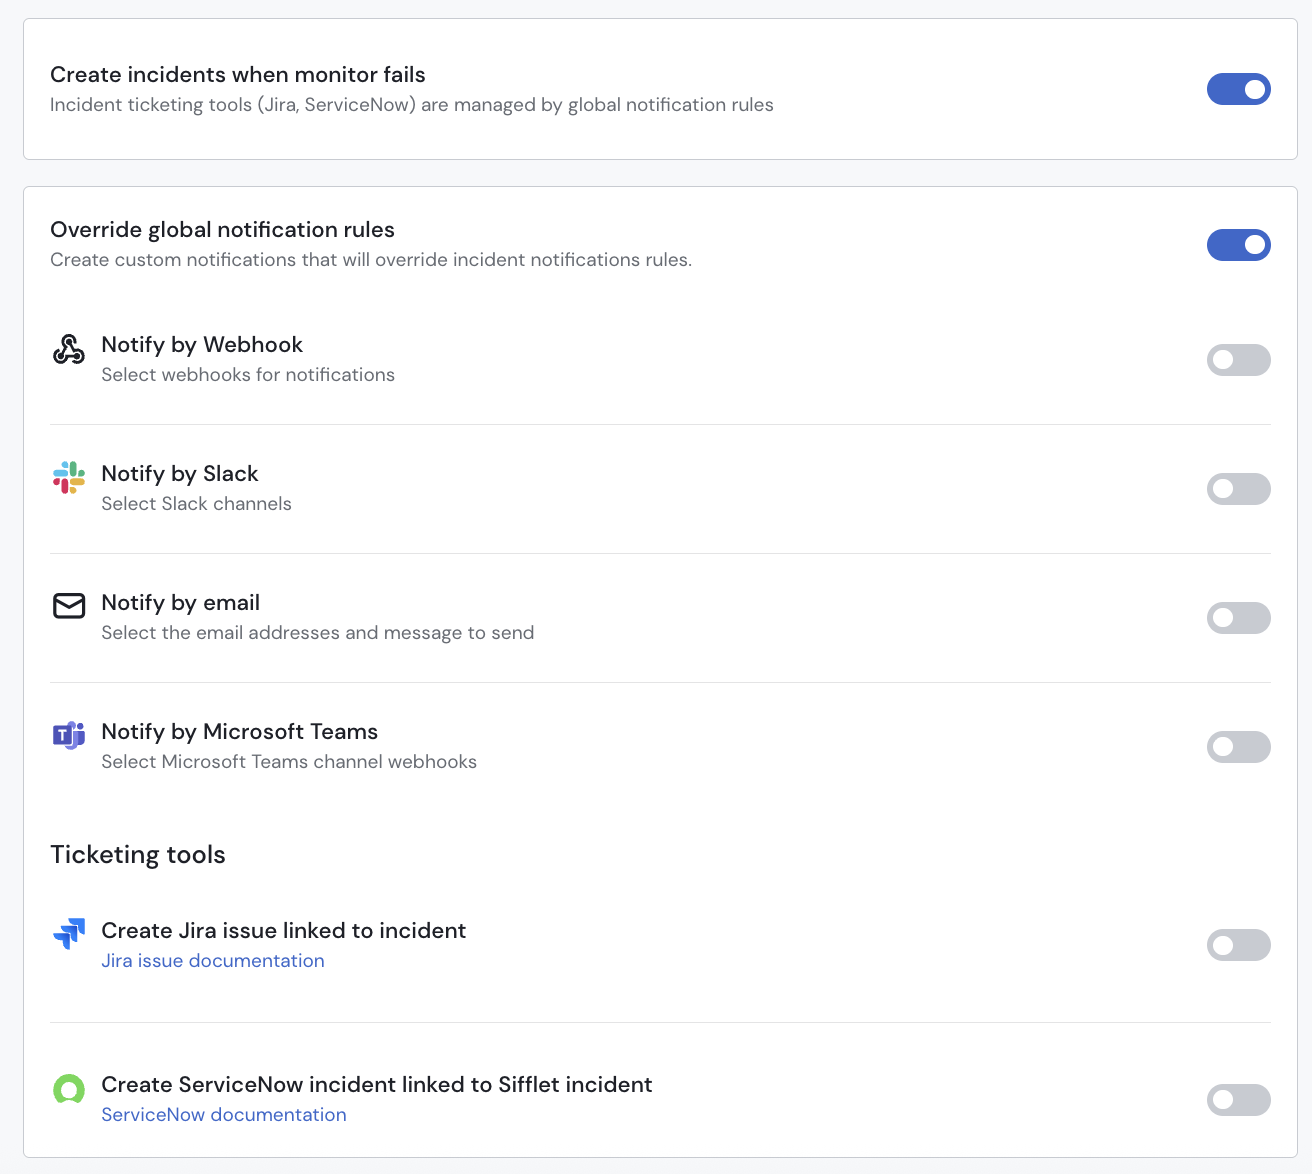
Custom notification applied
Example
Most Finance alerts go to #finance-alerts, but one critical monitor should notify executives. Enable override on that monitor and add the specific destinations.
How Multiple Rules Behave
A monitor can have more than one notification rule applied to it. When that happens, notification and ticketing tools behave differently.
- Notification tools (Slack, Email, Teams, Google Chat, Webhook) are combined across all matching rules.
- Ticketing tools (Jira, ServiceNow) use only one rule: the oldest matching rule that contains a ticketing destination.
A monitor matches two notification rules:
Example 1
| Rule | Slack | Jira |
|---|---|---|
| Rule 1 | Channel 1 | None |
| Rule 2 | Channel 2 | Template A |
Result: Notifications go to Channel 1 + Channel 2. Sifflet creates a Jira ticket based on Template A.
Example 2
| Rule | Slack | Jira |
|---|---|---|
| Rule 1 | Channel 1 | Template X |
| Rule 2 | Channel 2 | Template Y |
Result: Notifications go to Channel 1 + Channel 2. Sifflet creates a Jira ticket based on Template X.
Visibility
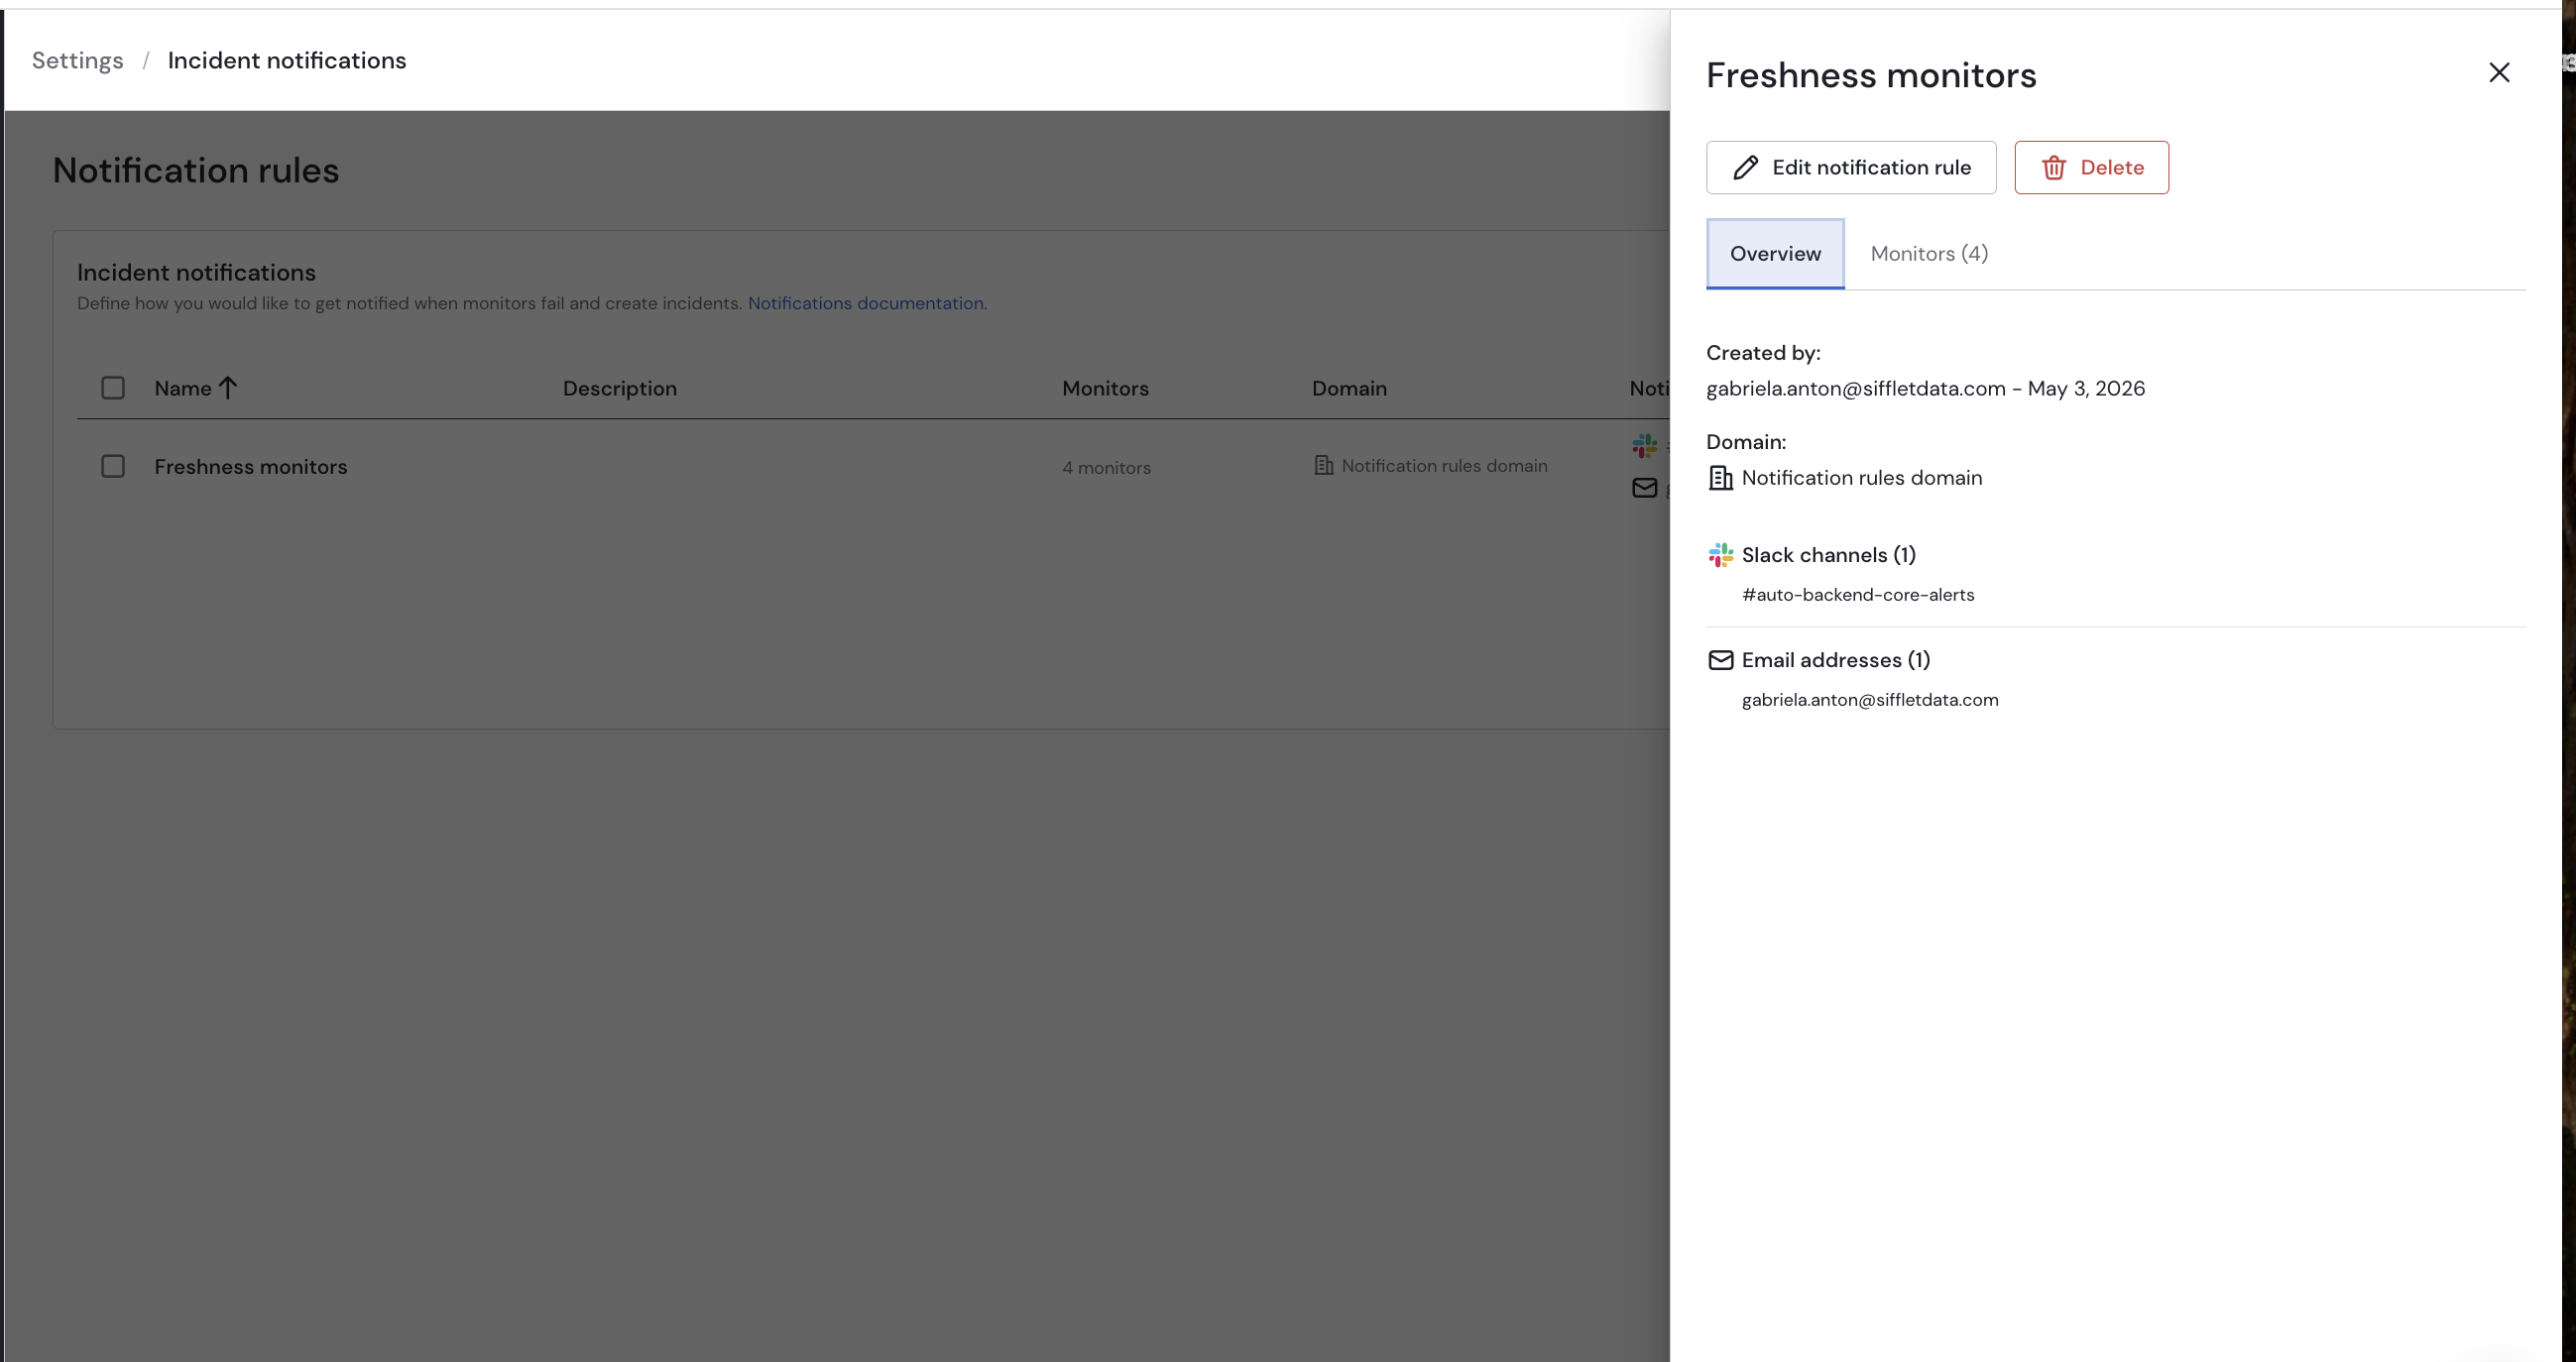
You can see what notification rules are applied in:
- Settings > Notification Rules overview (click a notification rule to see all the details)
- Monitor Overview
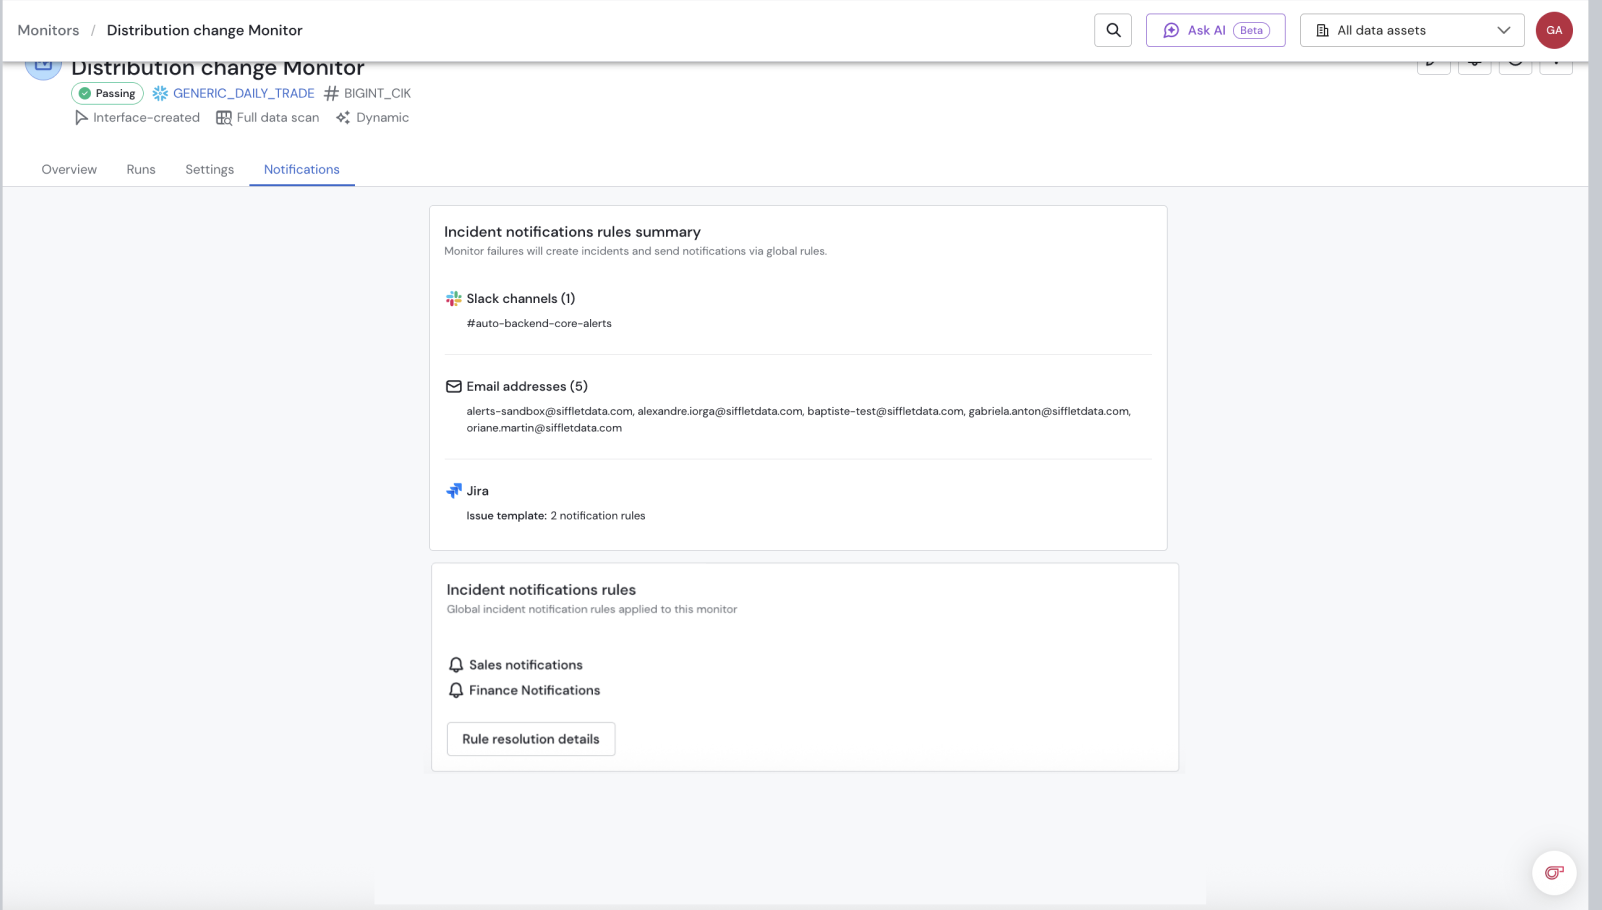
- Incident Overview
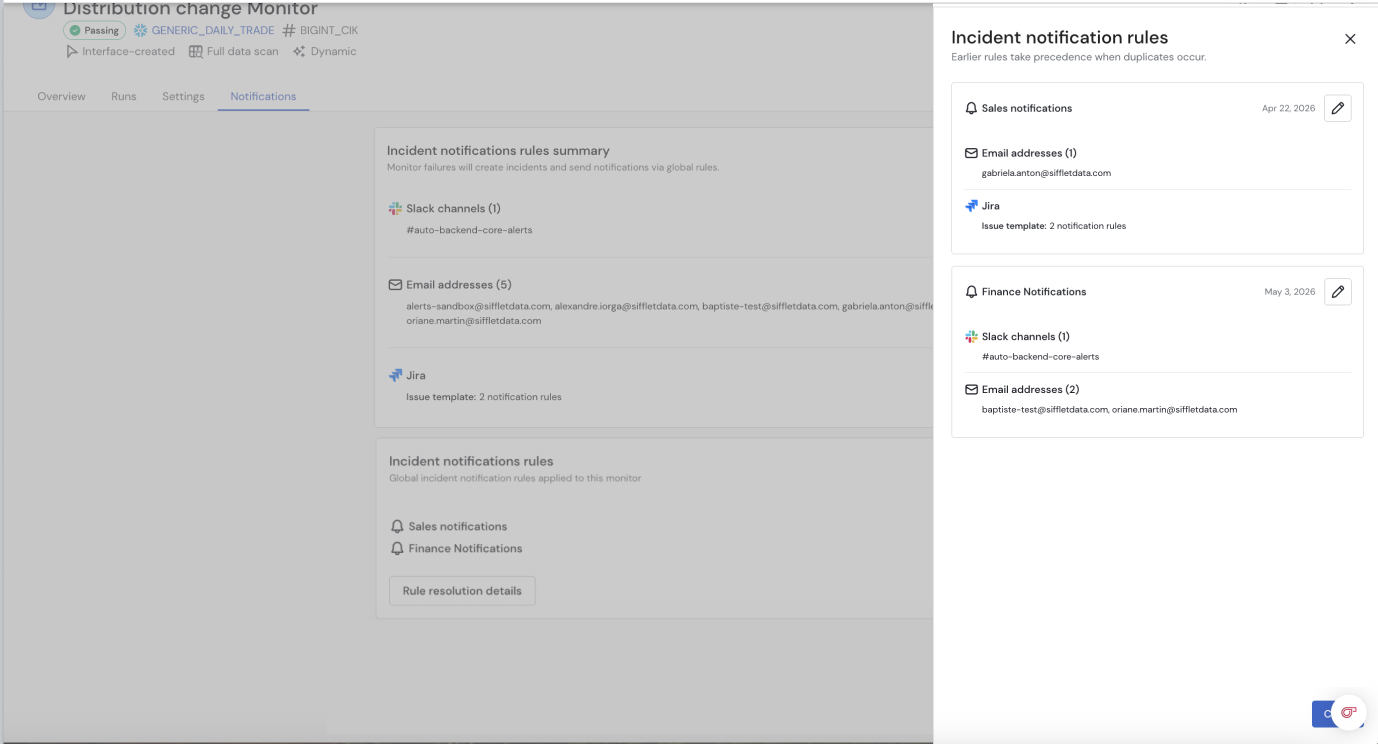
This helps you understand why you received an alert.
Duplicate Existing Notification Rules
You can duplicate an existing notification rule instead of rebuilding its filters from scratch.
How it works:
- Open the
⋮menu on a notification rule. - Select Duplicate.
- Sifflet creates a new rule with the same configuration.
This makes it easier to create variations of complex notification rules while keeping existing configurations intact.

Duplicate rule
Updated about 5 hours ago