Jira
Jira issues can be automatically created in case of a Sifflet monitor failure and manually created from Sifflet incidents. Generating Jira issues ensures data quality problems detected by Sifflet fit into your existing incident and task management workflow and that no important issue gets accidentally overlooked.
You can allow the creation of Jira issues from Sifflet monitors and incidents and activate Jira-based Sifflet incidents closing using the built-in Jira integration.
Set up the Integration
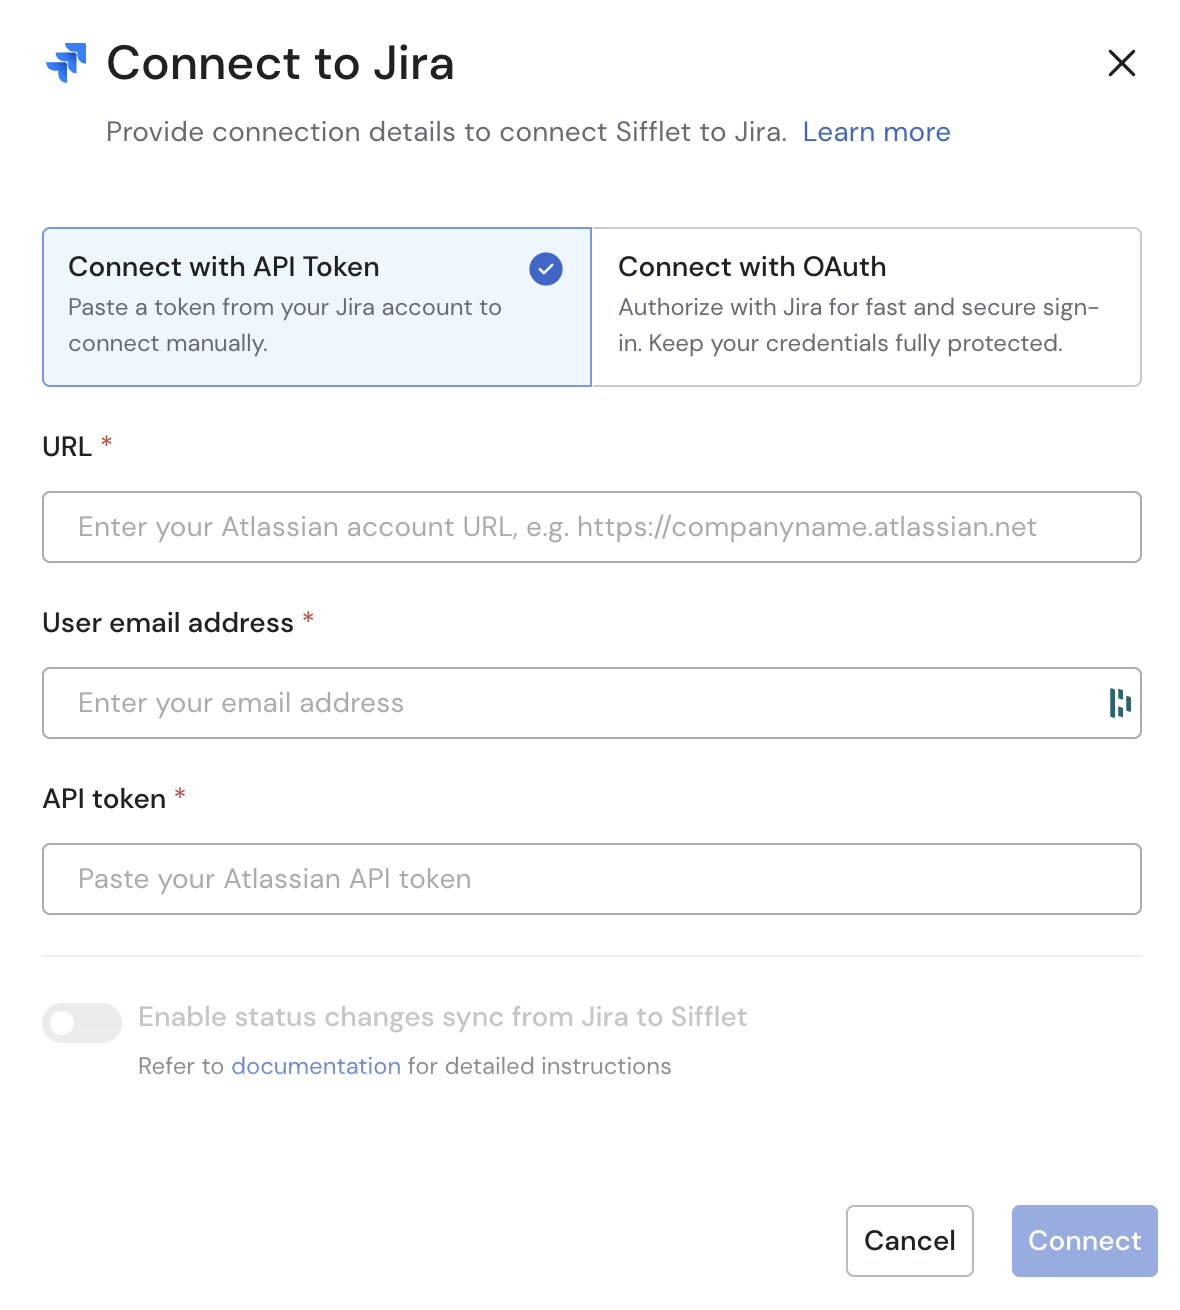
You have two options to connect Sifflet to Jira: API Token or OAuth
OAuth
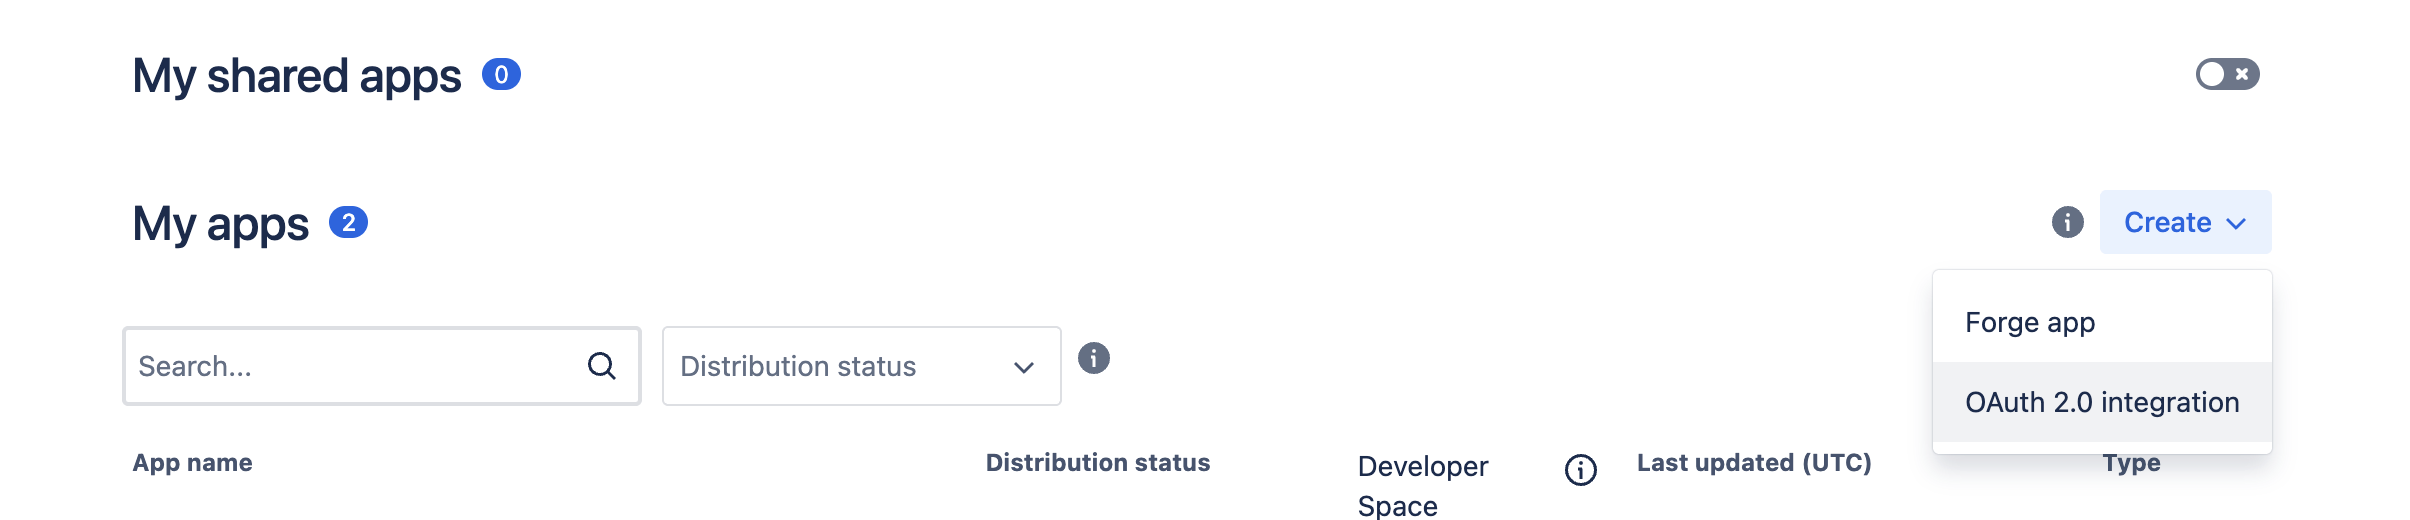
In Sifflet, open the Jira integration configuration and select Connect with OAuth (do this before entering any credentials).
- Go to https://developer.atlassian.com/console/myapps and create a new OAuth 2.0 (3LO) app named Sifflet. (Refer to the Jira documentation here for guidance.)
- In Permissions (left menu), click on Add button next to Jira API, and then click on Configure
Edit scopes and add the following classic scopes: read:jira-work , write:jira-work and read:jira-user. Save.
- Open Authorization, configure OAuth 2.0 (3LO), copy the Redirect URL from Sifflet’s Jira integration modal, paste it into Jira, and save.
- In Sifflet, enter your Jira domain (e.g. siffletdata.atlassian.net).
- In the Atlassian app Settings (left menu), copy the Client ID and Client Secret and paste them into Sifflet.
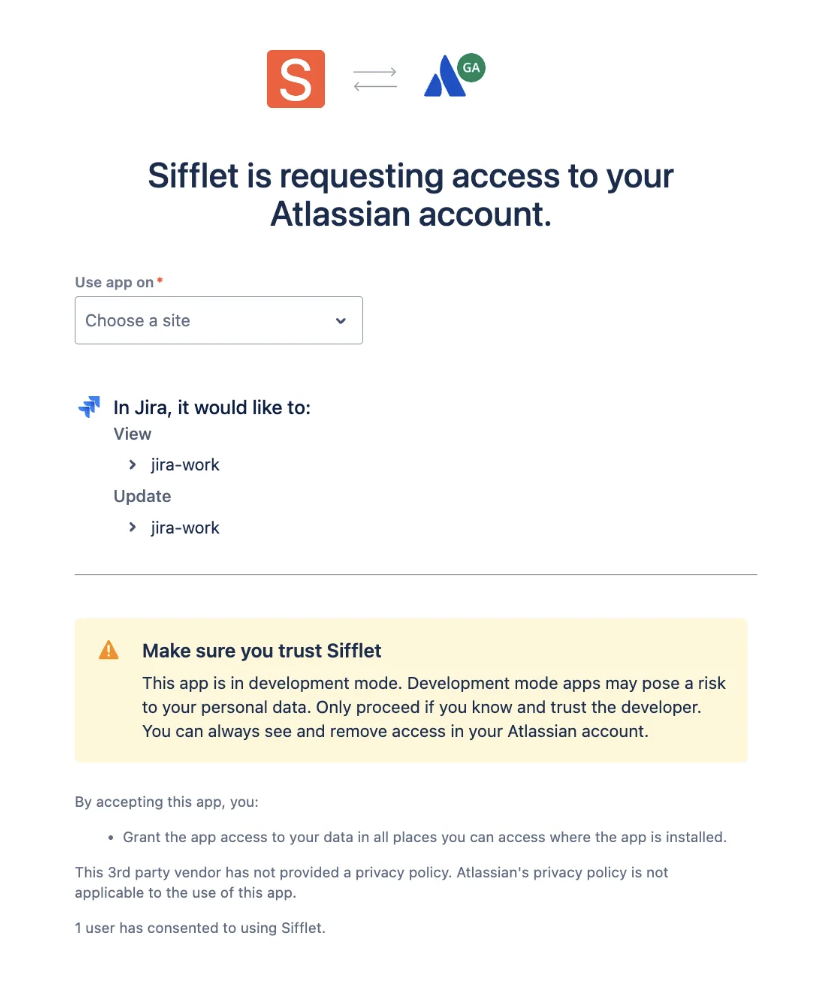
- Click Save in Sifflet and complete the authorization flow in Jira, making sure to select the correct Jira domain.
API Token
Follow the below steps to set the Jira integration up and allow your team to create Jira issues from Sifflet monitors and incidents:
- Sifflet authenticates to Jira using an API token. If you already have one handy, copy it. Alternatively, follow the below steps to create a new one. If you need any additional information on the below steps, you can visit this Atlassian documentation page.
- Go to your Jira application and head to PERSONAL SETTING > Atlassian Account Settings.
- Go to the Security tab.
- In the API tokens section, click the Create and manage API tokens.
- Click Create API token.
- Give a label to your API token, for instance Sifflet integration and click the Create button.
- Click the Copy button.
- Go to your Sifflet application, hover the Settings sidebar entry and click the Collaboration Tools entry.
- Go to the Jira section and click the Connect to Jira button.
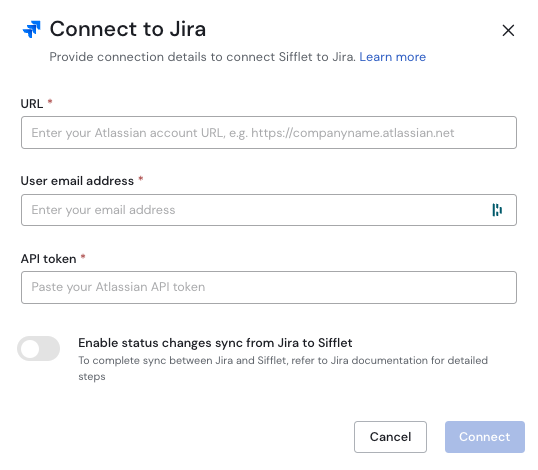
- Fill in the below fields:
- Jira domain: Enter your company's Jira domain (e.g.,
siffletdata.atlassian.net). - User email address: Email address associated with the API token generated on Jira’s side.
- API token: Paste your previously copied Atlassian API token.
- Jira domain: Enter your company's Jira domain (e.g.,
- Click the Connect button.
- If you have a success message and the Jira integration shows up as Connected, it means Sifflet was able to connect to Jira and has access to at least one Jira project.
Setting up the Integration
Creating Jira Templates
With your Jira integration configured, you can use issue templates to customize the Jira issues created by Sifflet. Templates let you specify the values for various issue fields, ensuring each issue has the required context.
To create a new Jira template:
- In Sifflet, go to Settings > Collaboration Tools and click on the Jira section.
- Click on the New issue template button.
- You will be prompted to provide the following:
- Template Name: A descriptive name for your template.
- Project: The Jira project where the issue will be created.
- Issue Type: The type of issue to create (e.g., Bug, Task, Story).
- After you select a Project and Issue Type, Sifflet will load all the available fields for that combination. You can then specify the values for the fields you want to include in the template.
Configuring Custom Fields
When you're setting up your templates, it's important to know that Jira's API expects different value formats for different custom fields. Here are some guidelines to help you:
- Fields referencing Jira entities (e.g., Assignee, Reporter, Priority): These fields expect an object with an
idorkey. For example:{"id": "user-id"}or{"id": "priority-id"}. - Multi-select or label-type fields: These expect an array of strings or objects, depending on the field's configuration. For example:
["label-1", "label-2"]or[{"value": "option-1"}, {"value": "option-2"}]. - Simple text fields (e.g., App link): These typically accept plain strings.
- Rich text / multiline fields (e.g., Description, Environment, Comment): These require input in Atlassian Document Format (ADF). Sifflet handles the
Descriptionfield for you, but if you want to use another rich text custom field, you'll need to provide the value in ADF. Here is a minimal example:
{
  "type": "doc",
  "version": 1,
  "content": [
    {
      "type": "paragraph",
      "content": [
        {
          "type": "text",
          "text": "This is a sample description"
        }
      ]
    }
  ]
}
For more details, you can refer to the Jira API documentation.
To find the ID of a custom field, you can follow the instructions in this guide.
- Fields referencing Jira entities (e.g., Assignee, Reporter, Priority): These fields expect an object with an
- Once you've configured the fields, you can click the Send test issue button to create a dummy issue in Jira and verify your configuration.
- Click Create to save your template.
Create Jira Issue From Monitor
To create a Jira issue from a monitor:
- When creating or editing a monitor, go to the Notification method section.
- Toggle the "Create incident when monitor fails" button.
- Tick the "Create Jira issue linked to incident" checkbox.
- Choose the template you want to use.
- Save the monitor.
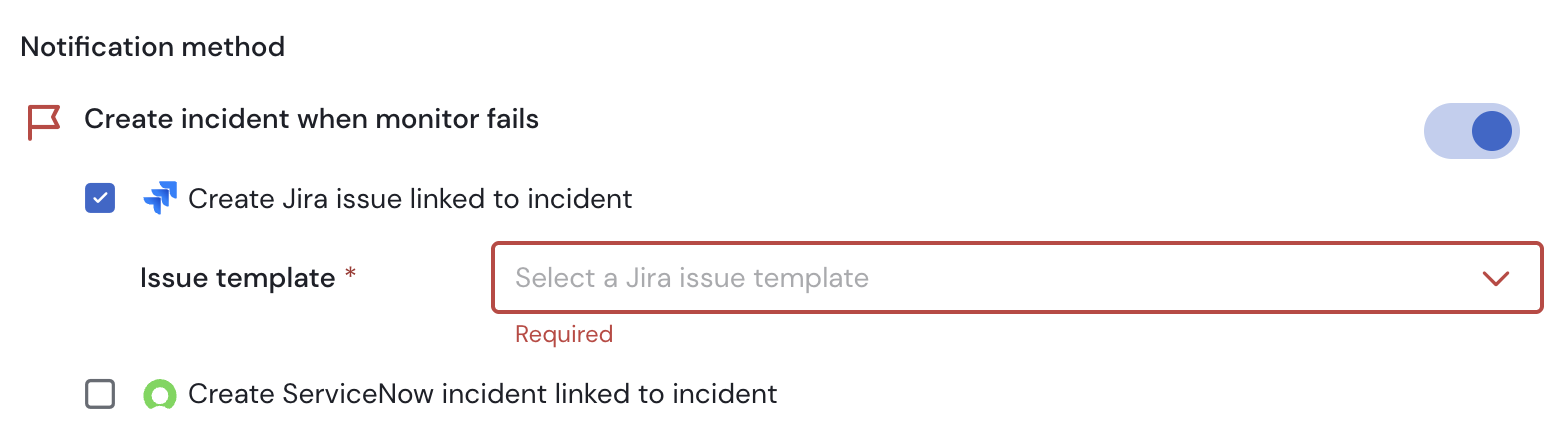
Configuring a Sifflet Monitor to create a Jira issue on failure.
Now, when this monitor fails, a Jira issue will be created automatically using the template you selected. The link to the Jira issue will show up on your monitor details page and on the associated freshly-created incident page.
Create Issue From Incident
Follow the below steps to create a Jira issue from a Sifflet incident:
- On your incident page, click the Create Jira issue button.
- Select the issue template you want to use.
- Click the Create issue button.
If the issue creation is successful, you should see a success message and the Create Jira issue button should have been replaced by a button containing a link to the created Jira issue. You can click it to visit the Jira issue.
Unlinking issuesYou can unlink a Jira issue from a Sifflet incident, which can be helpful if you wish to create and link a new Jira issue to the incident. Follow the below steps to do so:
- Click the downward arrow of the button displaying the Jira issue key.
- Click the Unlink Jira issue button.
- If the unlink is successful, the button should change to Create Jira issue, allowing you to create a new Jira issue from this incident and link it to it.
If the Jira issue originates from a monitor, unlinking the Jira issue at the incident level will also result in the removal of the link to the Jira issue from your monitor details page.
Status Changes Sync
Optionally, you can enable status changes sync from Jira to Sifflet. This will ensure any Sifflet incident gets moved to In progress or Closed • Fixed when its linked Jira issue gets transitioned to an In-progress or Done status. Enabling status changes sync allows you to benefit from Sifflet incident management troubleshooting and collaboration capabilities while ensuring a smooth incident management process thanks to automated closing of your Sifflet incidents.
Follow the below steps to enable status changes sync from Jira to Sifflet:
- Click the switch button to turn Enable status changes sync from Jira to Sifflet on.
- Copy the webhook URL showing up in step 1 of the checklist.
- In your Jira project settings, navigate to Webhooks and create a new webhook. (More details are available in the dedicated documentation page.)
- Paste the webhook URL and select the issue events you want to be notified about (e.g.,
issue_updated). - Head back to your Sifflet application. Paste the previously copied secret in the field of step 5 of the checklist. Click the Save button.
- Your Sifflet incidents' status should now update following Jira issues status changes. You can confirm the sync is working by changing the status of a Jira issue linked to a Sifflet incident to a In-progress or Done status and confirm that the corresponding Sifflet incident status gets updated accordingly.

Example Event About a Sifflet Incident Status Change Following a Jira Issue Status Change
Troubleshooting
Create Issue From Monitor And/Or Incident
I'm missing one or several projects when creating a Jira issue from a Sifflet incident
Sifflet integration for Jira uses an API token that inherits permissions of the user who created it. If one or several projects are missing from the list of projects when creating a Jira issue from a Sifflet incident, it's probably because the user who created the API token used at the integration level doesn't themselves have access to these projects.
To confirm, go to the Collaboration Tools page, go to the Jira section, click the Edit button, check the User email address field and confirm with the person whose email is entered whether or not they have access to the project you're looking to create Jira issue in. If they don't have access, you might want to replace the existing User email address and API token with new ones that have permissions on the project(s) of interest.
Bad Request - Jira issue creation failed - Failed to create Jira issue: <FIELD_NAME> is required.
This error means you're trying to create a Jira issue with a type that involves some required fields. To resolve this, add the missing required fields to the Jira issue template you're trying to use in Sifflet.
My monitor is configured to automatically create Jira issues. The monitor failed, yet no Jira issue was created.
This issue may be due to various factors:
- Jira issues only get created in case of new Sifflet incidents. If your monitor failed but no Jira issue was created, it might be because an incident was already opened for that monitor.
- The API token used by your Jira integration might have been revoked.
- The API token used by your Jira integration might have gotten the permissions required to create Jira issue on the configured project and issue removed.
- The configured project and issue type might have been deleted.
- If your monitor's Jira settings were configured using monitors as code, it's worth noting that no validation is done on the configured project and issue type so someone on your team might have inputed inaccurate parameters resulting in broken Jira settings for your monitor.
Status Changes Sync
Sifflet incidents status doesn't change when Jira issues status change
This means there is most likely an issue with the webhook sending events to Sifflet. It's recommended to perform the following checks:
- Confirm that the status change sync is activated on your Jira integration configuration
- Confirm that the
Statusfield of the Jira webhook configuration is set toEnabled - Confirm that the
URLfield of the Jira webhook configuration uses the URL specified in the Jira integration modal on your Sifflet application - Try generating a new secret for your Jira webhook on your Jira application and edit it accordingly on the Jira integration modal of your Sifflet application
- Confirm that the the
updatedcheckbox in theIssue related events>Issuesection is checked. - Confirm that no JQL query in the
Issue related eventssection excludes one or several of the Jira projects that should trigger events to update Sifflet incidents status.
Note: Only users with the "Admin" system role can access the Collaboration tools page so you might need to reach out to someone on your team with the "Admin" system role to perform some of the above verifications if you have a more restrictive system role.
I got a success message after setting up my integration, yet Sifflet incidents status doesn't change when Jira issues status change
The success message issued after Jira integration set up only reflects the fact that Sifflet is able to create issues on at least one Jira project. It doesn't test the ability for changes on Jira's side to result in Sifflet incident status changes. If Sifflet incidents status isn't updated following up on Jira issues status change, check out this troubleshooting guideline.
Integrating Sifflet and Jira Through Email
An alternative approach to integrate Sifflet and Jira is to leverage Sifflet Email integration and Jira's ability to create issues and comments from email. This approach can be relevant if you're looking to create Jira issues on every monitor failure, regardless of whether or not an incident was created.
Set up the Integration
Follow the below steps to set the integration up:
- Go to the
Systemsection of yourJIRA SETTINGS - Click on the
Incoming Mailentry of theMAILsection - Copy the email address corresponding to the incoming mail server you want to send Sifflet failing monitor emails to from the
Set up your incoming mail serversection of the page - Head to the
Settings>Collaboration Toolspage of your Sifflet application - Add the copied email address to the list of
Configured mail addressesin theMailsection of the page - Head back to the
Systemsection of yourJIRA SETTINGS - Click the
Add incoming mail handlerbutton in theMail Handlerssection of the page and configure it to suit your need
For more details on any of the above steps, visit the Sifflet and Jira related documentation pages.
Configure Monitors to Create Issues on Failure
Once the above steps have been completed, you can head back to your Sifflet application and start adding the configured email address to the monitors you expect Jira issues to be triggered from in case of failure.
Updated 5 months ago