dbt Cloud
You can integrate Sifflet with dbt Cloud via the following steps:
- (Optional) Adapt your dbt Cloud workflows
- Generate an API Service Token with read-only access
- Create a dbt Cloud source in Sifflet
1. (Optional) Adapt your dbt Cloud workflows
By default, Sifflet will retrieve the dbt artifacts generated by all jobs for a given dbt project. However, if your jobs contain multiple steps, Sifflet currently only retrieves the artifacts of the latest step of every job. This behavior will be changed in the near future to retrieve the artifacts of all steps, but in the meantime, you may need to adapt the execution of your dbt Cloud jobs as follows:
Option 1: Adapt existing dbt Cloud jobs
Instead of creating a dedicated job for Sifflet, you can adapt your existing jobs so that Sifflet can retrieve all the relevant artifacts. To do so, you need to perform the following operations:
Unselect the "Generate docs" option for all of your jobs
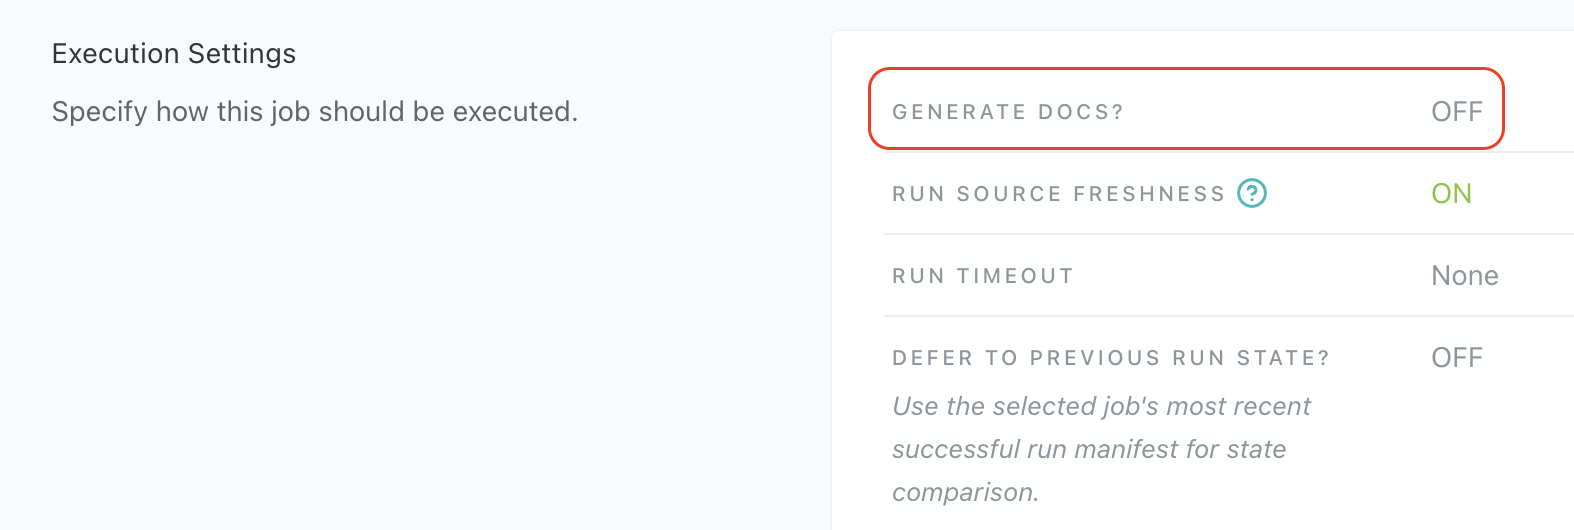
To ensure that the latest artifacts generated by your job contain relevant metadata, please make sure to unselect the "Generate docs" option when configuring your jobs:

Correct configuration with the option "Generate docs" unselected
Please note that you can keep a dbt docs generate step within your job so that dbt docs are generated nonetheless, as long as this step isn't the last one.
Use dbt build command
dbt build commandTo generate all the necessary metadata as part of your artifacts, we recommend using the dbt build command as the last command of your dbt Cloud jobs. This ensures that both model execution and test execution results are stored in the artifacts that Sifflet retrieves.
Option 2: Create a dedicated Sifflet job
Losing the dbt model execution status in SiffletIf you decide to use this option, please note that Sifflet won't be able to show the status of your dbt model executions.
To generate all dbt artifacts for Sifflet, you can create a dedicated dbt job containing the following commands (in this order):
dbt docs generatedbt test
dbt commands orderBy default, Sifflet will only retrieve the latest dbt artifacts. To get test results metadata, the command
dbt testmust be the last command to run in the job to ensure that the "run_results.json" artifact contains the results of your dbt tests.Consequently, please make sure to unselect the option to "Generate docs" in your job configuration.
You can schedule this job to run at the frequency that suits your pipelines best. Ideally, the Sifflet job needs to run after all of your project's pipelines finish their execution.
2. Generate an API service token with read-only access
Required permissionsPlease note that the service token can only be generated with a dbt admin account.
To generate a dbt Cloud API service token, you can follow the below steps:
- Connect to dbt Cloud with a dbt admin account.
- On the left panel, go to Account Settings and then Service tokens.
- Generate the new token by pressing "New Token":
- Add the permission set "Read-Only" and the corresponding project.
- After saving, the token will only be shown once, please store it in a safe location.

3. Create a dbt Cloud source in Sifflet
a. Add the dbt Cloud API token as a secret
Navigate to the Credentials page via the Integrations submenu and add a new secret. In the Credential field, paste the API service token generated in the previous step.
b. Create the dbt Cloud source
Navigate to the Source creation page and choose the dbt Cloud option. The required parameters are the following:
- Name: Choose a name for the source. This will be used to reference your source throughout the app.
- Base URL (by default
https://cloud.getdbt.com/api/v2): You can provide a custom base URL in case your dbt Cloud instance is hosted in a location other than North America (see here for more details). For example, in the case of EMEA, the URL ishttps://emea.dbt.com/api/v2. - Account ID: Your dbt Cloud account ID (see below on how to get it)
- Project ID: Your dbt project ID (see below on how to get it)
- Job ID (optional - only relevant if you created a dedicated Sifflet job): Your dbt job ID (see below on how to get it)
- Secret: The secret created in the previous step
- Frequency: By default, Sifflet will perform an hourly metadata refresh for your dbt Cloud sources. If you require a different schedule, you can specify it using this field.
How to find your dbt Cloud account ID, project ID and job IDConnect to your dbt Cloud account and choose a specific project. The URL link should be similar to this: https://cloud.getdbt.com/#/accounts/12345/settings/projects/67890/
- The dbt Cloud account ID is 12345
- The project ID is 67890
In some cases, creating a dedicated job to generate the dbt artifacts is easier. If you opt to use this option, then you can add the job ID to your source parameters. For the URL https://cloud.getdbt.com/#/accounts/12345/projects/67890/jobs/223344/, the job ID would be 223344.
FAQ
The dbt tests listed in the monitoring page do not show any status or last runs information
If the dbt tests listed in the monitoring page do not contain information about the status of the last run, it is likely due to missing metadata in the artifacts retrieved by Sifflet. Please ensure that your dbt Cloud jobs are configured correctly, that you deactivated the "Generate Docs" setting, and that the last step of your jobs is a dbt build command.
For more information, please refer to step 1 above.
Updated 3 months ago
