ServiceNow
Overview
Sifflet natively integrates with your ServiceNow incident management workflow. When a Sifflet monitor fails, a ServiceNow incident can be created automatically, ensuring that data quality issues detected by Sifflet are tracked in ServiceNow and preventing critical problems from being missed.
Setting up the integration
Integration requirementsThe ServiceNow integration process requires actions in both Sifflet and ServiceNow. A ServiceNow user with OAuth permissions will need to create an OAuth Application Endpoint, and a user with the ServiceNow ITIL role will need to grant permissions to Sifflet. These tasks can be performed by different users.
To connect Sifflet to your ServiceNow account, follow these steps:
- In Sifflet, go to Settings (via the sidebar) and click Collaboration Tools. Then, in the ServiceNow section, click Connect to ServiceNow.
- Copy the redirect URL displayed in the integration pop-up. You will need this URL later.
- In ServiceNow, create an OAuth Application Endpoint:
- In ServiceNow, create an OAuth application endpoint in your account. (Refer to the ServiceNow documentation here for guidance.)
- For the Redirect URL parameter, paste the URL you copied in Step 2.
- You can leave other parameters at their default values.
Important Note (ServiceNow behavior update):
ServiceNow recently changed the default for the Restriction Scope field when creating an OAuth application. It may now default to Securely Scoped, which can prevent successful authentication with Sifflet.If you encounter connection errors during setup, check the OAuth app’s Restriction Scope in ServiceNow and set it to Broadly Scoped before retrying.
OAuth refresh token lifespanBy default, ServiceNow OAuth refresh tokens have a default lifespan of 100 days. We highly recommend increasing the lifespan of the token created for Sifflet.
If you decide to keep the default lifespan, you'll need to reconfigure the integration every 100 days.
- Complete the Sifflet Integration:
- Return to Sifflet and continue creating the ServiceNow integration (following the same process as in Step 1).
- Enter the following details in the integration pop-up:
- Your ServiceNow instance URL (e.g.,
https://yourinstance.service-now.com) - Your OAuth application client ID
- Your OAuth application client secret
ServiceNow Role Requirement
The user creating the ServiceNow integration in Sifflet must have ServiceNow access with either the ITIL role assigned or sufficient permissions to create. This enables Sifflet to create and update incidents via the OAuth application.
- Your ServiceNow instance URL (e.g.,
- Click Save. You will be redirected to the ServiceNow OAuth portal. Click Allow to grant Sifflet access to your ServiceNow account.
Keep in mind that Sifflet will have the same permissions as the ServiceNow user who approves the OAuth request.
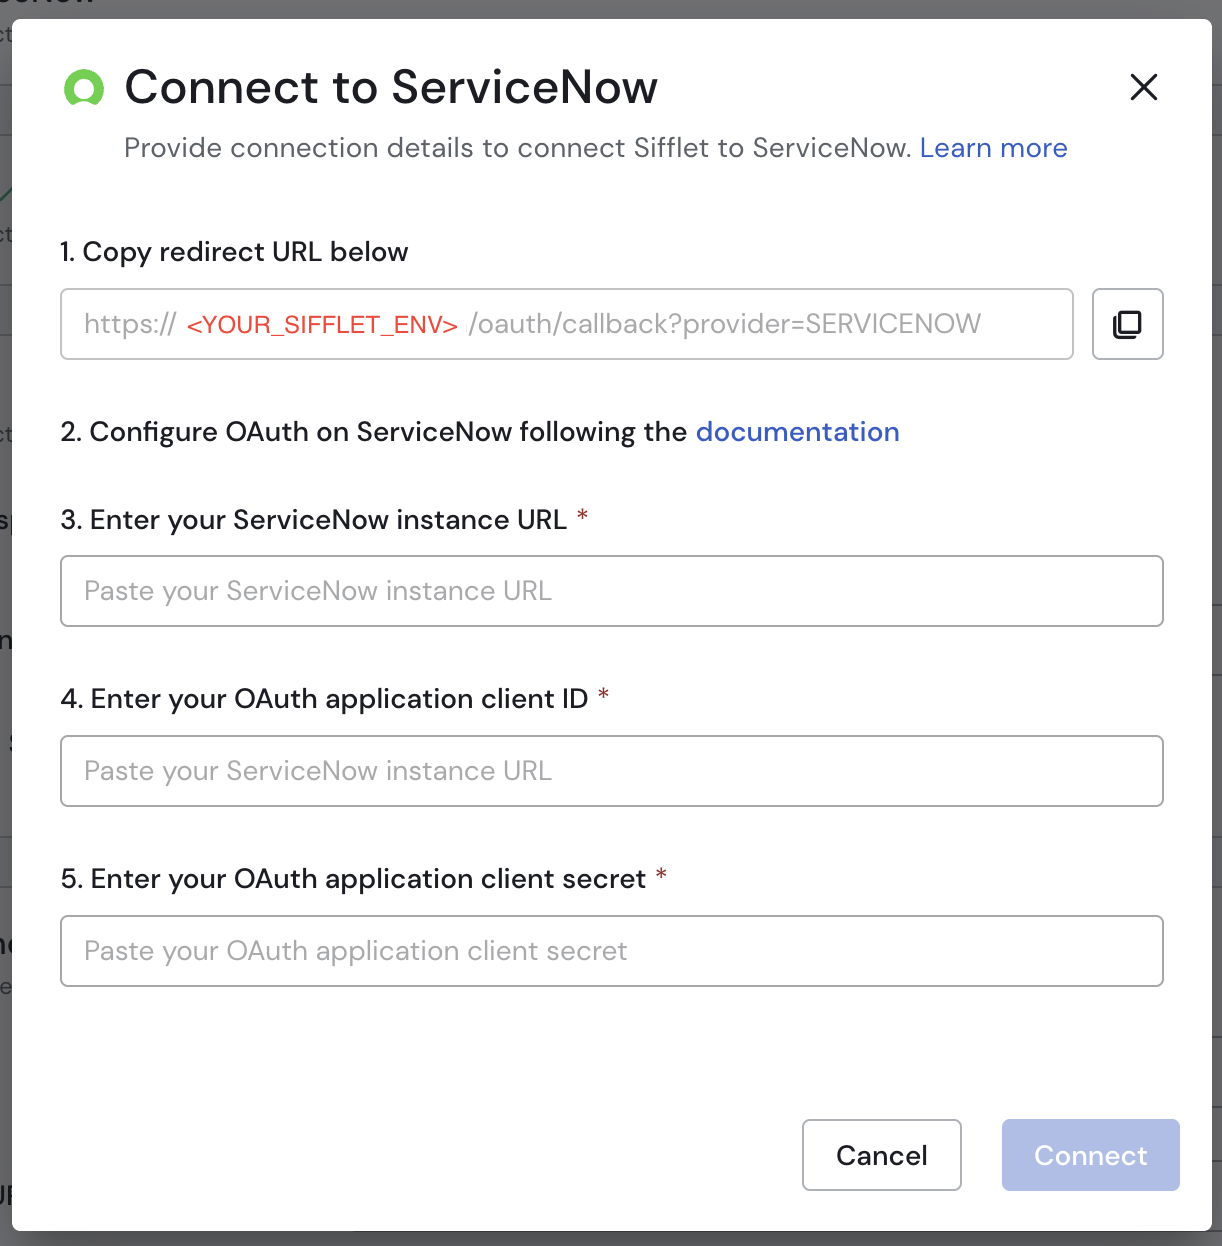
ServiceNow integration popup
- (Optional) To enable incident status synchronization between Sifflet and ServiceNow incidents, see the Status Synchronization section for setup instructions.
The integration should now be created. If you see an error message instead of a success message, check the configuration settings for any problems. The error message will provide details to help you troubleshoot.
Creating incident templates
With your ServiceNow integration configured, you can use incident templates to customize the ServiceNow incidents created by Sifflet. Templates let you specify the values for various incident fields, ensuring each incident has the required context.
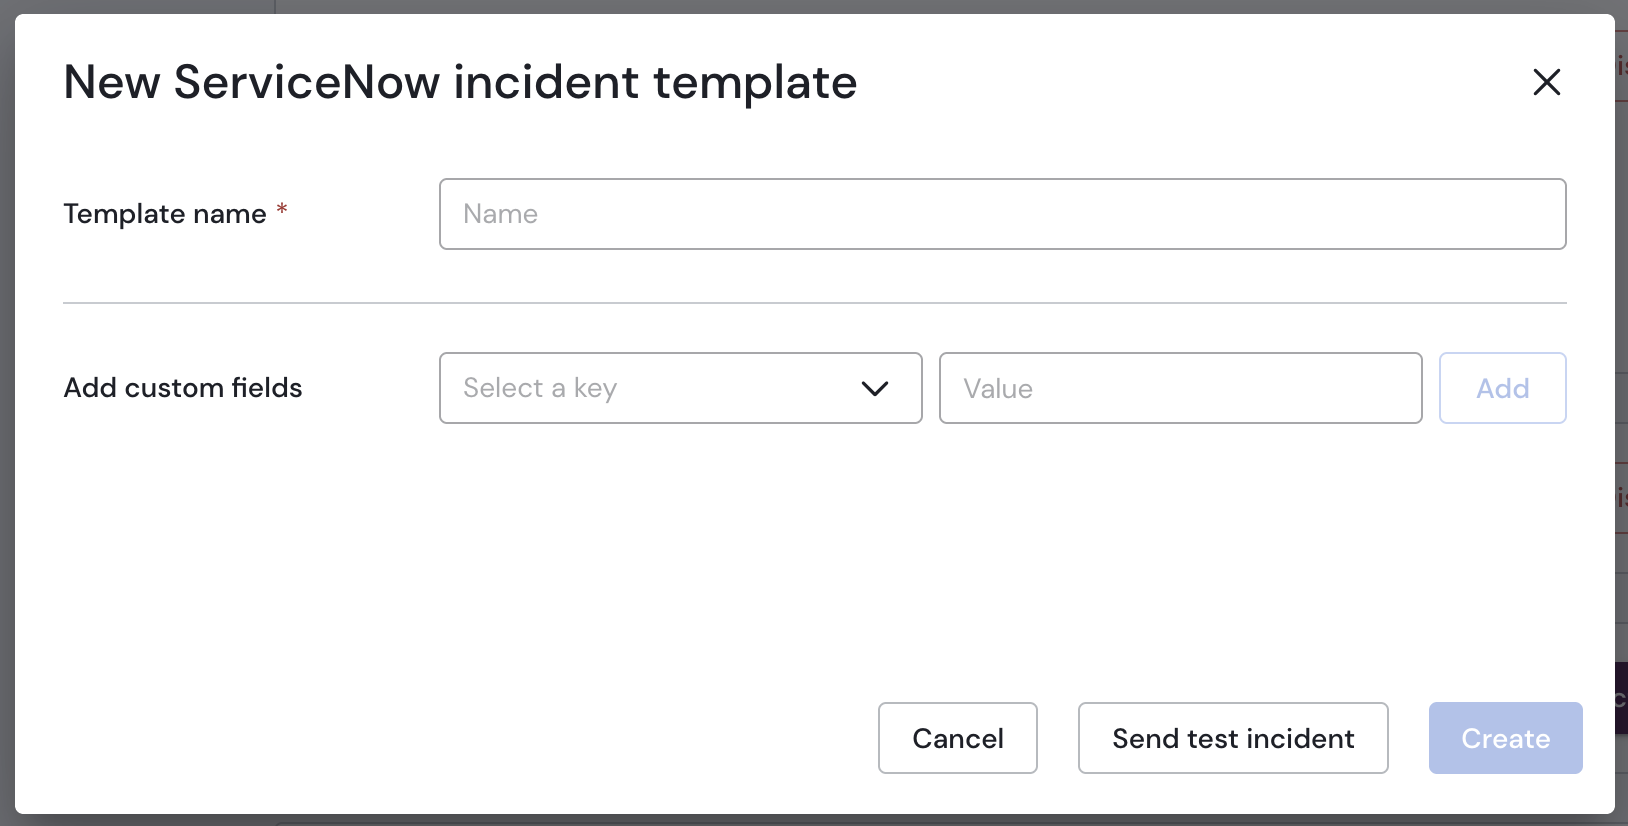
The incident template creation popup
Once you've defined the custom ServiceNow fields and their values within the template, click the Send test incident button to test your configuration. This will create a sample incident in your ServiceNow environment, which you can delete after verifying that the process is working correctly.
Double-check that the test incident contains all the custom fields and their valuesWe highly recommend that you ensure the test incident contains all the values and custom fields specified in the template before saving.
Custom field value typesEnsure that the values you insert for the different custom fields match with the field's type in ServiceNow. In case of a type mismatch, the incident creation will fail.
Configuring Sifflet monitors to trigger ServiceNow incidents
Via the UI
When creating a new monitor or editing an existing one, use the 'Notification method' section to choose whether a ServiceNow incident should be created if the monitor fails. Here, you can also select the ServiceNow incident template the monitor will use.
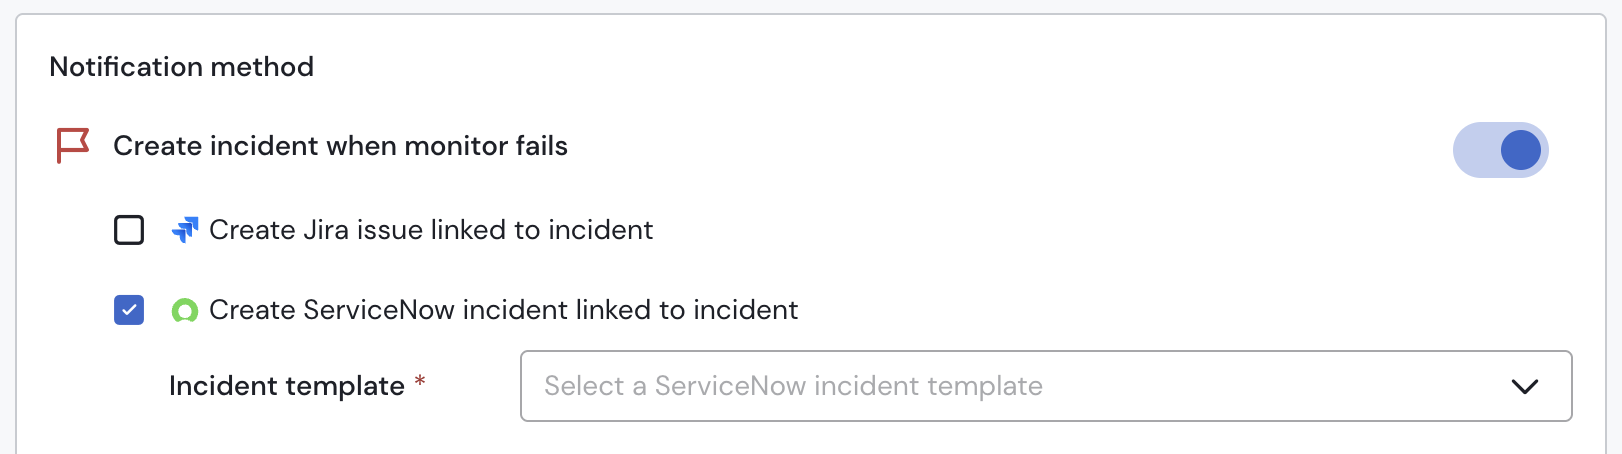
Creating a ServiceNow incident in case of failure
Via Data-Quality-as-Code
When creating a new monitor or editing an existing one, using Sifflet's Data-Quality-as-Code YAML syntax, you can configure it to create ServiceNow incident by adding the following parameter:
- kind: ServiceNow
	enabled: true
	templateName: <Name of the ServiceNow template>
Interacting with ServiceNow incidents via Sifflet incidents
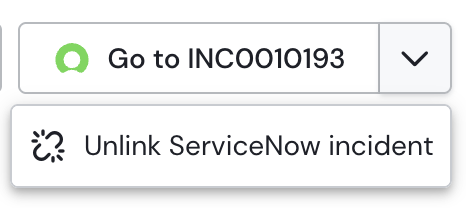
When a Sifflet incident is created, if the failing monitor is set up to create a corresponding ServiceNow incident, that ServiceNow incident will be created automatically. You'll see a dedicated button on the Sifflet incident page linking to the ServiceNow incident, and the creation event will be recorded in the Sifflet incident activity log.
Unlinking a ServiceNow incidentIf you want to unlink a ServiceNow incident and a Sifflet incident, you can use the dedicated
Unlink ServiceNow incidentbutton:
Incident Status Synchronization
Enabling incident status synchronization between Sifflet and ServiceNow allows you to ensure consistency across the different incidents and maintain an up-to-date status for incidents both in ServiceNow and Sifflet.
Benefits of incident status synchronization
Once you enable the synchronization:
- Sifflet incidents will reflect the latest status of the corresponding ServiceNow incident.
- The Sifflet incident activity timeline will include the history of status changes of the ServiceNow incident.
Enabling the synchronization
To enable incident status synchronization, you need to perform the following steps:
-
In the ServiceNow integration popup, toggle "Enable status changes sync from ServiceNow to Sifflet" to
on. -
Copy the webhook URL provided by Sifflet.
-
Provide a secret and then store it with the webhook URL.
-
Configure incident states mapping by associating ServiceNow incident states to the desired Sifflet incident states.
-
Create a business rule in your ServiceNow instance (documentation) with the following configuration:
-
Check the
Advancedbox -
Table:
Incident [incident] -
Configure the
When to runtab as follows:-
When:
after -
Order: You can keep the default value
-
Check the
Updatebox -
Filter Condition:
Incident state+changes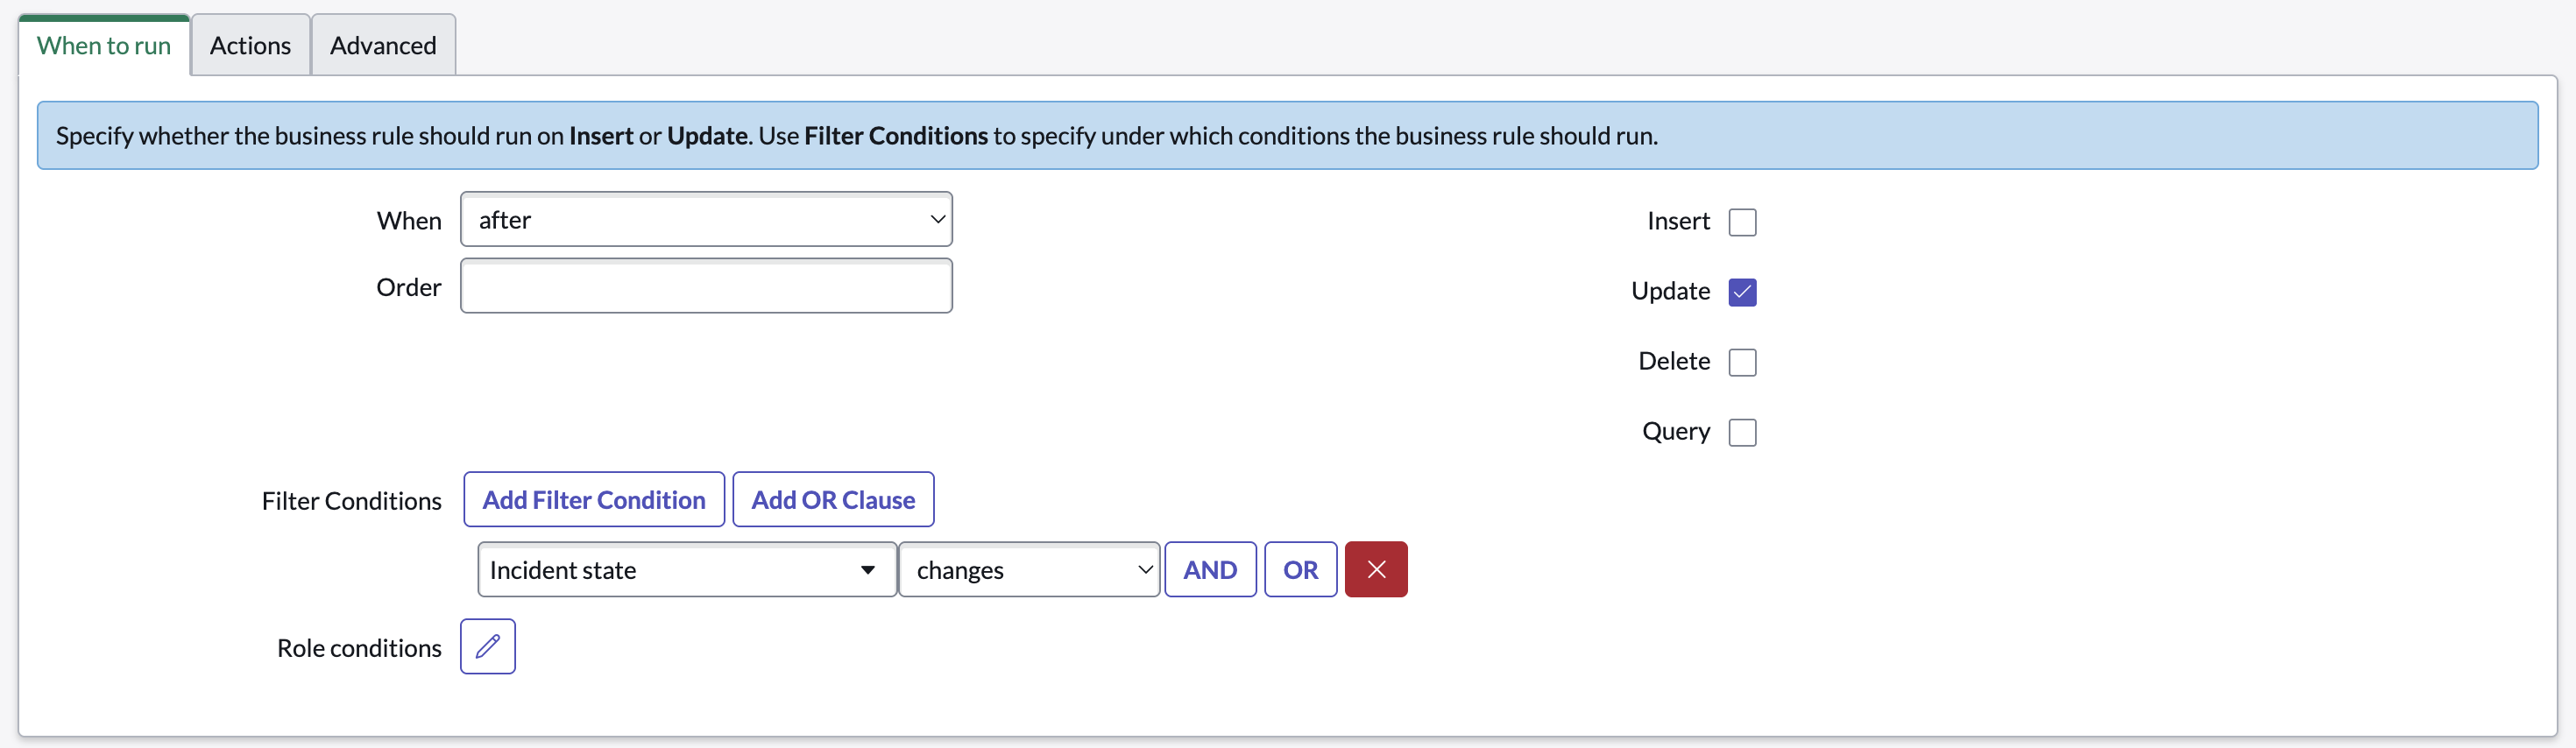
The configuration of the
When to runtab.
-
-
In the
Advancedtab, replace the boilerplate code with the following script (in line 5 replace<YOUR_SIFFLET_WEBHOOK>with the webhook URL copied in step 2 above, and in line 7 replace<YOUR_SIFFLET_SECRET>with the secret created in step 3 above.):(function executeRule(current, previous /*null when async*/) { try { var r = new sn_ws.RESTMessageV2(); r.setEndpoint("<YOUR_SIFFLET_WEBHOOK>"); // Sifflet Webhook URL r.setHttpMethod("post"); var secret = "<YOUR_SIFFLET_SECRET>"; // The secret key shared between your app and ServiceNow var payload = { "webhook_event": "servicenow:incident_updated", "current": { "number": current.getValue("number"), "incident_state": current.getValue("incident_state"), }, "previous": { "number": previous.getValue("number"), "incident_state": previous.getValue("incident_state"), } }; var json_payload = JSON.stringify(payload); var digest = new GlideDigest(); var hashHex = digest.getSHA256Hex(secret + json_payload); var signature = "sha256=" + hashHex; r.setRequestHeader("x-hub-signature", signature); r.setRequestBody(json_payload); var response = r.execute(); gs.info("Webhook sent to Sifflet. Status response: " + response.getStatusCode()); } catch (ex) { gs.error("General error in Sifflet webhook process: " + ex.message); } })(current, previous);
-
Troubleshooting
A ServiceNow field I set in the template is empty in the Sifflet-created ServiceNow incident
If a field in a Sifflet-created ServiceNow incident is empty, even though you set a value in the template, verify that the value meets the ServiceNow field's requirements. These requirements may include more than just the value's type.
Updated 5 months ago